Garden, Plant, Cook!

Friday, October 21, 2016

Eggplant and Pepper Sautee Fresh From The Garden

Dear Folks,

This is what growing your own food is all about.  Last night's dinner.  Eggplant and peppers fresh from the garden.  Dried onions, which were sundried this summer for later use.  A touch of my sundried oregano and done except for a sprinkle of my sundried parsley on top of the finished serving.

Sun Dried Onions
I made homemade sausage patties from naturally raised pork and turkey.  Did a quick marinade of the eggplant.  Sauteed up the veggies while the sausage patty, broken up cooked in another pan.  Cutting, marinading and cooking all took about 25 minutes!

Sun dried herbs and vegetables like the onion are just a logical way of preserving the bounty without electricity.

My "Casper" eggplant put out some lovely fruit and I knew I needed to cook or roast some in a sautee or similar.

Likewise the Paradicsom sweet pepper "needed" to be used in a flavor combo. 

The marinade I used is one I adapted from a "vegan eggplant bacon" recipe and it is a great one to keep on hand.  I make enough to have some marinade in the refrigerator for just this kind of "fast food."

Dan Reynolds "Fast Food For Cows"
"Fast Food" takes on new meaning when you walk out into the garden, harvest something fresh, stop at the pantry to grab a couple of jars of your own dried herbs, do a little cutting, a quick marinade, some cooking and serve up a delicious meal in 25 minutes.

Eggplant, Pepper & Onion Sautee

Marinade (see recipe below)
Eggplant (twice as much eggplant as peppers)
Sweet Peppers
1 tablespoon of dried onion - or more to your liking
1 teaspoon of dried oregano
Sprinkle of dried parsley for garnish

Place marinade in bowl.  Quickly chop eggplant and put in marinade while you chop peppers and heat up the frying pan. (Eggplant starts to brown as soon as you cut it, so you need to either put it in water or the marinade to keep from turning - does not affect the taste, just the look.)

Once you have the peppers chopped, add bit of marinade to the pan, heat for 30 seconds then toss in the peppers, dried onion and oregano.  Stir for 1 minutes, then add the eggplant and about a half of cup of the marinade ( you may need more marinade if you have left over, just watch the pan to keep from burning or add water).

Stir, cover and cook on medium high heat.  This only takes about 6-9 minutes or so for the eggplant and peppers to be tender.  I like some texture and firmness to my veggies. You can cook longer if you like.

At this point you can plate up, top with some dried parsley and you have a lovely veggie dish.  If you want to add the meat protein of your choice, add to the top of the veggies and sprinkle with parsley.

Marinade Recipe
Can be doubled or tripled - stores for a long time in the refrigerator 
(makes a 1/2 cup

1/8 cup (2 tablespoons) soy
1/8 cup apple cider vinegar
1/8 cup maple syrup
1/8 cup olive oil
1/2 teaspoon paprika
Pinch (1/16 teaspoon) liquid Hickory Smoke


Mix all together and use or store.


See my blog post on making "bacon" out of eggplant using this marinade.


I can't wait to make this again (actually I have to wait for more of my eggplant to be a little bigger).  It was that good!  I will probably add some carrots next time and in season squash.  BTW, back in September I used the marinade to make "carrot bacon" on the grill and the flavor was awesome!  Using a mandolin or similar even cutting tool makes nice slices out of carrots or eggplant for creating the "bacon" size.

Have a best day in the garden and kitchen!


-- Catherine, The Herb Lady

If you enjoyed this post, subscribe in the upper side bar link, to get all my posts!

Disclaimer: Clicking on links on this blog may earn me a small commission if you purchase something. Your price does not change. 


Thursday, October 20, 2016

Watermelon "Lemonade" and Hibiscus Roselle

Dear Folks,

We harvested the next big Bradford Watermelon this past Sunday, and in one of those "DARN!" moments, I dropped it!

I had been waiting on this one looking for the tendril to dry as the first one I harvested was really, really good, but could have stayed on the vine longer AND the seeds were not viable. So with this one harvested I thought we had a double winner, bigger, better fruit and with viable seeds.

After the melon crashed to the floor and we salvaged the pieces, the fruit looked a bit past its prime.  Good tasting but actually not as good as the first one.  However the fruit made wonderful drinking juice (making ""Lemonade" out of lemons) and the seeds are viable - Yippeee!

I now  have 1st generation Bradford Watermelons seeds to sow in January.  I am also going to put the germinating test seeds in some jiffy pellets and see if I can have happy transplants in January.  Watermelons are typically sown/planted in January/February.

My view on when to pick ripe, at least for this melon is going to be the "thump" test instead of looking for the tendril to dry.

My Roselle plants are just heavy with the calyx ready for harvesting and using.  I decided to dry some and they dried nicely in the sun.  The picture shows a fresh one and the dried petals.  The lemony / cranberry flavored treats can be used in teas and other dishes.

I had some left over turkey soup I had made, so I thought "turkey and "cranberry" and topped the hot soup with a small sprinkle of the roselle dried petals.

We agreed the flavor and contrast with the soups was delicious, the cranberry flavor was very subdued, so the over all taste was a lemony topping to the soup.  Very nice.  The petals softened some but were still a nice chewy texture to the soft noodles.

I will probably add them to dishes like Pasta Primavera.  I would suggest you try them in any dish which calls for lemon or lime additions.  You will be pleased.

Have a great day in the garden and you kitchen making delicious meals from your bounty!

-- Catherine, The Herb Lady

If you enjoyed this post, subscribe in the upper side bar link, to get all my posts!

Disclaimer: Clicking on links on this blog may earn me a small commission if you purchase something. Your price does not change.

Tuesday, October 18, 2016

November Planting In The Desert & Two Soup Recipes Using Herbs and More From The Garden

Dear Folks,

November is a continuation of the robust planting we can do in our fall garden, along with harvesting the last of the summer crops of produce and herbs. [Pictures is my herb harvest ready to dry or use.  Check out my recipe for "Herb Soup", below.]

November PLANTING:
Anise
Asparagus
Bay, Greek (Sweet)
Beets
Bok Choy
Broccoli
Brussels Sprouts
Cabbage
Cabbage, Ornamental
Caraway
Carrots
Cauliflower
Celery
Chamomile
Chard
Chervil
Cilantro
Dill
Endive (and Chicory)
Fennel, Leaf
Fruit Trees
Garlic (only as green garlic)
Greens
Horseradish
Kale, Ornamental
Kale
Kohlrabi
Lavender
Lemon Verbena
Lettuce
Marjoram
Mints
Mustard
Myrtle
Onions, Green
Onions
Oregano, Greek
Oregano, Mexican
Parsley
Parsnip
Peas
Radishes
Rosemary
Sage
Savory
Spinach
Tarragon, Mexican
Tarragon, French
Thyme
Turnips

EDIBLE FLOWERS TO PLANT:

Calendula
Carnation (Dianthus)
Chamomile
Cornflower (Bachelor Buttons)
English Daisy
Hollyhock
Jasmine Sambac (Arabian)
Johnny-Jump Up
Marigolds, including Tangerine Scented (Tagetes Lemonii), Citrus Scented (Tagetes Nelsonii)
Nasturtiums
Pansies
Primrose
Scented Geraniums
Shungiku Chrysanthemum
Snapdragons
Stocks (Matthiola)
Sweet Alyssum
Sweet William (Dianthus)
Violet

GARDEN TIPS for November
    First frost date average is around November 17th.
    Frost in the Valley at the 1100 or lower elevations is usually limited to ‘soft frost’ where simple cloth sheets or paper placed over sensitive plants (or moving potted plants beneath patios or trees) is sufficient to protect them.  Never use plastic covers as the plastic transmits the cold to the plant tips.
    For every 1000 feet over 1100 in elevation the first frost day is moved forward 10 days.  The possibility of hard (killing) frosts starts to occur, although at 2000 feet or lower this is still a rare occurrence.
    Frost pockets in the Valley can surprise gardeners.  As a matter of practice, if the weather forecasters predict an overnight temperature of 40 F, I prepare for frost by protecting my sensitive plants with cloth or paper covers This is because heat retention by buildings and walls dissipates by early morning (4 or 4:30 a.m. to dawn the temperature can drop 8 degrees plus or minus).
    Frost danger continues until about mid-February.
    Cool weather annuals and biennials can be sown every 2-4 weeks (beginning in August) through the end of November for a continuous crop through next spring.
    November through January can be a ‘rainy’ season for the desert. You can usually hold off on regular watering if you have received a half inch or more of rain within 2 days of normal watering days.  Make good use of your water meter to determine soil moisture. 
    If rains are heavy this month, in addition to foregoing some water days, you may need to put down Ironite or green sand to compensate for mineral bonding (which makes iron unavailable to the plants) due to both the excess water and the cold soil.

FROST DAMAGE
The best way to think of frost damage on your edibles is the damaged plant material is now a partial protective cover to the underlying growth.

As mentioned in prior notes, frost damage in the lower desert gardens is usually limited to 'soft' frost which is controlled by simply putting cloth or paper covers over the plants at night, or if containers, moving them under evergreen trees or onto the patio.

IF, however we get hard or killing frosts, of extended periods or days, die-back will occur even on protected plants.  The reason is the radiant heat retained by structures and even the soil dissipates completely, leaving the plants exposed to too-cold air.

Whether the frost damage is from soft or hard frosts if the plant is still alive DO-NOT-REMOVE-THE-DAMAGE.  Doing so risks damaging the growth still alive under the top die-back.  I don't remove even dead plants until spring.  I have found basil seedlings coming up under a large dead basil plant killed off by a hard frost.

Obviously we like our gardens to look pretty most of the time, but selectively resisting the urge to pull something a little bedraggled gives you, the gardener, access to earlier production of the warm weather plants because of their larger root systems.

Herb Soup

From the book : “101+ Recipes From The Herb Lady” - by Catherine Crowley

    A wonderful blend of herbs, lettuces, croutons and cheese. The greatness of this soup, besides its fabulous flavor, is the ability to vary the herbs, lettuces, croutons and cheeses for different flavors. I developed this recipe from Provencal soups.

1    shallot, finely chopped
2    tablespoons butter, unsalted
4    cups mixed fresh herbs, finely chopped (I used Thai basil, cilantro, parsley, see note below*)
1    package spring lettuce mix
1    teaspoon coarse salt
1/8    teaspoon black pepper
6    cups boiling water (can use broth - but try the water the first time)
6    cups croutons (any stale bread diced will work too - some day-old nice artisinal breads would be great for this)
3/4    cups Parmesan cheese or more if you like

    Set aside 1/2 cup each of herbs and lettuces for garnish. Divide croutons and cheese into 6 soup bowls.
    Saute shallot in butter for 1 minute. Add herbs, salt, and lettuces all at once and cook—stirring for 5 minutes. Add boiling water, cover and simmer for 15 minutes—stirring occasionally. Ladle greens and broth into soup bowls. Add garnish of herbs and lettuces to each bowl. Serve and enjoy. Serves 6.
    *Traditional recipes call for sorrel and chervil or any combination you like - the Thai Basil has a tarragon aspect to it which mimic the chervil with a kick and cilantro's citrus back-note mimic the sorrel. 

Here is another Harvest Soup Recipe for using greens and herbs from your garden, along with sweet potatoes.  I posted this on the blog back in February 2009.


-- Catherine, The Herb Lady

Like my facebook page and please share. Thank you!


If you enjoyed this post, subscribe in the upper side bar link, to get all my posts!

Disclaimer: Clicking on links on this blog may earn me a small commission if you purchase something. Your price does not change.


Monday, October 17, 2016

Cherries, Eggplant, Garlic, Avocado, Watermelon and Squirrel

 Dear Folks,

Lots of fun foods growing in the garden Sunday morning and a challenge.

My Barbados Cherry tree aka Acerola (Malpighia punicifolia L.) this morning had both unripe and almost ripe cherries on it.  The cherry is ripe when it releases freely from the tree.  Planted in February this tree is loving its home and putting out a lot of flowers and some cherries.  I expect great production in the coming year.

Garlic planted on October 1st is already this high this morning, most of them 9 inches or so.

If you want to grow garlic get the cloves planted by October 31st to ensure enough cold weather to produce the head garlic.  Plant extra and harvest green garlic (like a scallion) as needed through the winter.

I love the white eggplant "Casper" for its wonderful tender fruit which does not need salting.  I have peppers I harvested last week, so I will be doing a roast this week with eggplant, peppers and some of my I'itoi onions, tossed with herbs.

Today I will harvest my big Bradford Watermelon and will post pictures in the next day or two, but in the meantime, we found 3 more volunteer baby melons and we were thrilled and --- then --- the squirrel found two of them.  In the collage, the first picture at the top was taken 4 days ago.  The second part of the collage was taken this morning and you can see the melon has almost doubled in length AND the squirrel damage.  The third picture in the collage is of another melon we found hiding and had started to 'curl' because it was up against a wood barrier.

The two lower pictures of the collage clearly show the chewing by the squirrel.   However the skin seems to be drying and we hope it will scar and preserve the melon as it continues to grow.  I have placed wire hats over the fruit to keep the squirrel and other critters off.  The paper plate you see in the pictures is to protect the fruit from soil born bacteria.  Likewise the wood grate under the other melon is also to keep it off the soil.

Young growing fruit touching the ground is susceptible to soil born bacteria while the skin is tender, which in turn invites insect pests to attack.

Carpenter Bee on Pumpkin Flower
I decided to push the envelope and plant more seeds of the Upper Ground Sweet Potato Pumpkin on September 19th because the huge plant, which I also got in later than I should have, is not showing remarkable fruit production yet.  Huge leaves, lots of male flowers and some tiny, baby fruit, but not sure if they are pollinated.  The bees love the male flowers, but I've not seen evidence on the female flowers.  I sowed these seeds in the Bradford watermelon patch to give the pumpkin seedlings "nursery" soil cover.  The melon etc. family of plants put out a lot of male flowers early to get the pollinators noticing the plant.  We always hope a lot of female flowers show up timely enough to get fertilized.

Yesterday I picked up an Arizona Avocado tree from Shamus O'Leary at the Rare Fruit Growers sale at Mesa Community College. I'm glad I got there early, the rest of the garden folks hit the sales early!

Called the Aravaipa Avocado for the Aravaipa Canyon where the mother tree was discovered, this species is said to be temperature tolerant from 14 to 120 degrees.  My plan is for it to be part of my under story.  In back of the Avocado is my coffee tree, also purchased from Shamus last February.

This is one of my grand trialing journeys so we will see how they go.  The avocado has to remain in the pot for a while as it is not fully rooted to stability.

I have tried avocados without success before and this one I hope will be happy in my gardens.


Gardening

Stay up to date on planting schedules here in the Desert with my month-by-month planting calendar.

Have a great week in the fall garden.

-- Catherine, The Herb Lady

If you enjoyed this post, subscribe in the upper side bar link, to get all my posts!

Disclaimer: Clicking on links on this blog may earn me a small commission if you purchase something. Your price does not change.


Monday, October 10, 2016

Some of My Favorite Preserving Technique Recipes - Worth Re-Sharing!

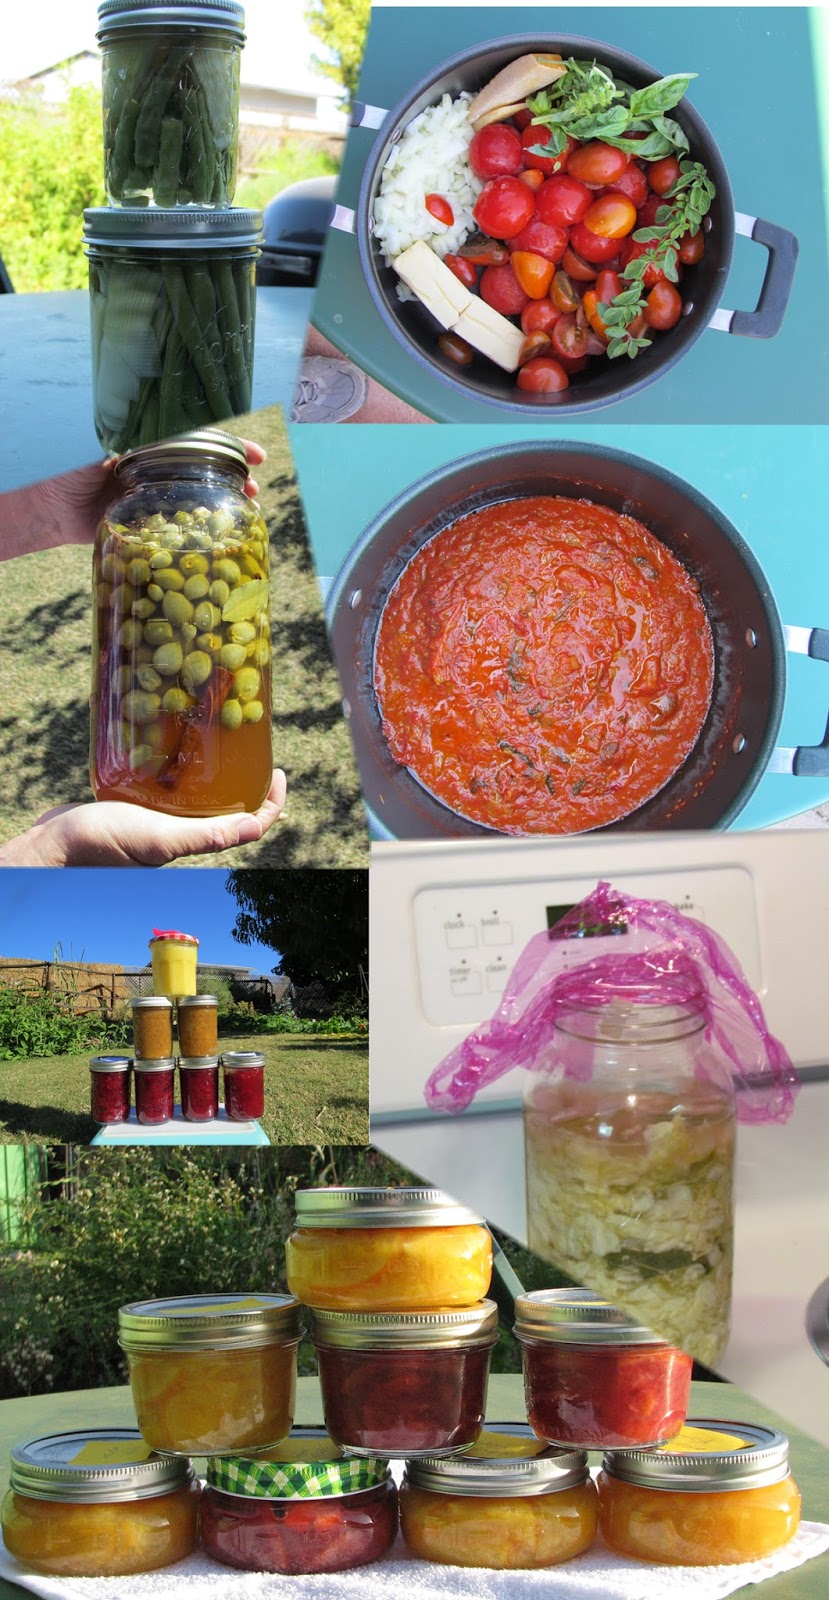
tomatoes, green beans, peaches, marmalade, sauerkraut
Dear Folks,

A coupon in the Sunday paper had me thinking about the recipes I've shared over the last several years for jam making, pickling, fermentation and other forms of "keeping" your bounty ready to use now AND later.  So I decided to give you a set of links to the best of the recipes using different techniques.

Use Glass Jars To preserve and store your food, not plastic!  I use my mason jars for storing everything from homemade broth, to preserved jams, to my dried herbs.

Ball/Kerr Jars (mason jars) is now known as Fresh Preserving.  Here is the coupon code for use online.  According to the newspaper the coupon is good through December 31, 2016.  Click on the "Ball" picture to take you to their website.

LIDSJARS4


I've mentioned that I have been canning for a number of years.  But I've also just made versions which require refrigeration instead of water bath or pressure canning.

Let me point out some differences.

Lacto-Fermentation - do not can:  If you decide to make sauerkraut or old fashioned dill pickles (and other "pickled" vegetables) using salt brine instead of vinegar, the good bacteria would be killed if you can the jars.  The lacto-fermentation process creates good bacteria - as in live culture yogurt.  If done properly once the sauerkraut or pickles reach your preferred taste, capped and refrigerated the product will last many months in your refrigerator as long as you use safe handling procedures (no cross contamination).

Refrigerator Pickles:  If you choose to make these types of pickles you have the choice of canning after you add the boiled liquids.  You would use the water bath method according to canning directions for size.  Here is the link to the national canning center.

Lacto-Fermentation is not discussed in the national canning site.  For more information on using lacto-fermentation go to this link.

Canning:  Canning means using a boiling water bath or Pressure Cooker to preserve foods which are shelf stable - meaning they do not need refrigeration until opened.  FYI all of my "Canning" recipes use no additional preservatives, so once you open a jar, you need to 1) refrigerate it and 2) use it up within about 3 weeks.

Real Marmalade -- I fell in love with this recipe because it uses the whole fruit and is delicious.  Also the recipe means you can multiple the recipe by the number of fruit you have not by pounds.   (If using small fruit like lemons or limes, just double the quantity of fruit but not the other ingredients per batch.)

http://edibleherbsandflowers.blogspot.com/2015/04/marmalade-and-red-celery.html


Lemon Curd, Whole Cranberry Sauce, Pineapple Guava Jam.  Our pineapple guava fruit is ready in November and I grabbed bags of fresh cranberries to make my own sauce.

http://edibleherbsandflowers.blogspot.com/2014/11/curds-jam-and-sauce-oh-my.html


Real Old Fashioned Sauerkraut - this is the fermented type and tastes just like it should without a "vinegary" taste, just a nice briney flavor.

http://edibleherbsandflowers.blogspot.com/2012/04/sauerkraut-dill-pickles-preserved.html

My homemade pasta sauce with tomatoes and herbs fresh from the garden.  Maybe one of the nicest foods you can make for your family from the garden.

http://edibleherbsandflowers.blogspot.com/2012/02/my-pasta-sauce.html

Quick Pickles or any vegetable.  These are "refrigerator" type pickles meaning they are ready in 4-24 hours.  Chefs use this method a lot.

http://edibleherbsandflowers.blogspot.com/2011/10/quick-pickles.html

More Quick Pickle with Green Beans and Leeks

http://edibleherbsandflowers.blogspot.com/2011/10/quick-pickle-more.html

Pickled Baby Peaches.  When we had to do the heart-breaking process of thinning our peach trees each year I thought there had to be something we could do with these tiny immature peaches.  I found a great recipe, from Europe where this is a common way to use up everything.  Why it works -- when you pick the baby peaches 3/4 of an inch or smaller, the "seed" is not former, so what you have is an "olive" type fruit waiting to be pickled.  The recipe I shared is for a fruity type pickle but you can also adjust the spices to be more savory.


I posted a video on my youtube channel on thinning peaches.  Check it out for when you need to thin your peaches (usually late Feb or early March). 

http://edibleherbsandflowers.blogspot.com/2016/03/thinning-peaches-and-way-to-use-thinned.html


I hope these recipes inspire you to save some of your garden bounty for later.  The beauty of living in the valley here is the ability to preserve as we go through the seasons and not be limited to a major all-at-once harvest in the fall.


-- Catherine, The Herb Lady

My website

If you enjoyed this post, subscribe in the upper side bar link, to get all my posts!

Disclaimer: Clicking on links on this blog may earn me a small commission if you purchase something. Your price does not change.

Saturday, October 08, 2016

When Pigs Fly! "You can't grow that in the desert." YES, you can.

Dear Folks,

A dear friend gifted us with a little metal statue.  We don't typically put art in the garden, because our garden IS art.  However this little girl flying pig (I named her "Daisy Mae") immediately brought to mind the oft-repeated statement and generality - "You can't grow _______ in the desert."

The comment/statement is made so often, that people take it as truth because they fear the summer heat, or they tried planting tomatoes in June (wrong time), or stuck a new shrub or vegetable plant in the ground without hardening off, or the local chain nursery sold it, so it must be planted "now.", or, or - the list goes on with folks either trying to replicate the timing for gardening based on where they came from, or because they simply presume "they" can't do it correctly.

Let's do a reality check on what is grown, typically, in the desert.

Grass!  If I was going to choose one plant which puts the "you can't grow that here" statement to test, it would be grass.

What do people do to have a lawn in the desert?  They pamper, nurture, feed, water -- a lot -- and as one wag put it, use precious resources to grow something, they then cut down and THROW AWAY what they just cut!!

Here is real reality check, if you ate the plant, it can probably be grown here in the desert.

If you compare the actions required to have a green lawn in the desert to growing plants you eat, you will spent less everything growing food instead of lawns.

Daisy Mae, the flying pig, is surrounded by my Bradford watermelon plant still going strong on October 8, 2016.  I have yet to harvest the last - very large - melon and the plant is still putting on flowers.  It remains to be seen whether we get more fruit, but the point is, I planted a couple of seeds, in an automatically watered bed, augmented the watering in the early weeks, and then let nature take its course.  No more anything, no extra fertilizer, cutting, or daily/weekly maintenance.  The only 'extra' thing we had to do was to occasionally 'herd' the vines back into the bed.

Maybe you have a gravel covered yard and think you are saving money.  This is where our sun and heat IS an issue.  "Pea gravel, volcanic rock and similar stones have a high capacity for absorbing and retaining heat, which they then release as the sun goes down. Rocks also reflect a lot of heat off of their exposed surfaces. The combination of the two factors can increase the day and evening temperatures in the area and make your house hot, especially when you have these ground covers near your exterior walls."  Which translates into higher A/C costs to compensate.

The utility companies frequently publish how much savings you achieve by lowering or changing your temperature settings during the summer.  If gravel raises the average outside air temperature by 10 degrees or more (it does),  your a/c has to work harder to compensate for all that reflected heat off the gravel.  Electricity cost savings can be put into "greening" your yards with food plants, which create cooler zones, provide eye appeal and you can EAT the plants instead of cutting them and throwing them away.

Edible Ground Cover Plants Instead of Grass or Gravel:

BETTER than Grass or Gravel!
It can be as simple as growing squash (pumpkins or zucchini) melons (cantaloupe or watermelon), sweet potato vines, or tomatoes and let them sprawl all over the bare ground (YES tomatoes - they actually produce better in the warm weather sprawling instead of staking).  Gives new meaning to a "ground cover" which 1) cools the surface temperatures, 2) makes attractive foliage and 3) provides food (fruit and the edible sweet potato leaves along with the roots).

Think outside the lawn or gravel for better, cooler, more useful plants!

If you are need to my blog, or new to gardening in the Phoenix Metro area, check out my recent post on what to plant / sow in October.

Have a great day in the garden,

Please share if you enjoy my posts, thank you!


-- Catherine, The Herb Lady

If you enjoyed this post, subscribe in the upper side bar link, to get all my posts!

Disclaimer: Clicking on links on this blog may earn me a small commission if you purchase something. Your price does not change.

Thursday, October 06, 2016

Chervil, Sunchokes, a Sea of Pumpkin and Sweet Potatoes, Beans, "Spinach", Ginger, Eggplant & Jam Bread

Dear Folks,

The other day I posted a picture of my Cilantro sprouting.  These are volunteer re-seeding from last season's plants.  Well, the next day I found my Chervil has also voluntarily re-seeded. WIN!

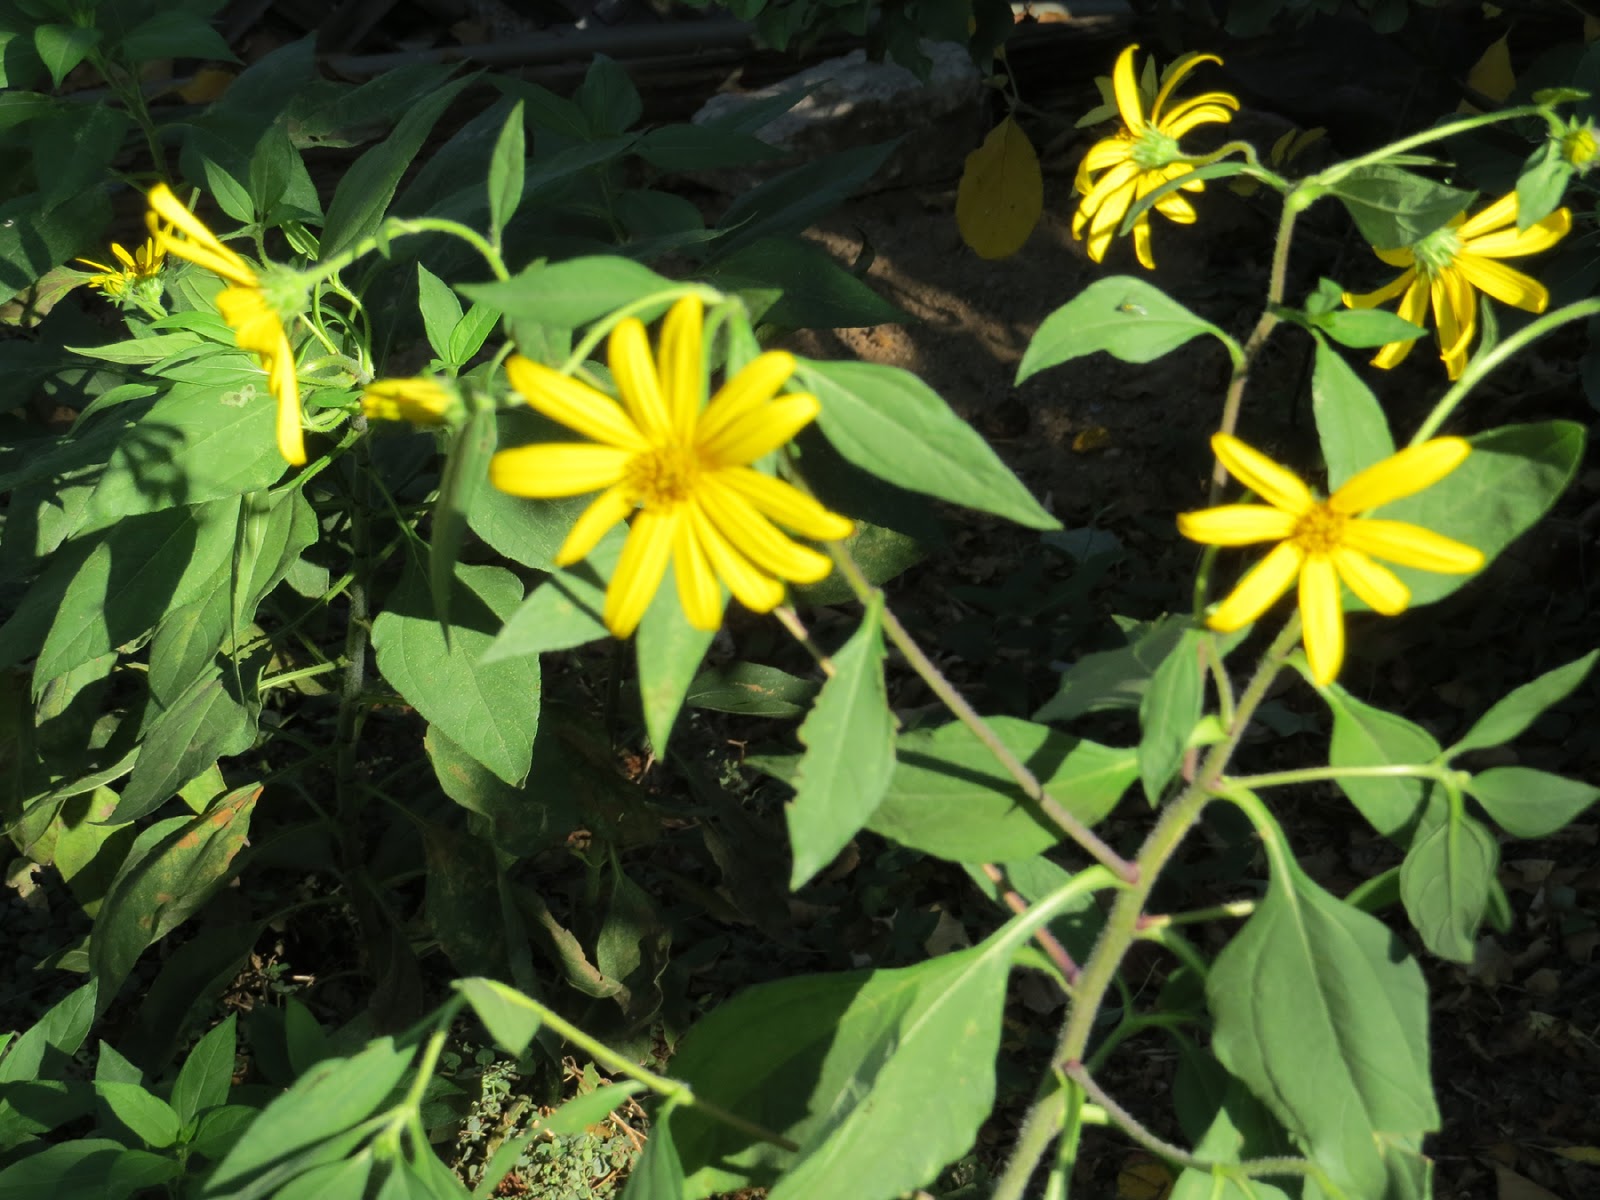
Meanwhile, the Jerusalem Artichoke, aka Sunchokes, are flowering.  That means when the flowers fade in a few weeks I can harvest this healthy and delicious potato alternative.  The beauty of growing these in the Valley, is we can get harvests twice a year.  Now and again in the spring.

The Upper Ground Sweet Potato Pumpkin and Sweet Potato Vine share a raised bed and you can see, a "sea" of leaves.  Looking forward to harvesting for Thanksgiving or earlier, IF the baby pumpkins thrive.  Fingers crossed!

The Blue Speckled Tepary Bean I planted on July 1st is starting to put out pods.  It is sharing a space with the back of the Roselle, but does not seem to mind, yet. :-)  I really need to plan for success better next year!  Something I preach often, but don't always apply to my gardens where I want to just "tuck" some extra things in and then bingo, everything loves the spot but then competes a bit for sun etc.

My friend Jacq Davis over at Epic Yard Farm, introduced me to Egyptian Spinach for salad leave substitute during the summer.  Wonderful option along with my sweet potato leaves for sandwiches, and in soups and salads.   Egyptian Spinach aka Molokia, is not spinach but Corchorus olitorius, C. capsularis, the leafy green part of the fiber plant Jute. The plant is in flower and producing seed pods, while still producing tasty leaves for us.  I am really looking forward to harvesting the mature seeds for re-sowing next spring, to have more fresh "greens" options during the heat.

The ginger I planted August 20th are really happy in their new, best location.  I now have another sprout on each piece I planted.  I wrote about this before.  I have been growing ginger for a number of years, but as we had to remove and replace trees the sun exposure increased on their former happy place and they did not like it.  So this new area is mostly shaded with good indirect sunlight.  Hoping they good a good growth streak going before soil temps cool in the winter. Then looking forward to them jumping up in the warming soil in spring.

I got my eggplant seeds in very late this year, so I am just now getting fruit coming on.  Looking forward to harvesting for marinated eggplant and maybe some ratatouille :-)

Preserving The Bounty!

If I have a good harvest of some of this bounty from the garden, I will probably can some of it.  I've been canning for a number of years and the WONDERFUL thing about gardening year round here is you are not restricted to canning in a mad rush all at once in the fall.  I can as the various produce ripens through the year.  I also sun dry a lot of my bounty and store in canning jars.  I've been trying to get away from using plastic containers as much as I am able, and the canning jars are perfect for storing.  TIP 1:  Remember when storing dried herbs etc. the mantra is:   cool, dry, dark!  This also applies to your canned foods.  There was a very good reason why Grandma stored her canned goods in the cellar.  Better food color retention and less exposure to temperature variations.

Speaking of preserving.  Even with canning in short spurts I can wind up with a lot of canned jams/preserves.  Wondering how to make room for the newest batches, I developed My Jam Bread recipe a while back.

Most folks are familiar with quick breads, aka sweet cakes baked as a loaf.  Many of them are filled with fruits and nuts, like the Christmas Fruit Cake.  The usual recipe calls for chopped fruit, dried or fresh and some liquid and sugar.  I got to cogitating on exactly what the ratios of the typical recipe were and realized my jams/preserves were 3 ingredients combined: fruit, liquid, sugar.  Bingo.  It took two tries to get this right and now everyone enjoys these sweet, fruity, nutty breads.  Here is the link to my post on the Jam Bread.  I would add one extra tip.  Add a 1/4 cup more flour if you think your batter is too loose.  Adjust cooking time if you double the recipe and make two loves.  Just use the toothpick test to make sure they are cooked in the center.

Pictured.  I made and canned Blood Orange Marmalade and used it to make this Jam Bread.  Speaking of Marmalade, I found a wonderful recipe idea for making REAL marmalade - not that jelly with a few pieces of zest in it.  Real, honest to goodness preserves using the whole fruit (except the seeds).  If you have citrus growing check out my recipe for marmalade from any citrus.

I do use and recommend Ball/Kerr canning jars.  When they started introducing their heritage colored jars a couple of years ago, I had to start getting them for use with my dried herbs and other non-canned storage like grains, pasta and beans.

TIP 2:  My first year of canning my jams quite a few years ago, I made the mistake of choosing the wrong size for much of the peach and apricot jams.  I chose to use quart and pint jars.  Sounds like a good idea, right?  Wrong, because unless you can use the whole jar after opening, with no preservatives, the jams have a short life in the refrigerator - plan on 1 month tops.  For us it is just the two of us and my guy likes to have variety which means multiple jars open in the frig.  The first year and a half I had to toss a lot of jars after they molded.  My new recommendation is to use 4 or 8 ounce jars for your canning purposes.  By the way, my Jam Bread recipe uses 1 1/2 cups of jam for one loaf.

-- Catherine, The Herb Lady

My website

If you enjoyed this post, subscribe in the upper side bar link, to get all my posts!  AND, please share. Thank you!

Disclaimer: Clicking on links on this blog may earn me a small commission if you purchase something. Your price does not change.

Monday, October 03, 2016

Garlic Planted, Cilantro Re-Seeded, Baby Pumpkin, Me and Roselle, Brining


Dear Folks,

The rain yesterday did two things in my gardens, settled in the garlic I planted on Saturday, October 1st and saved us a watering day.

We got nearly a half inch which means the gardens are nice and wet and do not need the scheduled watering.  Pictured is a clove Elephant Garlic being planted.  Beside that clove are regular garlic ready to be planted.  Plant garlic cloves with the pointy side up.  This will be the center stalk from which the mature head of cloves comes from.

The Allium family includes onions, chives, shallots, garlic, leeks and elephant garlic.  The familiar common Garlic is Allium sativum, while Elephant Garlic is Allium ampeloprasum.   Elephant Garlic is actual a form of leek - on steroids!  It has a milder flavor compared to common garlic's strong, even zingy flavor.

Both grow well here in the valley.  If it looks like I planted too close together -- I did on purpose.  I planted 39+ cloves of common garlic and 8 of the Elephant type.  I always plant extra by planting 3-4 inches apart, so I have "green garlic" to harvest like scallions through the fall/winter/spring.  This delicious addition to your cooking ingredients is a "scallion" only with garlic flavor instead of onion.  Harvest when the greens are about 8-10 inches tall and the clove has swollen slightly.  You can replace with another garlic clove to continue the harvest capability.   Instead, by harvesting every other plant as I need during the cool times, the space between widens allowing more room for each clove to grow to head size.

In April start watching for the plant to send up its flower stalk, called a Scape, it's spiral growth continues and you cut them off when they reach the height of the leaves -- this year it was early May.  Scapes are an edible delicacy only available about 1-2 weeks a year.  Once the Scape is cut off, watch for the leaves to begin turning yellow, about 2-3 weeks later.  This is harvest time. 
Gently dig each plant out, brush off the dirt and hang to dry in a shaded area in the garden or patio.  When the outside skin turns papery it is ready to store.  You can use the green tops as you would scallion tops.  Even the hard center stalk can be used to flavor broths, stews, soups and then removed at serving time.

From the aromatic to the gorgeous, this is my Roselle Hibiscus sabdariffa, now reaching taller than me and beginning the flowering stage moving toward harvest of the gorgeous lemony/cranberry flavored Caylx.  The entire plant is edible.  I've been using the leaves in place of lettuce with their tangy flavor.  While the caylx is known for its high Vitamin C component (if you see "hibiscus" or "red hibiscus" as an ingredient in teas - this is the plant), the leaves also have vitamin C as do the flowers.

Meanwhile, my Cilantro re-seeded and I spotted the new seedlings last week.

I love my gardens.  Many of my favorite plants freely re-seed coming back year after year.  Successive generations of seed is "regional adaptation" at its best.  The seeds which come up naturally are the strongest in your garden.

For this reason I urge you to direct sow if you can.  All of the seeds may not come up, but those which do will be the hardiest.

I am excited about the prospect of an heirloom pumpkin.  I have baby pumpkins on the vine, which has a mind of its own and has spilled out of the raised bed and ranging towards the trees.  I am going to let it roam and just try to keep it out of harm's way while it, hopefully, produces "Upper Ground Sweet Potato Pumpkin" reported to taste like sweet potato and once grown in Thomas Jefferson's gardens at Monticello.

In an "inspired" moment I decided to sow the pumpkin seeds in with the sweet potato, because the SP provided some "nurse" shade to the seed area.  It worked nicely as you can see a bed of sweet potato and pumpkin vines.   I hope to be harvesting pumpkin and sweet potatoes for Thanksgiving.

And, finally I decided to brine more of the Caper buds and berries and have set them to 'work' on the counter.  This is a fermentation brine with no vinegar and when I tried it for the first time, the buds turned out great but the berries not so much because I waited to long to pick them.  This time I picked the berries younger.  What I am looking for is that the berry seeds had not matured turning dark, and that I picked the berry while the seeds are white and immature.  The dark seeds proved to be very bitter, while the berry it self was tasty but not worth eating.  We shall see.  I want to be ready for next spring when the plants start budding and begin a large fermentation jar where I will pick buds regularly adding to my caper version of the old fashioned pickle barrel.  The food you are brining needs to be held completely covered under the liquid so I have a pickle weight wrapped in cheese cloth and tied with a string to allow me to lift and re-position any that rise to the top.  I have a light plastic food cover over it (not seen in the picture) to keep dust off, but allow any bubbles to escape.

That is all for today, folks.  I am always happy to answer questions.

Be sure to check out my youtube channel where I post short videos with helpful tips.

Have a great week in your fall garden!


-- Catherine, The Herb Lady

Website

P.S. I started a Cafepress "store" where I chose some of my favorite photos from the gardens and put them on t-shirts and other things.  The link is in the sidebar.  I welcome feedback and/or suggestions for products you might like to see offered.

If you enjoyed this post, subscribe in the upper side bar link, to get all my posts! And, Please Share.

Disclaimer: Clicking on links on this blog may earn me a small commission if you purchase something. Your price does not change.


Thursday, September 29, 2016

It's National Coffee Day - Tips, and Can We Grow It Here in The Desert - Giving it A Try!

Dear Folks,


Yes that is a coffee tree. I will talk about my experiment below.

I LOVE coffee. So much so that while I had to get off it twice on doctor's recommendations, I went back to my morning cuppa's each time.


I am rarely a purest on the subject of foods and recipes. Hummus, make it with any bean (or pea) you want. Burgers with blueberries in them -- check. Oatmeal as a side dish instead of rice -- check.

BUT when it comes to coffee after decades of office coffees that varied form week to sludge I want wonderful, fragrant, superior tasting coffee teach morning. I grind beans sometimes each day, but usually every several days. Store in a tight fitting glass jar in the frig waiting for me to make my morning coffees - 1 cup at a time!


I never liked iced coffee until several years ago when I saw a great short video on making it the perfect way.

I have enjoyed the Vietnamese Iced Coffee served in restaurants, even got the special filter (drip) which sits on the glass, but never got around to making it at home.

I can't find the video, but here is the simple trick. You are going to use your usual amount of grounds, whether pot or cut. Fill the pot or cup full of regular ice cubes - do not use mini cubes, you need the air space to make this ratio work out. Use 60% of the amount of water you normally use to make the coffee. Then make your pot or cup of coffee. Viola - Perfect Iced Coffee!!


There is apparently some science to this. The traditional way of making iced coffee it to 1) either make the coffee stronger and pour of ice, or 2) just pouring the usual hot coffee over ice. 1 usually tastes better than 2, but until you try to ice-in-the-pot method you won't have the BEST tasting coffee. Here is what happens. The very, very hot coffee is cooled immediately when it hits the cubes, immediately infusing the flavor with all of the "bright" notes coffee lovers want.


Give it a try and let me know what you think.


Recipe tips:

---Add some fresh coffee to your brown or beef gravy to add a rich note. If you do not over-use the coffee, no one can tell it is in there, it just tastes more flavorful.
---Of course any bakery chocolate can be enhanced with some coffee, add some brewed coffee, or I like to keep a jar of high quality espresso powder in the freezer for adding to recipes.

For Iced Coffee - how about replacing some of the ice cubes with Chocolate Ice Cubes!


My Version of Chocolate Ice Cubes
The original recipe, which I tried left grainy bits in the bottom of the cup not bad tasting, but I wanted all the flavor IN the coffee
7 ounces of milk
1 ounce of water
1 teaspoon of sugar
1/2 cup of Ghiradelli Cocoa (already has sugar in it.


In a small sauce pan add some of the milk, the water, sugar and cocoa. Turn the burner on medium and stirring constantly dissolve the sugar and cocoa. Then add the rest of the milk and heat to meld everything. DO NOT BOIL - it is not necessary - only heat to ensure the sugar and cocoa are dissolved.


Pour into ice cube tray and freeze - they do not get as hard as water ice cubes. Pop out (you may have to lift an edge of each with a knife) and store in container or ziplock bag.


Add one to your cup of coffee or 2 to a glass of milk for a cold "cocoa".

Here is the original recipe. Use the ratio of sugar suggested if you use unsweetened cocoa. Give the link a minute to work - it is translating from French.

Here is a fun link with what else you do with coffee and coffee grounds. 14 tips for using coffee and grounds. No 10 - feed acid loving plants. My container growing Blueberry plants (see the cover picture of my calendar in the sidebar showing my handful of blueberries) do well with my 1-2 times a month days worth of coffee grounds sprinkled on the soil

Growing Coffee In The Desert
I was inspired to once again try a coffee plant/tree in my garden - I was not successful before because I tried at the wrong time of year in the wrong place.  The inspiration came from a podcast over at Urban Farm with Scott Murray, a well known permaculture expert in California, who decided to create companion orchard.  He was growing avocado trees and interplanted with coffee!!  Okey dokey, the other tree I want to try in this experiment is avocado, but I will wait on purchasing one.

This is going to be one of my experiments where I keep my fingers crossed.  I picked up a Barbados (Acerola) tree from Shamus O'Leary this past February and could not resist purchasing a Coffee Tree from him.  Here is the challenge.  They are frost sensitive and usually brought indoors in the winter, even here.

When I received a Mango from a friend last year, I decided to create an "under story" grouping using specific orientation and a combination of evergreen (citrus and bay) and deciduous (plum).

So here is the positioning.  The Coffee is in front of an Orange tree.  To the left you can see Bay leaves, and to the right a bit of the Mango.  What you can't see is to the right - a huge Santa Rosa Plum.  The Coffee is facing south.  So protection from the intense Northern sun in the summer, a goodly amount of sun from the East in the winter, plus the Southern exposure in the winter.

My hope is the canopy of the bay and citrus will provide some frost protection, and I will plan on covering on freeze nights.

I will keep you posted on how it goes and grows.

REMINDER:  Free Seed Share and Lecture coming up Friday and Saturday.

Have a great day in your garden!


-- Catherine, The Herb Lady

If you enjoyed this post, subscribe in the upper side bar link, to get all my posts!

Disclaimer: Clicking on links on this blog may earn me a small commission if you purchase something. Your price does not change.

Tuesday, September 27, 2016

Around The Garden Garlic and Peppers, More Pictures and Reminder About Free Seed Share and Lecture.

Dear Folks,

When is garlic not "the" garlic?

When it is Society Garlic or Elephant Garlic (but that is for another post).

The gorgeous orchid-like, lavender flowers of the Society Garlic (Tulbaghia violacea), comes in a plain or striped leaf (I have the striped) variations.  This is a perennial member of the larger Amaryllidaceae family.  The "family" includes onions, garlic, leeks and Amaryllis.

Society Garlic is a strong garlic flavored plant.  The leaves and flowers are used not the roots.  It grows in clumps and should be separated every few years.  It will thrive in dappled shade, but can tolerate more sun.

The name comes from a feature people have reported -- no garlic breadth!  This lovely plant is worth adding to your garden, even if you prefer true garlic.

This spring I got two new-to-me sweet pepper plants from Suzanne Vilardi (of Vilardi Gardens) a very unusual and rare with a very long name Paradicsom Alaku Sarga Szentes Pepper from Hungary.  ("Paradicsom" short name.)

I gave the plants a challenge by planting in one of my large pots with a southern exposure.  They settled down but it took all summer (I planted late) and now are pushing out a lot of fruit.  A "pumpkin" or "scalloped" shape they are meaty and sweet.  I am trying to decide if I will try stuffing them with something or just use in salads and pastas when they are fully ripe.  Most of these are about an inch and half or slightly bigger.  Reportedly they can get up to 3 inches across.

I am trying to establish a larger amount of sweet peppers in various areas of my gardens to give me a more consistent harvest.

Sun/Shade Tips.  While the peppers need the sun and warmth it is clear to me from my plants responses, that they appreciate some afternoon shade.  While they grew well in the middle of the summer, fruit not shielded from the sun by the leaves got sunburn.  This is particularly true for the fatter bells and this Paradicsom because they tend to fruit high on the stems, while my Lipstick/Gypsy peppers are more pendulous and hang below the leaf canopy.

I have prepared the bed where I will plant out my garlic on October 1st.  If you want head garlic in the spring, you need to plant no later than October 31st to ensure all the winter chill/cold necessary to force the garlic to produce clove heads.

It looks like a muddy bog right now and that was intentional.  I dug, sifted a bunch of gravel out of it, it was flooded and leveled.  This particularly area gets flooded for watering, so it is necessary to have it level.

I will plant very close together to have "green garlic" to pull through the winter for cooking.  Green Garlic aka Garlic Scallions is used just like a green onion/scallion - only garlic flavored.  Pulling every other plant during the winter gives me this great green garlic and slowly expands the area for the remaining plants to grow fat clove/filled heads.

Reminder:

Free Seed Share at the Mesa Farmers Market this week.

Free Lecture at the Mesa Urban Garden, MUG, Mesa's public community garden.


-- Catherine, The Herb Lady

If you enjoyed this post, subscribe in the upper side bar link, to get all my posts!

Disclaimer: Clicking on links on this blog may earn me a small commission if you purchase something. Your price does not change.