Garden, Plant, Cook!

Wednesday, May 19, 2021

I am reducing my activity on the internet.

Dear Folks,

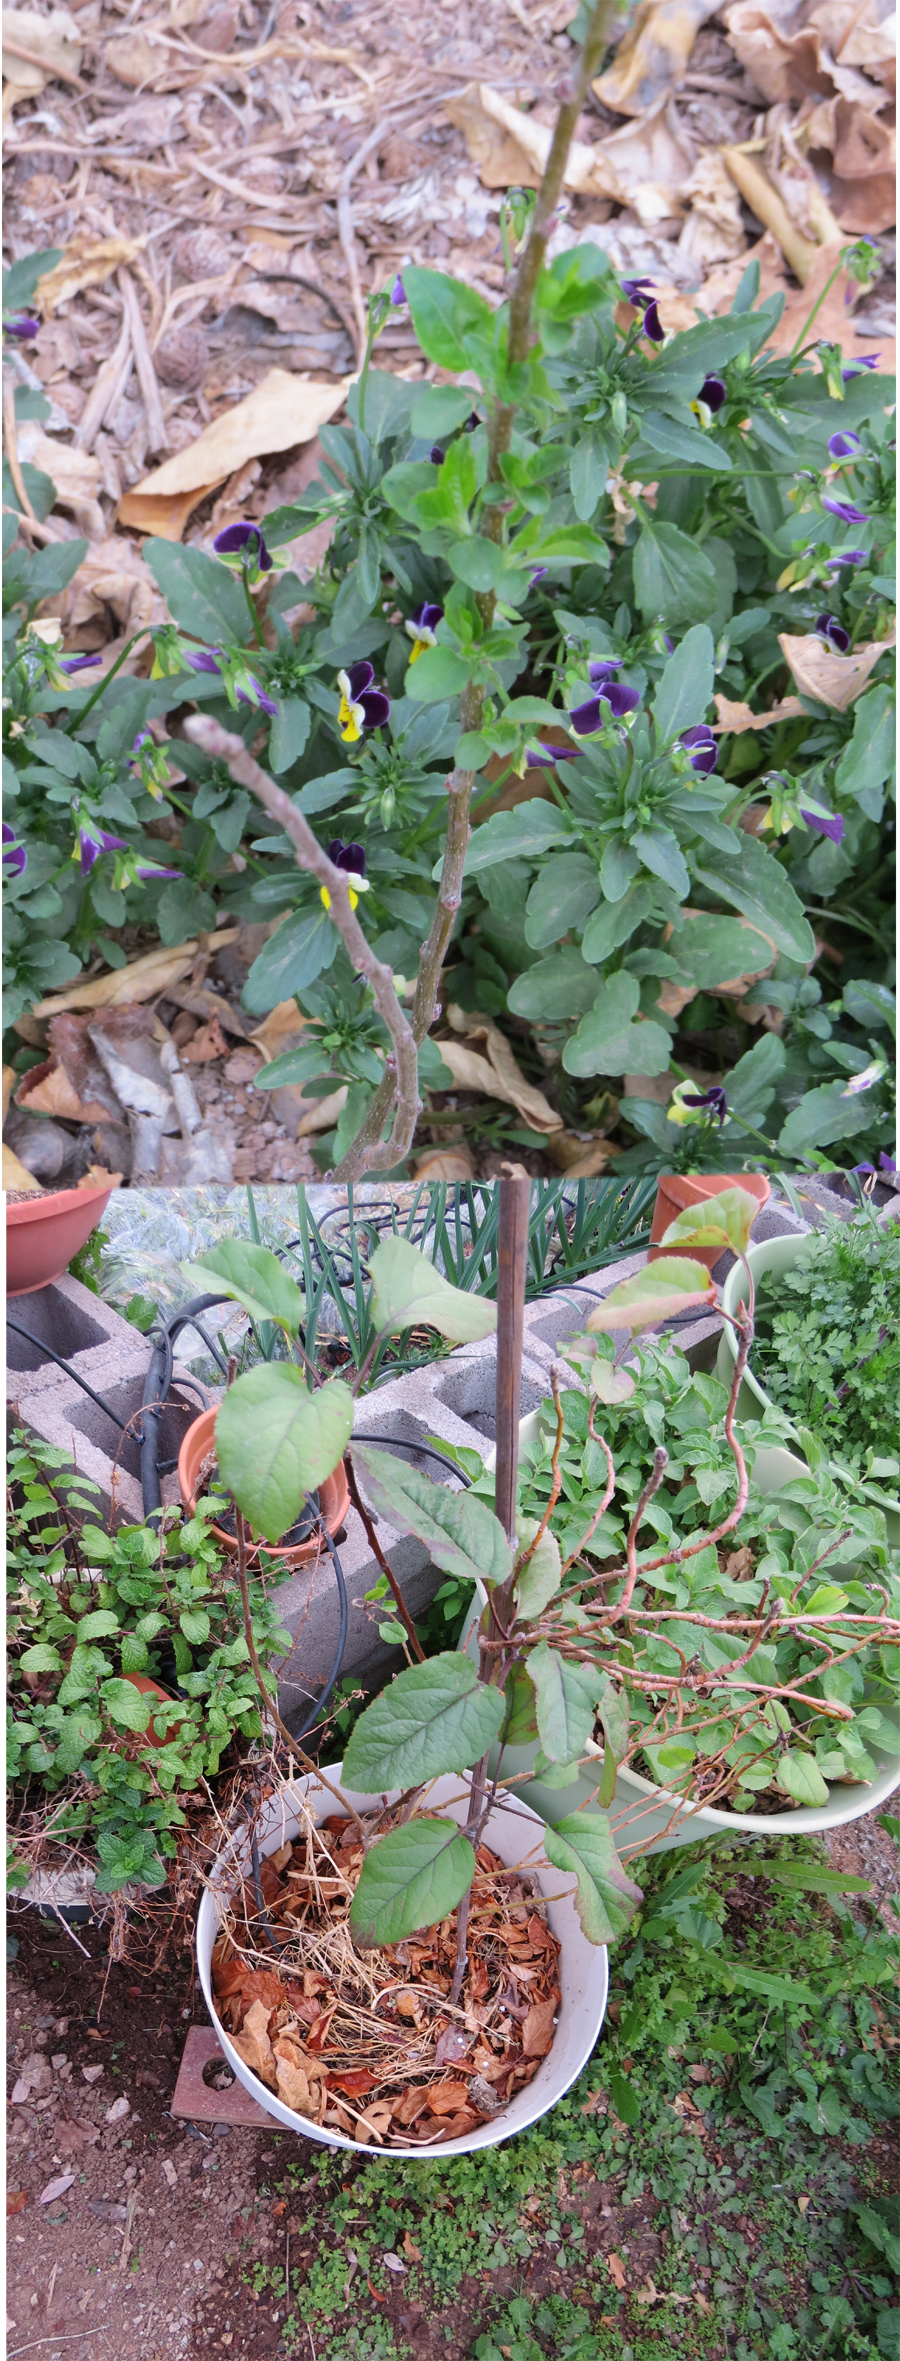
Pictured my harvest this morning.  I was out in the garden for a half hour enjoying the cool morning.

I will be reducing my presence on the Internet due to my ongoing health challenges.

Last year I was diagnosed with Cancer, and was symptom-free until the beginning of this year.  The covid virus restrictions stole my year of expecting to enjoy all the normal things without restriction.  I am not alone in this impact on my and my family's life.

I have enjoyed so very much sharing my gardening and cooking with you and I hope you chose to continue to find great resources out there.  If there was a silver lining to the covid impact it is that many people realized they could get control of "their" food by growing some or more of it and feeling of impowerment was substantial.

I will be keeping the blog and my facebook page up as long as feasible.  My website will be shutting down in a couple of months.

Meanwhile, as I can, I will be happy to answer questions on the facebook page ON any posts as they show up as an alert for me. 

Apparently my blogger, blog page may be changing according to a google notice about how the 'feedburner' for your 'subscription' to my blog works and I have no control over that.

You can send me an email to my aol account which I hope to keep up running as long as possible.

herbstwoyou@aol.com


June 2020

http://edibleherbsandflowers.blogspot.com/2020/05/june-planting-tips-and-around-garden.html

July 2020

http://edibleherbsandflowers.blogspot.com/2020/06/july-planting-sowing-tips.html

August 2020

http://edibleherbsandflowers.blogspot.com/2020/07/august-planting-and-sowing-tips-and.html

September 2020

http://edibleherbsandflowers.blogspot.com/2020/08/september-plantingsowing-tips-non-soon.html

October 2020

http://edibleherbsandflowers.blogspot.com/2020/09/october-planting-and-sowing-tips.html

November 2020

http://edibleherbsandflowers.blogspot.com/2020/10/november-planting-tips-and-new-to-me.html

December 2020
http://edibleherbsandflowers.blogspot.com/2020/12/december-planting-tip.html


January 2019 (apparently I missed doing 2020 and 2021!

http://edibleherbsandflowers.blogspot.com/2019/12/january-planting-tips-ready-set.html

February 2021

http://edibleherbsandflowers.blogspot.com/2021/01/february-planting-tips.html

March 2021

http://edibleherbsandflowers.blogspot.com/2021/02/march-planting-tips.html

April 2021

http://edibleherbsandflowers.blogspot.com/2021/03/april-planting-tips.html

May 2021

http://edibleherbsandflowers.blogspot.com/2021/04/may-planting-tips-around-garden-and-more.html


Additional Post you may find helpful

This was the top 10 posts you liked in 2019.  You can look on my right sidebar to see what is 'trending'   :)

http://edibleherbsandflowers.blogspot.com/2020/01/top-ten-posts-for-2019-and-happy-new.html


Take care of you and your garden, be patient and kind to yourself and each other.


-- Catherine, The Herb Lady If you enjoyed this post, please share and subscribe below by entering your email, to get all my posts!

Enter your email address:

Delivered by FeedBurner

Disclaimer: Clicking on links on this blog may earn me a small commission if you purchase something. Your price does not change.

Thursday, April 22, 2021

May Planting Tips - around the garden and more

Dear Folks,

May has several celebration dates for gardeners:

May 1st, is International Herb Day

May 2nd is International Permaculture Day

     International Permaculture Day on the first Sunday in May (or thereabouts) is a day of celebration and action for permaculture around the world.
https://permacultureday.org/
Began in 2009 in Australia

May 3rd-Mother's Day May 9th Is National Herb Week.

Pictured is my harvest of greens and herbs for salads etc. Herbs include Variegated Lemon Thyme, and some you can't see: Cilantro, Dill, Chervil and Parsley.

A link to last year's May Planting Tips is below.  In some ways, this year is the same with sickness, challenges, supply issues and more.

But if there was and is a bright spot it was the new and renewed interest in gardening, growing your own food.

Last spring, I do not have the date, I sowed seeds for a Royal Black Bell Pepper,  About January 20th this year, I was pulling back lush growth on the plant and spotted DEEP black peppers!.  Fast forward to the day before yesterday and I was again pulling back the growth and low-and-behold RED peppers.  This is a pretty cool plant.  The fruit starts out black, turns some green and then matures to red. 90 days or thereabouts to maturity.  The fruit is thick walled.


No matter what else is going on, some things do not change.  This baby Mocking Bird was begging for food and mom was going back and forth to our lawn picking up "groceries" :)  That is Anna Belle one of our garden statutes - she is in our Saturn Peach which is THE place I thought a goat should be :)

One of my "I did it" garden successes is this stunning Red and White Amaryllis.  This is from a SEED!!!!! While not edible I could not resist the mother plant at the Sun City Farmers Market back in 2015.

When the flowers faded, there was a seed pod - well why not try.  I looked up propagation of Amaryllis, followed the information.  The notes indicated it would take 5+ years.   Well this is 6 years and it is visible as we step our our front door!!!  Yippee!

I also have my beloved Amaryllis - a white and blush gorgeous flower.  I have quite a few baby plants. My dad gave me the original bulb (I still have it) back in the 80s.  We call is "Dad's Amaryllis".

Last is a recipe.  Some "kismet" in a cool kind of way happened when I turned on my table while relaxing.  I intended to scrolled through current whatevers.  To my surprise the very top trend was "2 Ingredient Yogurt Biscuits" some said rolls.  Well -- I already make a cream biscuit with heavy cream and either self-rising flour (I make the substitute) - that's it.  I checked out some ideas did one batch and we really liked it.  For the next batch I tweaked the amount of salt in the substitution and added a bit of sugar to offset the tang of the yogurt.

Unlike the heavy cream biscuit (we love them) this one has a high protein content from the yogurt, a plus.

Yogurt Cheddar/Dill Biscuits

I also made a Cheddar, Garlic, Parsley version - you know like the famous restaurant biscuit :)

Pre-heat oven 400F. Prepare a pan with either parchment paper or aluminum foil - I found I needed to add a light pan spray to the foil.

Ingredients:

Equal amounts of self rising flour (SRF) and Greek Yogurt. I use an organic low fat, but you can use whatever you like.   ----   SRF Substitution - 1 cup all purpose flour, 1 1/2 teaspoons baking powder, 1/2 teaspoon salt, 1 teaspoon sugar

1/2 cup shredded white cheddar cheese (my preference, orange works too :)

1  tablespoon  fresh or dried dill

Directions.

Place flour in bowl and add yogurt.  Start by blending them together. Unless you use a mixer, you will eventually need to use your hands to get all the dried bits incorporate.

Flatten the dough and sprinkle the cheese and dill cross the top and start folding the ingredients in.  Should not take more than 4-6 folds to get them in nicely.

I use a knife to cut into 6 equal (more or less) pieces and place on pan about 2 inches apart.

Bake for 20-24 minutes, turning the pan half-way through.

Use immediately or store in frig and use within 3-4 days or freeze.  Because of the yogurt they will get "tangier' in the frig.

Although I have not tried it, you can make the dough a day or two ahead, store in plastic wrap and bake when you are ready.

HERE is the link for last year's May Tips.

Take care of yourselves and each other, work in the garden, share as you can and keep a positive mind.  So many, many stores of folks helping each other.  Keep that image in mind when it feels challenging to you.

-- Catherine, The Herb Lady

If you enjoyed this post, please share and subscribe below by entering your email, to get all my posts!

Enter your email address:

Delivered by FeedBurner

Disclaimer: Clicking on links on this blog may earn me a small commission if you purchase something. Your price does not change.

Tuesday, March 16, 2021

April Planting Tips

Our Florida Prince Peach Planted 10/12/1997
Dear Folks,

Maybe??!!! our up/down weather could be getting behind us.  In which case you need to be observant and prepare for a traditional warm up into mid-to late spring.

See note below about this Peach tree picture.

That does mean you still need to be prepared to protect tender seedlings, not so much from frost but from the possibility of hail. As the soil warms up and if the air temperatures get cool, and you add in some moisture and wind - you get hail.

The other factor to be aware of, moving forward into really warm weather is getting tender seedlings transplanted after the best "safe" times.  The soil surface can heat up fast and a transplant in the middle of bare ground is ripe for major stress -- trying to establish roots while dealing heat.  I suggest my "flower mulching" technique

FLOWER "MULCHING:  Soil canopy (shade) is necessary to protect young plants, BUT not shading the plants - they need the sun.  Purchase 6 pack of flowers, surround transplanted herb or veggie with 3-5 flower plants - "think" 12 inch diameter circle.  Why? This cools the soil surface and shades the sides of the primary transplant, without encouraging pests near tender stems.

Peach Tree.  Our initial planting of fruit trees was done in 1997 and 1998.  This Florida Prince Peach is one of the last of the original trees and the old gal just keeps, keeping on.  If you look at the base, over the years one branch/trunk died back and Deane cut it off.  The last several years we figured she was not going to make it, but here she is almost 24 years later with fruit on the tree, this trunk looks reasonable healthy.  Deane will be thinning the fruit shortly to keep weight off and get bigger fruit.  This is also the last of the peaches we really like.

Apple Trees.  These two small apple trees, I started from seed.  It is interesting to watch them grow.  One is in the ground. My experiment to see if our soil would stress the tree.  I purchased Wild Land Race Montana seed in April 2018.  I sowed them in small pots and transplanted to a couple of different locations.  One is in a pot on the southwest corner of my cinder block bed and the other in the east garden - in ground.  Over the last 2 years the eastern one dutifully lost its leaves when it should, then put out new leaves in the last 2 weeks, or so. That tree is the top one, showing new leaves. 

The cinder block tree still has leaves on it and may not lose them until April, then new leaves come on later.


One of our Apricot trees started to bloom a week or so ago.  Just such pretty flowers and delicious fruit (May).  We have two apricot trees and this one is the Gold Kiss and has the most wonderful flavor.


My dill came in so nicely.  I harvested some to dry in the frig for use later. When I cut greens and herbs for my salads and soups, dill is one of the mix :)


And finally, we have a zig-zag fence in the garden that the doves just love to sit on.  Here they are just waiting for us to put out seed. In the cold weather they will line up shoulder to shoulder even "staking" on top of each other like cord wood.

APRIL PLANTING:

Artichoke, Jerusalem
Bean, Snap
Beans, Soy
Cantaloupe
Carrots
Cucumbers       
Garlic, Green
Jicama
Melons, Musk
Okra
Onion, Green
Peanuts
Peas, Sugar
Peas, Black Eyed
Peppers
Radishes

EDIBLE FLOWERS TO PLANT:

Impatients Wallarana
Marigolds, including Tangerine Scented (Tagetes Lemonii), Citrus Scented (Tagetes Nelsonii)
Portulaca
Purslane
Roselle
Scented Geraniums
Sunflower
Sweet Alyssum
Zinnia


GARDEN TIPS for April
    Prune spring-flowering shrub fruit trees before flowering starts (April - May for shrubs like Pineapple Guava).
    If you planted your potatoes January 1st you can start checking the end of this month for usable size — just insert your fingers gently into soil. (See the file "Planting Potatoes")
    Get the children involved in gardening by helping them grow a Tee Pee or Sunflower House.
    Described in Linda Lovejoy’s fabulous book “Sunflower Houses,” either of these ‘hideaways’ will delight your budding gardener.
        a)  Create Tee Pees using 8-foot garden bamboo poles bundled and tied tightly 1 foot from the top.  Prepare the ground for the garden. Spread the legs of the Tee Pee — and anchor in the ground.  Plant pea, cucumber, or other edible vines at the base of each pole, and allow them to grow and cover the teepee.
        b) Sunflower Houses are created using the growing sunflowers for the poles of the house.  Prepare the planting area and decide how wide and long you want the house to be — ex. 4 x 6 — and draw the dimensions in the soil, leaving an opening for the ‘door.’  Mammoth sunflowers (those that grow over 6 feet) are best for this.  Plant the sunflower seeds 2 or 3 to a hole, about 1 foot apart all along the ‘walls’ of the house.  In between the sunflower seeds, sow edible vines like peas or cucumbers.  Given the water requirements, creating a trench for the walls will allow flood watering for the growing plants. These houses can be as elaborate as you and your children wish. Plant flower or strawberry beds along the outside walls;  herb and flower ground covers inside for a ‘carpet’ are limited only to the imagination. The vines grow up the sunflowers and if they are enthusiastic enough, will even grow over the top of a narrow room creating a ceiling.
        c) do teach the children about bees, leaving them alone and avoiding them when they are "working" the flowers.

I hope your garden is growing well.

Stay safe, be patient with your garden, yourself and each other.

Have a best day,

-- Catherine, The Herb Lady


If you enjoyed this post, please share and subscribe below by entering your email, to get all my posts!

Enter your email address:

Delivered by FeedBurner

Disclaimer: Clicking on links on this blog may earn me a small commission if you purchase something. Your price does not change.

Wednesday, March 03, 2021

Harvest: Options for Bounty

Dear Folks,

I have had a real bounty of things from the garden this past month, and it is continuing.

While I do compost, and "chop and drop" extra foliage while working through the various areas, I really needed to capture the freshness of these great meal options.

Because it is just the 2 of us (although I do share), if I make something like the "sauce" or roasted veggies I freeze in small jars for later use in soups, stews, and pastas - Or Tortilla Pizza! See recipe here.

The picture above is my sweet peppers turned into a roasted sauce I can use later.  The roasting made this even sweeter than the raw peppers. See the collage of process below.

I have a lot of greens and herbs that I harvest to add to anything from salad to soups to pizza or pasta.  Look closely as the collage top left and you will see green, pink and white! celery.  This was a fun surprise when I was harvesting.  I added some pink celery seeds to this celery pot and while I was cutting for this harvest day, I discovered the white. WOW, fun garden find.  This mass of greens (and some nasturtium petals) has herbs, kale and i'itoi onion tops. I also use the bulb, not not this time.

I decided to make some "salad in a jar" for having on hand.  I add tomatoes later when I am ready to dress the salad. Tomatoes can lose their real flavor when refrigerated.

Typically, salad in a jar has a dressing on the bottom, sturdy chopped next and greens on top so they do not get soggy.  I like to add dressing later when I actually am ready to use the salad, so all veggies stay fresh.  I also put a small piece of paper towel on top before capping to control excess moisture.

On another harvest day, I brought in more celery and parsley because I decided I needed to have 'pesto' on hand (and in the freezer)

I did use some of this pesto when I made another tortilla pizza the other day with some of my homemade pasta source, some of those chopped veggies shown in salad-in-jar picture and a LOT of cheese :)  I know you may say "pesto"? but really any combination of herbs, greens, oil, garlic (my limequat juice and garlic in the left of center picture), walnuts and some salt makes a great pesto. If you want to call it a paste or sauce, that works too.

I have been harvesting a lot of sugar peas and asparagus (we are now in what should be the final week of our asparagus bed harvest, I sometimes push that time frame :).  Here I decided to roast some of each - I did not have a lot that day so I just used the same pan.  I warm a little oil in a pot.  Add chopped veggie, and swirl to coat.  Lay out on a tray, add salt and pepper and roast . I use my toaster oven a lot, saving the big oven for bigger meal prep.  I may add herbs, I did not this time.  About 15 minutes at 425 usually works for a nice roast and slight char.


Back to my sweet pepper sauce.  Here is the process I follow.

Seed and chop the peppers, roast, cook down a bit more, then puree in my bullet blender.  I used the "left over" sauce in the blender swirled with some stock in a pasta dish later.  Froze the sauce.  All those peppers cooked down into two 4 oz jars :)  Sounds like a lot of work, but I consider it worth it to have garden deliciousness later! 

With the peppers and all of these continuing to produce, I still have fresh whenever I want to go out and pick.

I hope these give you some ideas for preserving your own bounty and using creatively.

Have a best day,

Be patient, be safe and be kind to yourself and each other.


-- Catherine, The Herb Lady If you enjoyed this post, please share and subscribe below by entering your email, to get all my posts!

Enter your email address:

Delivered by FeedBurner

Disclaimer: Clicking on links on this blog may earn me a small commission if you purchase something. Your price does not change.

Tuesday, February 16, 2021

March Planting Tips

Dear Folks,

This Wednesday, February 17th is Random Acts of Kindness Day.

We just celebrated Valentine's Day with our loves.  Look around you, not only February 17th, but always, to see it someone or something could use a little kindness.  The stress, boredom and confusion brought to our lives by the Pandemic as we try to navigate to a better place, can make the challenges of others less visible.

My Dwarf Black Mulberry is putting out leaves, has been for a couple of weeks now.  The unusual warm January and February beginning has many of the plants growing sooner.

Looking forward on weather we are going to have a warmer spring, sooner.  I would not be surprised if we beat one of our first 100 degree day statistics.

About every 4 or so days for the last 2-3 weeks I have been harvesting asparagus, alpine strawberries and sugar peas.  Wonderful time of the year in the garden.

I cook the tops of the asparagus up for Deane who just loves them, wound up freezing a couple of jars for later.  The bottoms which are just a little tougher, I just eat raw as a snack!  If you have never eaten a raw asparagus fresh from the garden you do not know what you are missing!

MARCH PLANTING:
   
Artichoke, Jerusalem
Artichoke, Globe
Basil, Plant or seed
Bay, Greek aka Sweet
Bean, Lima
Beans, Snap
Beans, Soy (March 15th)
Bee Balm
Beets
Cantaloupe
Carrots
Catnip, Plant or Seed
Chives, Garlic, Plant or seed
Chives, Onion, Plant or seed
Corn        
Cucumbers
Eggplant
English Daisy
Epazote, Plant or seed
Hollyhock
Jicama
Lavender
Lemon Grass
Lemon Balm
Lemon Verbena
Marigolds including ,Citrus Scented (Tagetes Nelsonii), Tangerine Scented (Tagetes Lemonii)
Marjoram
Melons, Winter
Melons, Musk
Mints
Myrtle   
Okra
Onions, Green
Oregano, Mexican
Oregano, Greek
Peppers
Perilla, Plant or Seed
Portulaca
Pumpkin
Radishes
Rosemary
Safflower
Sage
Savory
Scented Geraniums
Squash, Winter
Stevia
Summer Squash
Sunflower
Sweet Alyssum
Tarragon, Mexican
Tarragon, French
Thyme
Tomatillo
Tomatoes
Watermelon

EDIBLE FLOWERS TO PLANT:

Bee Balm
English Daisy
Hollyhock
Marigolds including ,Citrus Scented (Tagetes Nelsonii), Tangerine Scented (Tagetes Lemonii)
Portulaca
Safflower
Scented Geraniums
Sunflower
Sweet Alyssum


GARDEN TIPS for March
    If you are just now thinking about planting, see Flower Mulching technique. And run, do not walk, to purchase a water meter from your favorite garden nursery.  The gallop into high heat can occur this month with such rapidity that we can go 70 to 95 in 30 days. (In a rare occurrence, we hit a 100 one year on March 29th.)
    Get a jump on spring with weed cleanup.  Some pests breed on the winter weeds and can launch an incredible attack (a type of gnat can assume locus swarm proportions), which may cover everything light or white in color, plants, flowers, buildings, even clothes drying on the line.
    Perennial herbs will be starting to flower by end of March / beginning of April.  If you use thyme, marjoram, oregano or any of the trailing herbs as ground covers, enjoy the blooms, then give them a hair cut.  Remember the flowers are edible!
    HAIL!!!  Is a possibility in spring as the soil warms, and weather highs and lows bring alternating warm and cool air mass.  If you add winds to the mix HAIL is a strong possibility.  Keep your frost protection covers/poor man’s cloches handy.
    The pest bugs like our mild weather too with aphids a particular pest.  SAFE Soap Spray for aphids: 1 tsp each vegetable oil and Dawn to 1 quart of water.  Spray every 5 days at sunset at least 3 times.  DO NOT MISS a follow up spraying - spraying once will not take care of the aphid problem.  The 1st gets the active adults, the 2nd one picks up the just hatched and missed ones and 3rd one gets the stragglers.


FLOWER MULCHING TECHNIQUE
    Some years ago I tripped across this idea when I wanted to grow a lot of basil fast, and I was planting late into the heat (late spring, early summer).
    First, what is going on that a special technique needs to be used?
    As the spring and summer day time temperatures climb into the high 90s and 100s, the surface of ANYTHING heats up and stays hot -- remember burning your feet on the pool surrounds?  By July and August the surface afternoon mean temperature of soil, the sides of pots, asphalt and concrete can be as high as 180 degrees F!  That includes the top 3-4 inches of soil.  Without a protective canopy or surround the soil heats up to root killing levels.
    So back to the basil.  It was June and as I say I wanted a lot of basil fast, and so I planted about 8 young starter basil plants out of 3-4 inch containers, planting them about 6 inches apart.  As I watched them over the course of a couple of weeks, the outer plants one by one died off.  But the 1 or 2 plants in the center not only lasted, they thrived.
    So what was going on?  The outer plantings shaded the sides of the center plants, but still allowed the very necessary direct sunlight from above to feed (photosynthesis) the center plants.  The outer plants leaves, while canopying the soil around the center plants also keep the soil surface cooler and moister until the center plants grew big enough to be their own canopies.
    My "Flower Mulching" technique was born.  Not wanting to sacrifice primary edibles, I turned to seasonal edible flowers to provide the initial protection.
    THE TECHNIQUE:  Imagine a 12 inch diameter circle.  Place your primary herb, vegetable or fruit plant in the middle and using 3-5 flowers from a six pack or 3-5 4 inch flowers plant very close to the primary plant staying within the imaginary 12 inches.  You can also plant the flowers first and then the primary plant, or you can use existing plantings to perform the same service.  Many of the flowers will survive to be used in salads etc. (which is why I choose seasonal edible flowers).  If the flower plants were not grown organically or without chemicals, wait 90 days before harvesting the flowers for food use.

Have a best day in the garden.

Be patient, be kind to yourself and one another,

-- Catherine, The Herb Lady If you enjoyed this post, please share and subscribe below by entering your email, to get all my posts!

Enter your email address:

Delivered by FeedBurner

Disclaimer: Clicking on links on this blog may earn me a small commission if you purchase something. Your price does not change.

Sunday, January 31, 2021

What do you do with a 'mess' (bunch) of fresh herbs and greens?

Dear Folks,

For all of my frustration with the under-performing gardens because of the up/down weather, I have been blessed with a lot of herbs and greens!  So what to do. Pictured, I gathered, rinse and chopped a big pile of kale, lettuces, celery, parsley, and chervil.  I froze half of this for later use and used half to make one of my 'Herb Soups'.


This is a picture of one I made last year.  Topped with Parmesan cheese crisps. 

My original recipe for Herb Soup in 2013 is here.  I have made many versions over the years because it is just so good.  You can imbellish/garnish with whatver you like.

I encourage you to use boiling water for your first try rather than a broth as the herbs etc. give it an amazing flavor.

Well, what else can one do with a whole 'mess' of greens and herbs?

In the past I have made pesto, green goddess dressing (unlike many recipes, I start with a base of a vinaigrette of oil and lemon, lime juice or vinegar) add any greens and herbs I have and whirl in the blender.  A wonderful dressing for salad or pasta.

I decided to do a little research and found a wonderful article on Epicurious website for 10 Green Sauces.

I am sure many of you have heard of some of them in addition to pesto, there is chimichurii, and Salsa Verde.  BTW if you make Salsa Verde I have used my fresh Epazote as part of the mix. Some of the recipes for Salsa Verde from Mexico stuff a fish with a mix of herbs, including Epazote.  Not quite a green "sauce" but same flavor enhancer. 

I hope you use your greens and herbs for some of these amazing sauces.

Have a best day,

Stay safe, be patient and be kind to yourself and one another,

My Original Herb Soup Recipe is from my book "101+ Recipes From The Herb Lady" where I highlight one or more herbs to create recipes focusing on them.

-- Catherine, The Herb Lady

If you enjoyed this post, please share and subscribe below by entering your email, to get all my posts!

Enter your email address:

Delivered by FeedBurner

Disclaimer: Clicking on links on this blog may earn me a small commission if you purchase something. Your price does not change.

Monday, January 25, 2021

My Sweet Peppers in the Garden in January

Dear Folks,

For all of the crazy up/down weather, my sweet peppers are loving the cooler temps and ramping up production. So, I decided to use them to make some meals.  I did not take a picture of the potato/egg/pepper salad I made with the Orange Hungarian Paradicsom Sweet Pepper.  But is was great.  This pepper is a thick-walled lobbed variety and very sweet.  The plant is going on 5+ years old

The Purple Beauty (really black) Sweet pepper is truly a remarkable color.  I was so excited to harvest them, I forgot they are actually in their "green" stage and would eventually be more purple.  No matter, they were going into one of my "creamy soups."  The plant is still putting out flowers.

I sowed the seeds for the Purple Beauty, mid-December-2019 and transplanted to its pot home mid February 2020.

Peppers struggle to produce well in the heat of our summer, but overall grow well.  Then when the temps start to fall back down in fall they ramp up production again.

My "creamy" soups are a main vegetable, in this case the purple peppers, potato (for the 'creamy'), onion, avocado oil, salt, pepper and an herb or herbs. I choose rosemary for this one.  I frequently stir in cheese to melt right after pureeing the soup.  This time I decided not to use cheese.

I created a long collage of the photo steps.  I always garnish the soup with things from the garden.  Sometimes flowers or chopped sugar pea pods.  I used a mix of greens, herbs and sprouts (I was gifted with seed sprout tray-which I love), sliced radishes and I had some leftover breakfast sausage, and finally I always squeeze some of our limequat juice over the soup just before service. It gives the soup and extra zip.

Basic "Creamy" Potato Vegetable Soup
This makes about 3+ cups of finished soup (can easily be doubled)
The "Creamy" is from the potato - cheese optional, so this can be vegetarian, vegan, and dairy-allergic friendly

These soups reheat beautifully the next day - if there are leftovers.  Warm on the stove or micowave for 90 seconds. I have also frozen leftover.

THE KEY to the flavor and quality of this soup is:

1)  roasting the focus vegetable(s)
2)  using potato, don't rinse you need the starch and I strongly recommend leaving the peels on.

Ingredients:
2 tablespoons of avocado, olive or oil or fat of of choice
2 - 4 tablespoons of diced onion, leek, garlic, chive etc of your choice
1 medium size potato (small chunks equal to about 1 1/2 cups) - I do NOT peel my potatoes.
2 cups of vegetable of choice, diced
2 cups of water or broth
salt and cracked black pepper
limequat, lime or lemon
Optional:  complimentary herbs/spices to the vegetable
Optional;:  4 ounces of shredded or grated cheese of choice which compliments the vegetables and herbs: White cheddar, parmesan etc.  You could float a small cube of Brie on each bowl of soup as a garnish

Garnish of choice:  minced vegetables, slivered greens, capers or minced olives, edible flowers - pretty much any topping you think goes with the vegetable you chose.

An immersion blender works great for this.

Directions:

Heat oven to 450 and prepare a pan with aluminum foil for roasting the focus vegetable.

The timing of preparation is to take advantage of cooking two different components at the same time, so the whole preparation takes about 20-30 minutes.

Prepare the vegetable.
Wash potato, remove any blemishes, do not peel, cut into chunks and add to water, set aside.
Prepare onion (garlic etc.) of choice
Prepare or have ready the complimentary herb or spice mix you are using
Have your choice of garnishes ready and set aside
Shred cheese if using, set aside

In the pot you will cook the soup in, warm 1 tablespoon of fat/oil of choice and toss the focus vegetable with the oil - in the pot.  Spread the vegetable out on the prepared pan and season with salt and pepper. Do not wipe out the pot.

Add the last tablespoon of fat to the pot, and cook the onion of choice on low.  Put the pan of vegetables into the oven and set the time for 5 minutes.

Stir the onion and do not let it burn.

When the timer goes off, add the potatoes and water (or broth) to the pot, bring to a boil, covered.

Stir the pan of vegetables and reset the timer for 5 minutes.

Lower the pot to a gentle low boil.

When the timer goes off, add the roasted vegetable to the pot, add any herbs or spices you are going to use, cover and boil on low for 7 minutes or until the potato is tender.

Remove from heat and using an immersion blender, puree the soup - I like to leave some chunks in for texture.

At this point if you are adding cheese, do so and stir to fully melt the cheese.  Ladle into bowls, top with garnish of choice, squeeze some lime or lemon juice over and serve and enjoy!

I hope you try this type of soup with your favorite vegetable(s) from the garden.

Have a best day,

Be safe, be kind, be gentle with yourself and each other. 

You can find my gardening calendars and books on my website.

-- Catherine, The Herb Lady

If you enjoyed this post, please share and subscribe below by entering your email, to get all my posts!

Enter your email address:

Delivered by FeedBurner

Disclaimer: Clicking on links on this blog may earn me a small commission if you purchase something. Your price does not change.