Dear Folks,
Did you know some backyard gardeners with a passion and extra bounty went on to become the vendors you love at your farmers market?
There is a facebook page - Farmers Market Coalition - you may wish to check out.
National Farmers Market Week was first Proclaimed in 1999 by the USDA Secretary of Agriculture, "in honor of the important role that farmers markets play in local economies."
If you are not sure what farmers market is near you, check out these sources:
USDA Farmers Market Directory - search by zipcode
(NOTE: individual markets are responsible for submitting their data to this free directory.)
Arizona Community Farmers Market is a group of markets in the Valley
LocalFirstArizona
Or you can do a google search of your area and "farmers markets".
Do you have some extra bounty, but not enough to be a listed vendor at your farmers market? The Community Exchange group manages tables at many of the markets here in the valley. They will sell your extra bounty for you, take a small percentage to cover their costs and give you a check once a month for your sales. NOTE: Sales are what they actually sell, not what you give them. Sometimes thing simply do not sell.
Use the link below to go to their Facebook page and check them out. You can contact them through the page or catch up with them at one of the markets.
Community Exchange Group
Reminder: I will be traveling most of the next several weeks. If you contact me I will get back to you as soon as I can when I am off traveling.
The link below goes to my recent post on what to sow in August, and summer "greens" you should be growing for your salads etc.
August Planting Tips Post
You can find my gardening calendars and books for sale here on the sidebar. PDFs of some of these let you have the information right at your finger tips with any device which reads Adobe.
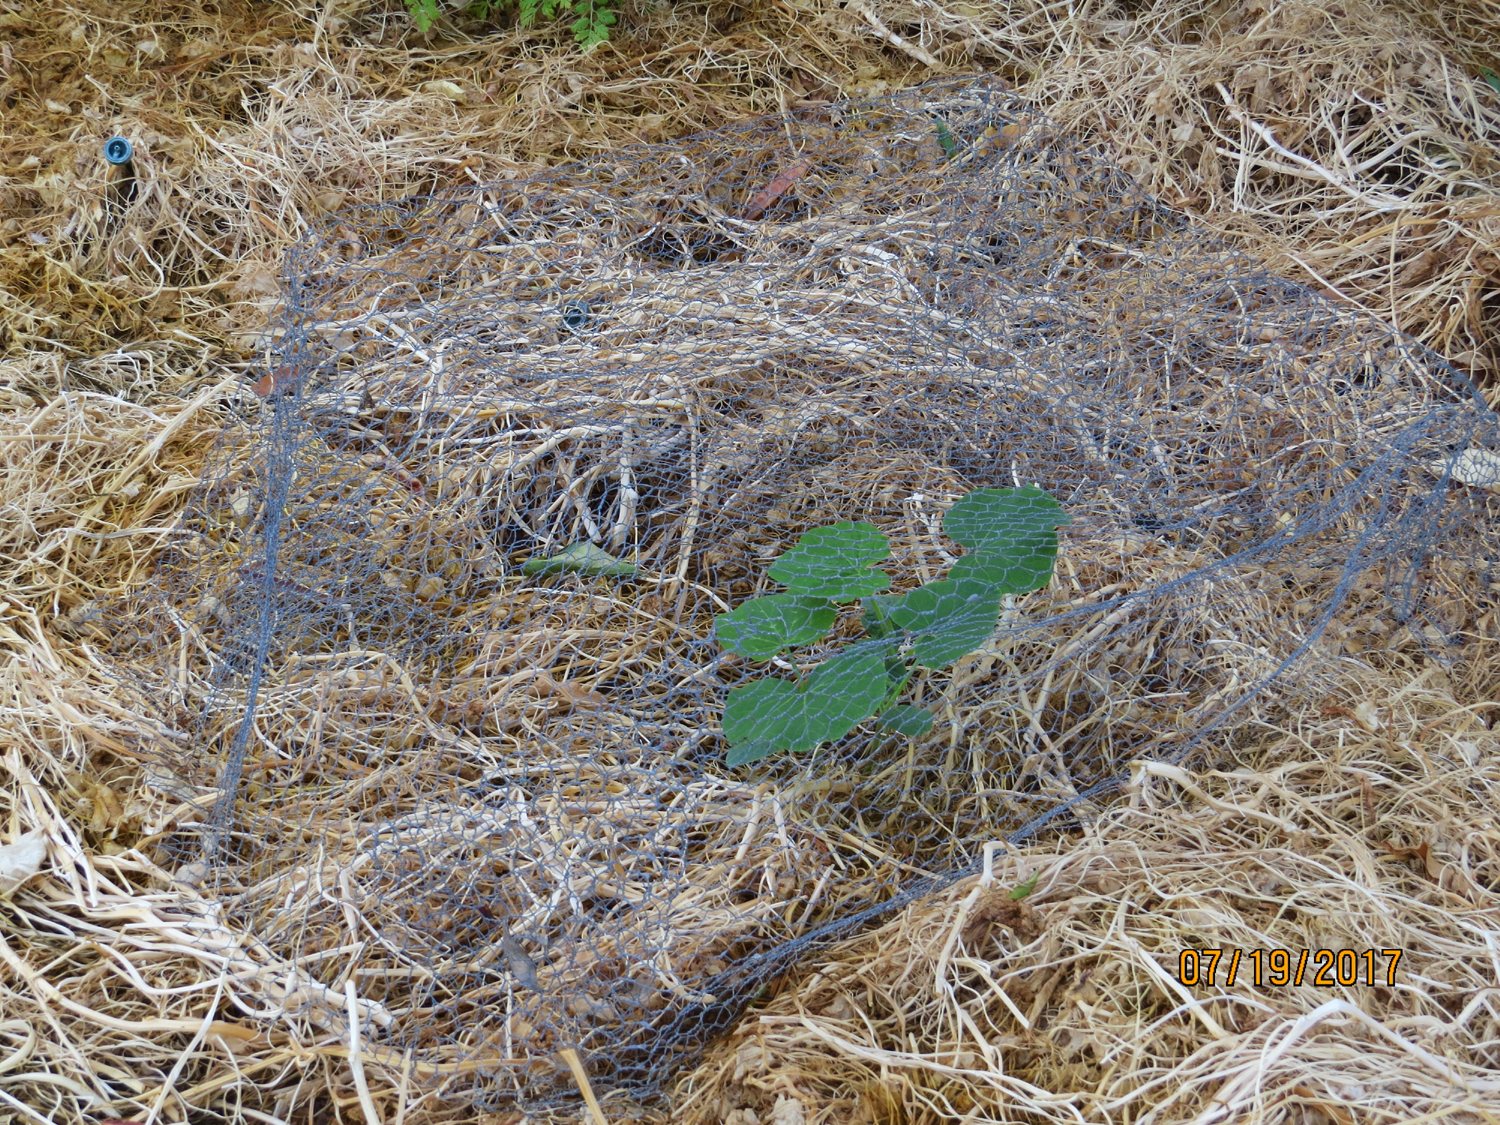
I will finish this post with a picture of my "Upper Ground Sweet Potato Pumpkin" seedlings protected by one of my chicken wire hats. If you love the visitors to gardens as much as we do, but don't want them eating your tender plants, these simple covers allow the air and bees in but not birds etc.
Have a best day in the garden and kitchen!
-- Catherine, The Herb Lady
If you enjoyed this post, subscribe below by entering your email, to get all my posts!
Disclaimer: Clicking on links on this blog may earn me a small commission if you purchase something. Your price does not change.
Friday, August 04, 2017
Friday, July 14, 2017
August Planting Tips, Summer Greens and Around the Garden.
Dear Folks,
I'm sure that the idea of planting in August -- actually sowing seeds -- seems counter intuitive given the heat and humidity, but if you want fall foods like winter squash you need to understand the way the desert areas grow.
Seeds like either warm feet or cool feet and they germinate based on this concept. Basil will not, for instance, germinate in cool or cooling soil. We take control of production by starting seeds off in flats in the house or greenhouses where we control the environment. But given natural preferences by the various edible plants, they germinate when the conditions are right for them, meaning soil temperature and moisture content of the soil.
Pictured are greens for the salads I made, fresh from the garden the other day: Starting at the top clock wise is sorrell, roselle, Egyptian spinach, celery, two types of sweet potato leaves and some sweet basil in the center. These greens are great and healthy substitutes for lettuce as they all love the heat, except celery. In the case of the celery I have a pot in an afternoon shaded area in which I sowed a bunch of lettuces and celery seeds this base winter and I treat them as a kind of Micro-Green bed, cutting as needed and the celery has hung in there. Sweet potato leaves, on the other hand, LOVE the heat and will provide you with a lot of greens during the summer, then give you the tubers in October/November.
Sow seeds in August in beds where you can keep them slightly moist. Some will germinate mid-August, some may take a month, but they will give you a jump start on fall gardening. Cover seeded areas with a fine mulch (crushed leaves) about 1 inch should be good, then sprinkle every evening. When they start showing leaves, water deeper and then begin backing off the watering frequency to encourage deep roots.
AUGUST PLANTING:
Large selection of seed-only plantings. -- Anise; Beans, Snap (bush and pole); Bok Choy; Broccoli; Brussels Sprouts; Cabbage; Caraway; Carrots; Cauliflower; Chervil; Cilantro; Corn; Cucumbers; Dill; Fennel; Greens, all; Kale; Kohlrabi; Lettuce; Luffa Gourds; Mustard; Onions, Green; Parsley; Pumpkin; Purslane; Squash, Winter
EDIBLE FLOWERS TO PLANT: Marigolds, including Tangerine Scented (Tagetes Lemonii), Citrus Scented (Tagetes Nelsonii); Nasturtium; Portulaca (Moss Rose); Stock; Sweet Alyssum
PLANTING CORN: One variety per season, plant in blocks (not rows) 6 inches apart. Can be planted with beans and squash (Three Sisters).
SUNBURN damage: Like frost damage - do not prune until danger of sunburn is over - the damaged plant protects the lower growth.
I used the greens to make salad, one to enjoy right away and the other to save for later, using the mason jar method. (The usual way to do this jar salad it so put the dressing in the bottom with chunky ingredients in the bottom, then layering the lighter stuff on top, so it does not get soggy.)
We have been enjoying our bananas! Everyone we have shared this wonderful variety with (Blue Java aka Ice Cream Banana) has declared them the best. They have a creamy some say vanilla flavor which is just amazing. Don't be put off by the color of the skin, they have a different color hue than the store bought cavendish, and the birds sometimes get to them a bit before we harvest the bunch.
This last bunch (thankful we have one more to harvest) had several "doubles". We ate or shared more than half of the bunch shown here before I remembered to take a picture!
We have been delighted that a covy of quail has been showing up. A lot of "teenagers" in this group. Normally we only see a pair with babies. This has been a real treat to see them frequenting the yard. In the picture are a pair and their 2 babies. I have to take the pictures through the window to keep from spooking them. They are getting a bit more used to the idea that we put out seed regularly.
A NOTE: I will be traveling quite a bit in August, so I won't be posting as frequently but will get the September planing tips posted mid-month.
One last neat cooking idea. I am waiting to have more squash blossoms to make something like this, either pancake or I may try my hand at rustic tortillas.
I purchased these squash blossom tortillas at the farmers market a couple of years ago, put them in the freezer and forgot about them!!! (That's me!) So when I found them I decided to do our Sunday eggs on top of them with a slice of cheese between the egg and tortilla. Yummy! Squash blossoms are a nice treat, crispy and refreshing eaten raw, or filled with something and cooked. Many plants put out an abundance of male blossoms initially to attract the pollinators, so you should have spare ones to try using them like this. Remove the stamen before using.
You can purchase my gardening calendars and books on the sidebar here on the blog.
Enjoy your garden and its rewards.
-- Catherine, The Herb Lady
If you enjoyed this post, subscribe below by entering your email, to get all my posts!
Disclaimer: Clicking on links on this blog may earn me a small commission if you purchase something. Your price does not change.
Tuesday, July 04, 2017
Where Do You Store Your Root Vegetables in the Desert Garden?
Dear Folks,
Where "Do You" store root vegetables in the desert garden, when conventional spring houses and root cellars are not as easily doable?
Answer: In The Ground!
I partially dug up one of my sweet potato beds I did not harvest from last fall. Pictured are some of my eggplants too.
So what is the deal with leaving root vegetables in the ground until you need them? They stay fresh, may get bigger, store better than in your crisper, and you don't have to figure out what to do with pounds and pounds of something all at once. If you are wondering about taste -- overall if you choose heirloom quality root vegetables to grow, they maintain their flavor over a long in-ground season.
Sunday I decided on using some of the sweet potato for breakfast and the combination of the sweet potato and eggplant with dinner.
Sunday is the day we have eggs and bacon as our special treat. While we enjoy soft fried egg on toast I frequently come up with something special to put the egg on. Sometimes it is oatmeal with herbs and cheese in it. Last month I cooked up diced potatoes, topped with cheese and place the egg over it.

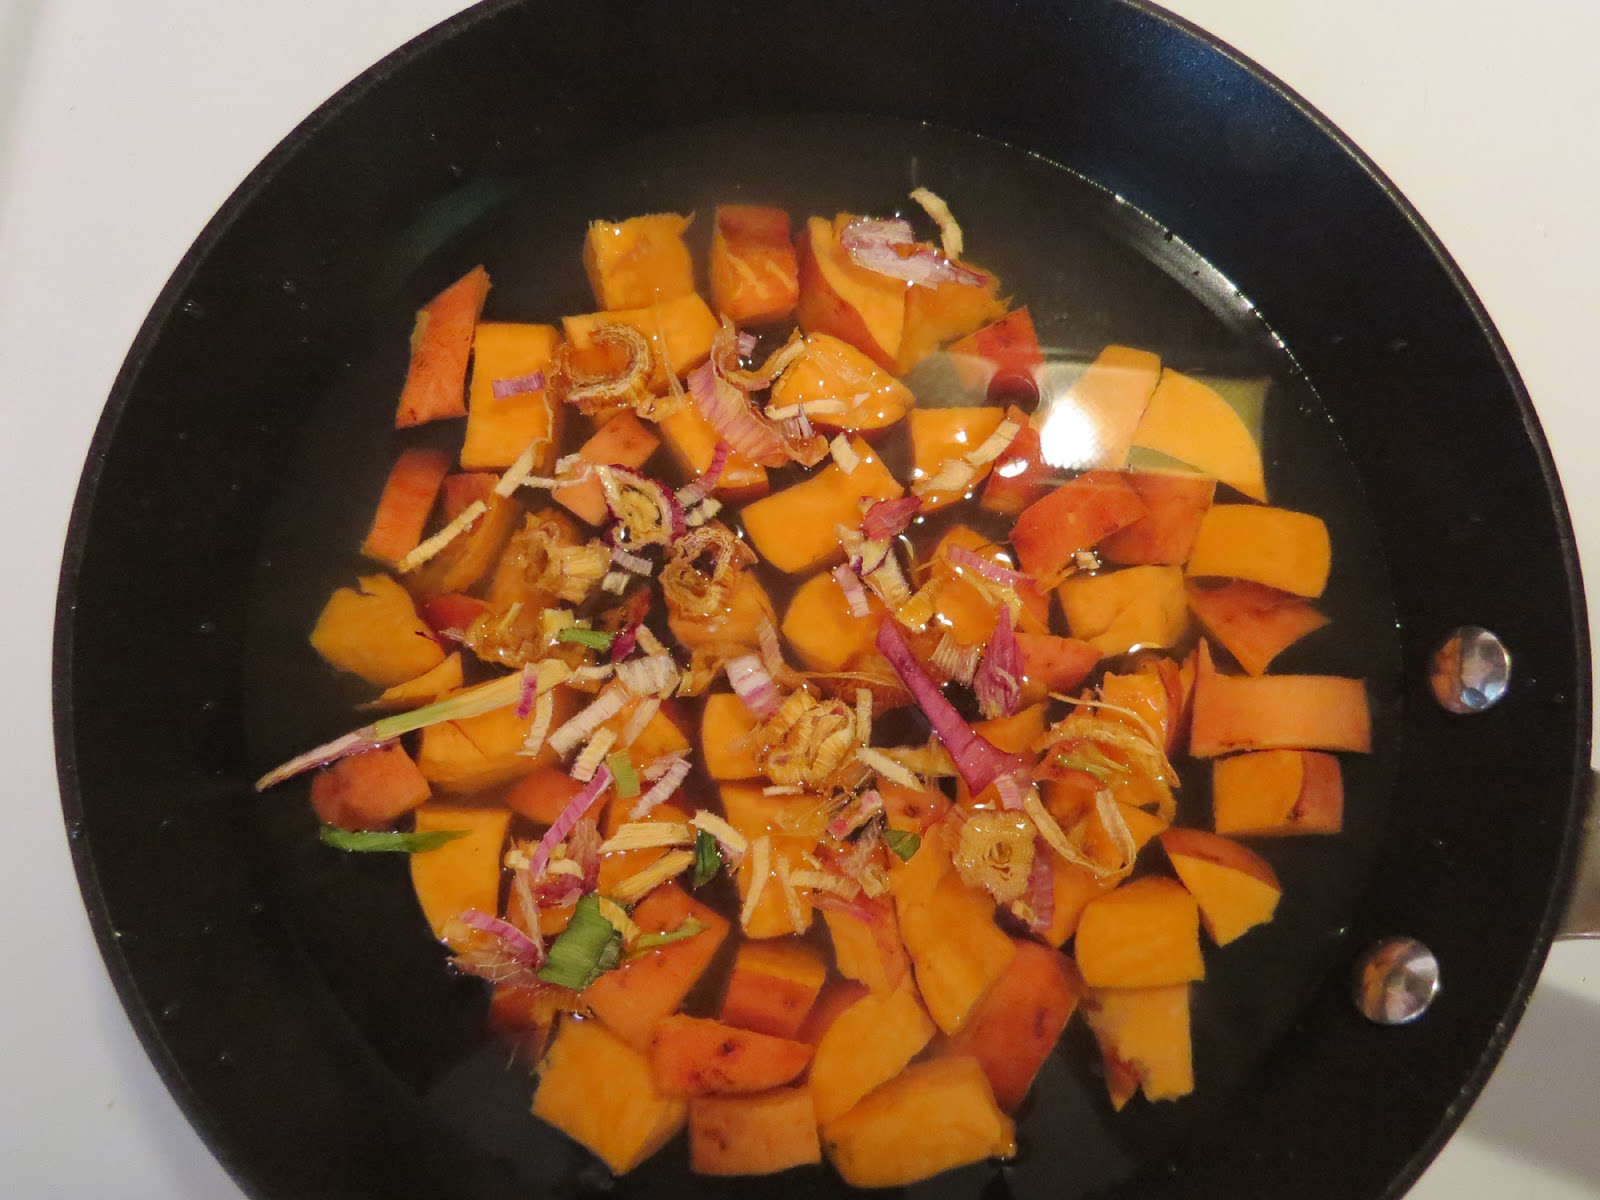
I diced up the sweet potato, added some of my sun-dried onion to soften and cook with it, topped it with Parmesan Cheese, and the egg.
I cooked up 4 strips of bacon - reserving two for dinner and we enjoyed a filling and tasty breakfast. I buy no-nitrate added bacon and usually microwave it if I don't want some bacon fat, to remove the extra fat.
For Dinner, I sauteed the diced eggplant and sweet potato along with more of my dried onion, a half a teaspoon on turmeric I'm trying to add more turmeric to our meals for its anti-inflammatory and antioxidant helpers (plus great taste)
I topped the veggies with the reserved crumbled bacon and served with chicken.
While conventional spring houses and root cellars are difficult in the desert garden, have you tried one of the alternative methods like digging deep holes with containers for storage?
Pioneer History Museum has a reconstruction of a root cellar and spring house. Pretty cool the way they demonstrate how they were made/used back in the 1800s. Pioneer is a great historic recreation museum. If you have never been, check it out.
. . .
A Note Folks: I will be traveling quite a bit in August, so I will only have a couple of posts to share (including monthly planting guide), but will be back to posting at least weekly in September.
NOW through August 1st is the time to plant your Three Sisters seeds and plants like pumpkins.
Have a wonderful week!
You can purchase my planting calendars and books through links on the side bar here on the blog.
Please share this post with friends and family. Thank you!
-- Catherine, The Herb Lady
If you enjoyed this post, subscribe below by entering your email, to get all my posts!
Disclaimer: Clicking on links on this blog may earn me a small commission if you purchase something. Your price does not change.
Where "Do You" store root vegetables in the desert garden, when conventional spring houses and root cellars are not as easily doable?
Answer: In The Ground!
I partially dug up one of my sweet potato beds I did not harvest from last fall. Pictured are some of my eggplants too.
So what is the deal with leaving root vegetables in the ground until you need them? They stay fresh, may get bigger, store better than in your crisper, and you don't have to figure out what to do with pounds and pounds of something all at once. If you are wondering about taste -- overall if you choose heirloom quality root vegetables to grow, they maintain their flavor over a long in-ground season.
Sunday I decided on using some of the sweet potato for breakfast and the combination of the sweet potato and eggplant with dinner.
Sunday is the day we have eggs and bacon as our special treat. While we enjoy soft fried egg on toast I frequently come up with something special to put the egg on. Sometimes it is oatmeal with herbs and cheese in it. Last month I cooked up diced potatoes, topped with cheese and place the egg over it.

I diced up the sweet potato, added some of my sun-dried onion to soften and cook with it, topped it with Parmesan Cheese, and the egg.
![]() |
| One with egg, other waiting for egg |
For Dinner, I sauteed the diced eggplant and sweet potato along with more of my dried onion, a half a teaspoon on turmeric I'm trying to add more turmeric to our meals for its anti-inflammatory and antioxidant helpers (plus great taste)I topped the veggies with the reserved crumbled bacon and served with chicken.
While conventional spring houses and root cellars are difficult in the desert garden, have you tried one of the alternative methods like digging deep holes with containers for storage?
Pioneer History Museum has a reconstruction of a root cellar and spring house. Pretty cool the way they demonstrate how they were made/used back in the 1800s. Pioneer is a great historic recreation museum. If you have never been, check it out.
. . .
A Note Folks: I will be traveling quite a bit in August, so I will only have a couple of posts to share (including monthly planting guide), but will be back to posting at least weekly in September.
NOW through August 1st is the time to plant your Three Sisters seeds and plants like pumpkins.
Have a wonderful week!
You can purchase my planting calendars and books through links on the side bar here on the blog.
Please share this post with friends and family. Thank you!
-- Catherine, The Herb Lady
If you enjoyed this post, subscribe below by entering your email, to get all my posts!
Disclaimer: Clicking on links on this blog may earn me a small commission if you purchase something. Your price does not change.
Tuesday, June 20, 2017
Why small pots/containers kill in the desert summer heat.
Dear Folks,
Why am I posting a video of an annual valley tradition of frying an egg on the road? Because the thermometer shows the temperature of 162.5. [Picture is a still from the video.]
Regularly and constantly I try to help folks understand just how HOT pots and containers can get in our summer afternoon heat. This applies to the top 3 inches of exposed soil.
I was wondering when the annual fried egg picture / video would show up this year and went searching and found one from last year and "Bingo" I thought - this is perfect for showing just how REALLY HOT surfaces are in our summer afternoons.
WHY Small pots kill plants.
This is THE TEMPERATURE range (actually up to 180) for any exposed surface in the summer afternoon here. Sidewalks, asphalt, sides of containers, block walls etc.
https://youtu.be/0MPNgCo9auk
I hope this helps you understand why your cute pot or very small and shallow container garden is going to cook your food plants before you get them harvested.
You put a plant in a 1 gallon black pot in the middle of your garden, and you quickly learn just how making adobe bricks works.
When choosing a pot make sure it is at least 20" across. When building raised beds, make sure the depth is at least 18 inches and a minimum of 2 feet wide x 2 feet across.
And ALWAYS plant at least 6 inches in from the sides to allow the soil to insulate the roots.
Use mulch even in containers, but keep 2 inches away from the base of the plants to keep snails, slugs and sow bugs from the tender plants.
You can purchase my books and planting calendars through the sidebar here on the blog.
Like my facebook page.
-- Catherine, The Herb Lady
If you enjoyed this post, subscribe below by entering your email, to get all my posts!
Disclaimer: Clicking on links on this blog may earn me a small commission if you purchase something. Your price does not change.
Sunday, June 18, 2017
If You MUST Transplant in Hot Temperatures, Use a Wicking Bottle!!!
Dear Folks,
Just a short post here to illustrate using a wicking bottle (poor man's version of those pretty but useless glass blue bulbs) to stabilize and get good growth on a transplant.
The point is to water the gardens regularly BUT to also add several of these bottles of water for the first couple of weeks to ensure the plant's roots start to settle in. Then gradually expand out the days between adding a bottle. Choose a day when the garden is watered to add the next bottle as you increase the number of days between adding the next bottle.
What I did not show in the video is I added more mulch around the plant and placed the "chicken wire hat" (see other videos on my channel on using chicken wire hats) around the plant to protect.
If you are wondering how the papaya did, unfortunately I took the "hat" off to soon and later on a critter broke the main trunk and the plant never recovered.
My Youtube Wicking Bottle Video
If you are not familiar with how this works, the wet soil and full bottle of water creates a vacuum. When the soil begins to dry it "wicks" the moisture out of the bottle to re-wet the soil.
The plastic bottle may actually collapse if the vacuum is really strong.
You can use any bottle, wine bottles make good options and can be re-used. The plastic bottles can also be re-used if the vacuum does not crack the plastic.
Sometimes you can always plan ahead for when you get a much coveted plant, so give the wicking bottles a try to give your treasured plant a better opportunity for success.
My books and gardening calendars (48 herbs and also the month-by-month calendar) are available for purchase in the sidebar.
Have great day, keep cool and enjoy your garden bounty!
One more helpful tool for your bees and butterflies and other pollinators in this hot weather. A dish filled with beads or pebbles to let them get a drink without drowning. They may leave your pool alone.
Place the dish in the shade to keep from heating or evaporating too fast. There even some better ideas pictured on the internet. Pet watering dishes with bottles to auto-refill (like the wicking bottle principle) with the base filled with pebbles. Cool creativity to help our pollinators!
-- Catherine, The Herb Lady
If you enjoyed this post, subscribe below by entering your email, to get all my posts! And, please share! Thank you!
Disclaimer: Clicking on links on this blog may earn me a small commission if you purchase something. Your price does not change.
Just a short post here to illustrate using a wicking bottle (poor man's version of those pretty but useless glass blue bulbs) to stabilize and get good growth on a transplant.
The point is to water the gardens regularly BUT to also add several of these bottles of water for the first couple of weeks to ensure the plant's roots start to settle in. Then gradually expand out the days between adding a bottle. Choose a day when the garden is watered to add the next bottle as you increase the number of days between adding the next bottle.
What I did not show in the video is I added more mulch around the plant and placed the "chicken wire hat" (see other videos on my channel on using chicken wire hats) around the plant to protect.
If you are wondering how the papaya did, unfortunately I took the "hat" off to soon and later on a critter broke the main trunk and the plant never recovered.
My Youtube Wicking Bottle Video
If you are not familiar with how this works, the wet soil and full bottle of water creates a vacuum. When the soil begins to dry it "wicks" the moisture out of the bottle to re-wet the soil.
The plastic bottle may actually collapse if the vacuum is really strong.
You can use any bottle, wine bottles make good options and can be re-used. The plastic bottles can also be re-used if the vacuum does not crack the plastic.
Sometimes you can always plan ahead for when you get a much coveted plant, so give the wicking bottles a try to give your treasured plant a better opportunity for success.
My books and gardening calendars (48 herbs and also the month-by-month calendar) are available for purchase in the sidebar.
Have great day, keep cool and enjoy your garden bounty!
One more helpful tool for your bees and butterflies and other pollinators in this hot weather. A dish filled with beads or pebbles to let them get a drink without drowning. They may leave your pool alone.
Place the dish in the shade to keep from heating or evaporating too fast. There even some better ideas pictured on the internet. Pet watering dishes with bottles to auto-refill (like the wicking bottle principle) with the base filled with pebbles. Cool creativity to help our pollinators!-- Catherine, The Herb Lady
If you enjoyed this post, subscribe below by entering your email, to get all my posts! And, please share! Thank you!
Disclaimer: Clicking on links on this blog may earn me a small commission if you purchase something. Your price does not change.
Friday, June 16, 2017
July Planting Tips and Looking towards Fall. Fun Roots to Grow!
Dear Folks,
The Pre-Monsoonal Heat Blast is here and I'm talking planting, actually sowing seeds in July!
MOST of the planting in July and August is by seed for fall production/harvest. Consider this: If you want pumpkins for Halloween, you have to count back 90-120 days for seeding in. If you do not have a bed prepared or in mind for planting now, start preparing the soil ASAP if you want an early fall growing start.
JULY PLANTING:
Sunflower, Roselle/Jamaica Sorrel (Hibiscus sabdariffa), and amaranth seeds anytime in July.
If you have not planted your sweet potato slips yet get them in the ground no later than first week in July for best harvest potential in the fall. Remember you can eat the leaves during the summer for a lettuce substitute in salads, sandwiches etc. (A recent study reported the leaves may have even more good things for you than the tubers!)
WEEK OF JULY 16TH Seeds Only Planting: Anise; Cantaloupe; Caraway; Chervil; Cilantro; Corn; Dill; Fennel; Luffa Gourds; Musk Melons; Parsley; Peppers; Pumpkins; Squash, Winter. See My June Planting Tips for June Sowing and about gardening density.
Sow seeds under existing plants where possible to help keep the seeded area cooler, moister and out of site of the birds.
These cool soil loving plants will germinate as the soil begins to cool later on. Sowing now, in the ground, gives them a jump start and by-passes transplant issues later on.
[Pictured is my chervil seedlings,
seed was sown August 1st and I spotted these Sept 25th. I planted
inside a cardboard tube collar with mulch around the outside. This was
two years ago. Last year the plants re-seeded and the seedlings were up
by the end of September, again reacting to the cooling soil.]IF YOU are transplanting this time of year use leaf-type mulch to keep the soil surface cool around "but not touching" the transplant -- keep about 2 inches away from base of plants to keep the pest bugs away from the tender stems. The mulch should be at least 2 inches deep.
You should harden off the plant(s) by exposing to direct sun for an hour the first day (then back into shade, but NOT inside) and increase by an hour each day until it is in the sun for about 4 hours, then transplant.
Ginger, Turmeric and Horseradish - if you want to try growing these, get some nice healthy roots, even better if they have some buds on them. Find a mostly shady, healthy, well drarining spot in your garden and plant the ginger or turmeric about 2 inches down, the horseradish as deep as the root covered by 1-2 inches of soil. My patch pictured is in the shade of a large citrus tree (north side) and gets a bit of sun first and last thing of the day. These have re-sprouted from last year's planting.
WATERING: Higher humidity can reduce moisture loss to plants, reducing watering frequency, but check with water meter regularly. You can actually over-water in the height of our Monsoon season, so make sure you use the water meter.
Chlororsis can occur (yellowing of leaves leaving the veins bright green) caused by too much water causing the soil iron to bind with other minerals making it unavailable to the plants. Add ironite or green sand and the leaves will return to normal in about 2 weeks.
SUNBURN damage: Like frost damage - DO NOT prune until danger of sunburn is over - the damaged plant protects the lower growth.
July is a good time to think about the Three Sisters (Monsoon) gardening concept. Corn, beans and squash. The beans can be Tepary (bush) although traditionally the Native People planted vine beans which grew up the corn stalk, while the squash covered the ground, keeping it more weed free, minimizing water needed and providing an all but complete diet. They also planted sunflowers on the outside to draw away pest bugs.
Start Planning For August Sowing! What do you want growing in your fall/winter garden. Many root vegetables should be planted successively (do you really want 10 feet of carrots maturing all at once?). Some roots vegetables can take 100+ days (Parsnips) but you have shorter maturity types of carrots and beets. Head plants like cabbage, broccoli and cauliflower can also take 100+ days. So Plan And Plant (sow) accordingly. Consider sowing every 2-4 weeks through February for most of the non-head varieties. Get your seeds for head varieties in by late September to ensure all that cool weather for growing healthy plants.
WATERING: Higher humidity can reduce moisture loss to plants, reducing watering frequency, but check with water meter regularly. You can actually over-water in the height of our Monsoon season, so make sure you use the water meter.
![]() |
| Ginger Re-Sprouting - June 15th |
SUNBURN damage: Like frost damage - DO NOT prune until danger of sunburn is over - the damaged plant protects the lower growth.
July is a good time to think about the Three Sisters (Monsoon) gardening concept. Corn, beans and squash. The beans can be Tepary (bush) although traditionally the Native People planted vine beans which grew up the corn stalk, while the squash covered the ground, keeping it more weed free, minimizing water needed and providing an all but complete diet. They also planted sunflowers on the outside to draw away pest bugs.
Start Planning For August Sowing! What do you want growing in your fall/winter garden. Many root vegetables should be planted successively (do you really want 10 feet of carrots maturing all at once?). Some roots vegetables can take 100+ days (Parsnips) but you have shorter maturity types of carrots and beets. Head plants like cabbage, broccoli and cauliflower can also take 100+ days. So Plan And Plant (sow) accordingly. Consider sowing every 2-4 weeks through February for most of the non-head varieties. Get your seeds for head varieties in by late September to ensure all that cool weather for growing healthy plants.
Stay cool, drink water and enjoy your garden.
-- Catherine, The Herb Lady
You can purchase my planting/sowing calendars and books through the sidebar links. These calendars are for the desert southwest, deep south and all areas USDA Zone 9b and above. Planting times are as much about day light hours and soil temperature as air temperatures.
If you enjoyed this post, subscribe below by entering your email, to get all my posts!
Disclaimer: Clicking on links on this blog may earn me a small commission if you purchase something. Your price does not change.
Saturday, June 10, 2017
National Herbs And Spices Day - June 10th
Dear Folks,
Today is National Herbs and Spices Day!
I'm re-sharing my post from April on how I dry my herbs from my garden. Two ways: In the Sun and In The Refrigerator.
[Pictured in jars are dill and cilantro and drying are Chervil and Parsley.]
I have jars and jars of my own dried herbs to use individually or together in our meals.
Click on this link to read the entire column on drying. Drying herbs and more.
Besides just simply using basil or oregano in your meals, think about making your own signature blend(s).
Then take the creativity to the next level and make your own dried bouillon - incredible taste and NO SALT.
I discuss the bouillon in the drying herbs post but the above link takes you through the whole process from drying to grinding.
There is an easy way to make your own blend. Your own blend will be uniquely you if you follow this simple method because it is all about your sense of smell.
Put a dried or fresh bit of herb in the palm of your hand, rub to release the oils in your hand. Smell it, if it smells good to YOU, it will taste good to you.
Next add another herb to the first, rub together and then give a sniff. If it still smells great, add another one, and another. Putting 4 or 5 herbs and spices together will give you a blend uniquely yours.
Not sure where to start? Start with Thyme. If you look at packages of blends on the grocery shelf, you will find thyme is almost always included because it is considered an "anchor herb" in blends, around which everything rotates.
I created my own proprietary blends some years ago and the ingredients ranged from just 3 up to 17! So the options for you are limited only to your sense of smell and taste.
In honor of National Herbs & Spices Day, be creative and make your own great aromatherapy in the kitchen!
Not growing enough herbs in your garden? Purchase my PDF Herb Planting Chart for the Desert Southwest and USDA Zone 9B and above. It covers 48 culinary herbs you can grow and use yourself. The link is in the upper sidebar here. There is a preview available see "preview" under the picture when you click on the link.
. . .
There are still 2 more days to purchase the new PDF e-bundle on handling everything from emergencies to homesteading and sustainable practices. Click here.
-- Catherine, The Herb Lady
If you enjoyed this post, subscribe below by entering your email, to get all my posts!
Disclaimer: Clicking on links on this blog may earn me a small commission if you purchase something. Your price does not change.
Today is National Herbs and Spices Day!
I'm re-sharing my post from April on how I dry my herbs from my garden. Two ways: In the Sun and In The Refrigerator.
[Pictured in jars are dill and cilantro and drying are Chervil and Parsley.]
I have jars and jars of my own dried herbs to use individually or together in our meals.
Click on this link to read the entire column on drying. Drying herbs and more.
Besides just simply using basil or oregano in your meals, think about making your own signature blend(s).
Then take the creativity to the next level and make your own dried bouillon - incredible taste and NO SALT.
I discuss the bouillon in the drying herbs post but the above link takes you through the whole process from drying to grinding.
There is an easy way to make your own blend. Your own blend will be uniquely you if you follow this simple method because it is all about your sense of smell.
Put a dried or fresh bit of herb in the palm of your hand, rub to release the oils in your hand. Smell it, if it smells good to YOU, it will taste good to you.
Next add another herb to the first, rub together and then give a sniff. If it still smells great, add another one, and another. Putting 4 or 5 herbs and spices together will give you a blend uniquely yours.Not sure where to start? Start with Thyme. If you look at packages of blends on the grocery shelf, you will find thyme is almost always included because it is considered an "anchor herb" in blends, around which everything rotates.
I created my own proprietary blends some years ago and the ingredients ranged from just 3 up to 17! So the options for you are limited only to your sense of smell and taste.
In honor of National Herbs & Spices Day, be creative and make your own great aromatherapy in the kitchen!
Not growing enough herbs in your garden? Purchase my PDF Herb Planting Chart for the Desert Southwest and USDA Zone 9B and above. It covers 48 culinary herbs you can grow and use yourself. The link is in the upper sidebar here. There is a preview available see "preview" under the picture when you click on the link.
. . .
There are still 2 more days to purchase the new PDF e-bundle on handling everything from emergencies to homesteading and sustainable practices. Click here.
-- Catherine, The Herb Lady
If you enjoyed this post, subscribe below by entering your email, to get all my posts!
Disclaimer: Clicking on links on this blog may earn me a small commission if you purchase something. Your price does not change.
Wednesday, June 07, 2017
New e-Bundle PDF offer - Sale open through June 12th
Dear Folks,
The Self-Reliant School folks have a new e-bundle you may find very helpful. $29.97 which is 90% off the total value of $309.67 for 30 e-books and additional bonus offers.
If you are trying, or interested in trying, more Do It Yourself projects around your home, this prepper e-bundle is for you. It is not just for emergencies, but more self-reliance with some real money saving concepts.
This $309.67 value of 30 e-books, plus bonus offers, is just $29.97 for the PDF downloadable files. You have the option to purchase on a flash drive or you can purchase both the downloads and the flash drive.
This e-bundle sale is available through June 12th
Alternative cooking techniques and recipes
Seed saving and gardening
Edible and medicinal wild plants
Creating a wholesome, healthy food storage
Learn about bushcraft and primitive survival
How to build the ultimate bug out bag
The blueprint to a first class first aid kit
Preparing for extreme weather
Plus learn how to do more things yourself, manage a small homestead, and much much more!
The list of e-books is on this link with titles, authors and descriptions.
SRS is donating $1.00 from each sale to a Veteran's support charity. Gary Sinise Foundation.
Some of the bonus offers are (books listed first then bonus offers and purchase options):
Sun Oven - $164 off a Sun Oven package
Trayer Wilderness Academy - 1 month membership free
MadeOn Skin Care - Free bug block (just pay shipping)
Seeds For Generations - 25% off seed purchase - Beyond Off Grid - 50% off Beyond Off Grid course & 25% off DVD + online access pass
Pioneering Today Academy - 1 month membership free
FYI - I do not have a book in this bundle, however, I thought it worthwhile enough to share with you..
-- Catherine, The Herb Lady
If you enjoyed this post, subscribe below by entering your email, to get all my posts!
Disclaimer: Clicking on links on this blog may earn me a small commission if you purchase something. Your price does not change.
The Self-Reliant School folks have a new e-bundle you may find very helpful. $29.97 which is 90% off the total value of $309.67 for 30 e-books and additional bonus offers.
If you are trying, or interested in trying, more Do It Yourself projects around your home, this prepper e-bundle is for you. It is not just for emergencies, but more self-reliance with some real money saving concepts.
This $309.67 value of 30 e-books, plus bonus offers, is just $29.97 for the PDF downloadable files. You have the option to purchase on a flash drive or you can purchase both the downloads and the flash drive.
This e-bundle sale is available through June 12th
Alternative cooking techniques and recipes
Seed saving and gardening
Edible and medicinal wild plants
Creating a wholesome, healthy food storage
Learn about bushcraft and primitive survival
How to build the ultimate bug out bag
The blueprint to a first class first aid kit
Preparing for extreme weather
Plus learn how to do more things yourself, manage a small homestead, and much much more!
The list of e-books is on this link with titles, authors and descriptions.
SRS is donating $1.00 from each sale to a Veteran's support charity. Gary Sinise Foundation.
Some of the bonus offers are (books listed first then bonus offers and purchase options):
Sun Oven - $164 off a Sun Oven package
Trayer Wilderness Academy - 1 month membership free
MadeOn Skin Care - Free bug block (just pay shipping)
Seeds For Generations - 25% off seed purchase - Beyond Off Grid - 50% off Beyond Off Grid course & 25% off DVD + online access pass
Pioneering Today Academy - 1 month membership free
FYI - I do not have a book in this bundle, however, I thought it worthwhile enough to share with you..
-- Catherine, The Herb Lady
If you enjoyed this post, subscribe below by entering your email, to get all my posts!
Disclaimer: Clicking on links on this blog may earn me a small commission if you purchase something. Your price does not change.
Monday, June 05, 2017
Root Vegetables With Cheese and Cool Link to Interesting Vegetables to Grow
Dear Folks,
Yesterday for our Sunday breakfast I cooked up Chantenay carrots (THE best carrot in the garden), Purple "Molokai" sweet potatoes and regular potatoes all from the garden, covered with some cheese and topped with a fried egg!
Since I had the Molokai sweet potato, I did not include my own purple Irish potatoes as I had when I made a great potato salad for our Memorial Day BBQ. (I called it my Red, White & Blue Potato Salad -- I make mine with a citrus/avocado oil dressing, not mayo, and herbs from the garden.)
Back to the potatoes for breakfast.
Oh boy was this good. Our Sunday breakfast is our weekly big breakfast treat, eggs and bacon and I mix up the methods; sometimes I make up a small pot of savory oatmeal and top with an egg, other times it is just simple egg over toast, and when Deane makes breakfast he scrambles everything together.
In the pan I would be using for the eggs, I simmered the diced potatoes for about 8 minutes in salted water until knife tender - I did not want them to be mushy. Drained, then I topped with shredded cheese (Monterey Jack in this case) then fried up the eggs. I cook the bacon (no nitrate type) in the microwave to reduce the fat.
We like eggs many ways, but I used to have the worst time getting fried eggs that were perfectly cooked, until I read and saw a demo on the old America's Test Kitchen on how to cook the perfect fried eggs. The total time involved is anywhere from 2.5 minutes plus to more depending on how many eggs you are cooking. This was a genius tip. The video is difficult to find, so here are the steps.
Crack your eggs into a bowl - best to use eggs at room temperature. TIP: Crack eggs on a flat surface not the edge of a bowl, you will be less likely to end up with shells. Season the eggs while in the bowl.
Heat a pan on medium high. It needs to be screaming hot - takes about 4-5 minutes, seriously. Add 1 teaspoon / tablespoon oil and swirl around until it shimmers. Have eggs and cover ready. Once the oil shimmers add 1 teaspoon / tablespoon of butter. Swirl quickly, add eggs and cover and set the timer for 1 minute.
Here are the ratios: I only do 2 eggs, and use a teaspoon of the fats. If you have a large pan and more eggs go with the tablespoon.
Once the timer goes off I count while looking through my clear cover for the white to look "more set" - then -- and this is the important part - remove, still covered to a cool burner and reset the timer for 1 minute.
Again check through the cover when the timer goes off and maybe give it more time. With my two eggs in a small pan, my eggs are usually done in total of 2.5 minutes. About 1:20 for each of the two steps.
Immediately serve your perfect fried eggs. The first time you do this it will take you a bit to learn your pan / eggs / timing / stove (electric/gas) but once you have it figured, and enjoy fried eggs you will love the technique.
The reasons this works is: 1) screaming hot pan - most people don't really let the pan heat up enough; 2) JUST enough cooking time, and 3) Removing the still very hot covered pan to continue slowly finishing the cooking on a cold burner.
Two things I forgot with our breakfast meal. I meant to drop some chopped onion into the pan with the potatoes for the last minute, and I forgot to sprinkle the eggs with chopped celery leaf from the garden. Flavor flourishes that add just a bit more to the meal.
MORE cool vegetables to consider for your garden.
I have a reader in Spain and she and I share what is growing from time to time and she mentioned Yakon and Crosne two cool vegetables, I checked out when she first mentioned them last year. At the moment I don't have a place for them, but decided to refresh my memory and found this really cool site on "24 forgotten" vegetables. You NEED to check this out and decide if you should be growing any of these. I do grow the purple/blue potatoes. I need to spend some time (probably today) and carefully go through the list
While the link title is "For Vegans & Vegetarians" omnivores will love these too.
When you get to some of the neat sounding veggies like Crosne, they reminded me of Jerusalem Artichokes which have the same crinkly texture and I had seen a very cool video on how to clean these types of veggies without needing to peel them (and lose a lot of edible flesh). Of course I can't find the video, but the gist is you rinse the roots, shake coarse salt all over them, wrap in a cotten towel and roll back and forth, scrubbing the roots with the salt. The resulting roots are partially salted too, although you can rinse again if you like.
Ending this post with a picture of my lovely Conehead Thyme. This lovely and aromatic herb has a combination flavor of thyme, oregano and savory. Delicious on your food, and gorgeous in the garden.
You can find my gardening calendars and books for purchase on the sidebar here on the blog.
-- Catherine, The Herb Lady
If you enjoyed this post, subscribe below by entering your email, to get all my posts!
Please share with friends and family. Thank you!
Disclaimer: Clicking on links on this blog may earn me a small commission if you purchase something. Your price does not change.
Tuesday, May 30, 2017
In the Garden and Kitchen - May 30, 2017
Dear Folks,
Every time I step out our front door this time of year in the morning, the Chocolate Flowers incredible cocoa aroma greats me. Berlandiera lyrata aka green eyes is native to our southwest and should be in every valley garden. Each flower blooms in the early dawn hours and fades when the sun hits it so, it is one of those few plants you want with morning shade to appreciate the wonderful scent. Use the flower heads to when making your own sausage as the Native Americans did. (Cocoa, chili and coffee make great additions to sausage spiced foods.)
My caper plants are producing berries and I have started to pick them for fermenting. These olive-like fruits are a wonderful addition to salads, pastas and just as a side nibble at meals, or any way you would use olives. Growing these plants is a truly cost savings choice. When you think of the cost of a tiny jar of caper buds, along with allowing the plant to fruit instead of picking the buds off, the value of a jar of berries means you have a wonderful and valuable addition to your cooking ingredients options.
Fermenting these and other vegetables is so easy. You need a salt (1 teaspoon of kosher salt to 1 cup of hot water, cooled - double or triple as needed) solution, optional bit of whey from organic yogurt, a jar, another jar to weigh down the veggies so they are completely covered in the solution and 1-3 weeks depending on the vegetable. I use an 8 oz mason jar filled with a bit of water, to weigh the caper berries down in a 16 oz jar, lightly covered with paper or plastic (just to keep dust out) and set aside on your counter out of the way of drafts and changes in temperature.
Another of the edible flowers in the garden blooming one after the other is this gorgeous red/burnt orange daylily. Daylilies are edible. Do Not mistake the lovely but not edible exotic lilies for these simple garden favorites.
And who does not love tomatoes, sweet peppers and apricots. We are at the last of our apricots, but the tomatoes and peppers are still putting out fruit, oh boy! The small sweet peppers (including the green one) are "Lipstick" type and the ribbed one is a "Paradicsom" variety from Hungary. Among the tomatoes as the bottom of the picture is a "Cream Sausage" sweet and mild in flavor, these are fun to grown and the birds have trouble seeing them because they are not red.
The Paradicsom is from a 2 years old plant I got from Suzanne Vilardi -- all of her plants are wonderful. You can find them as some at nurserys and farmers markets around town. Suzanne and I collaborated on the Caper Growing project in the valley, which successfully resulted in Arizona grown caper plants from seed. Check our Suzanne's site for where to purchase transplants.
I grow three Oreganos, one of my favorites is Mexican Oregano, a large shrubby relative of Lemon Verbena (which I also grow). This Oregano is wonderful in broad usage in the kitchen. While Greek Oregano (Origanum vulgaris hirtum)of the Italian flavor uses has a great peppery bite, the Mexican Oregano ( Lippia graveolens) lack the bite of the Greek, but not the great flavor and is just a tad on the sweet side, lending itself to a wide variety of ethnic dishes.
For our Memorial Day BBQ I made Home Grown Red White and Blue Potato Salad and I was tickled that the only thing I did not grow was the avocados to make the oil I used and the salt and pepper. Aren't the colors lovely!
I make a limequat / avocado vinaigrette for these type of salads. Once the potatoes are finished cooking, and drained I put them back in the hot pot and while they are hot I add some oil so that the potatoes absorb the oil better. I wait until they cool, drain off any extra oil, add the limequat juice, salt and pepper (sometimes I add one of the dried oreganos). For this salad I used the red, white and blue potatoes, sweet peppers, celery, Ii'toi onions and sweet basil. It was a hit.
If you would like some other recipe ideas, may I recommend my Niece's new blog. Allison was trained at a Le Cordon Bleu school but after working at commercial kitchens for several years decided a career in the kitchen was not for her, but still loved cooking. So she started a weekly blog of menus and began developing recipes with foods she loves. Check out her blog (At The Kitchen Sink) and tap into her creative cooking spirit.
Please share my blog with family and friends.
Find me on Facebook
My calendars and books are available for purchase on the sidebar here.
Have a fun time in the garden and kitchen!
-- Catherine, The Herb Lady
If you enjoyed this post, subscribe below by entering your email, to get all my posts!
Disclaimer: Clicking on links on this blog may earn me a small commission if you purchase something. Your price does not change.
Every time I step out our front door this time of year in the morning, the Chocolate Flowers incredible cocoa aroma greats me. Berlandiera lyrata aka green eyes is native to our southwest and should be in every valley garden. Each flower blooms in the early dawn hours and fades when the sun hits it so, it is one of those few plants you want with morning shade to appreciate the wonderful scent. Use the flower heads to when making your own sausage as the Native Americans did. (Cocoa, chili and coffee make great additions to sausage spiced foods.)
My caper plants are producing berries and I have started to pick them for fermenting. These olive-like fruits are a wonderful addition to salads, pastas and just as a side nibble at meals, or any way you would use olives. Growing these plants is a truly cost savings choice. When you think of the cost of a tiny jar of caper buds, along with allowing the plant to fruit instead of picking the buds off, the value of a jar of berries means you have a wonderful and valuable addition to your cooking ingredients options.
![]() |
| Caper Berries Fermenting/Brining |
Another of the edible flowers in the garden blooming one after the other is this gorgeous red/burnt orange daylily. Daylilies are edible. Do Not mistake the lovely but not edible exotic lilies for these simple garden favorites.
And who does not love tomatoes, sweet peppers and apricots. We are at the last of our apricots, but the tomatoes and peppers are still putting out fruit, oh boy! The small sweet peppers (including the green one) are "Lipstick" type and the ribbed one is a "Paradicsom" variety from Hungary. Among the tomatoes as the bottom of the picture is a "Cream Sausage" sweet and mild in flavor, these are fun to grown and the birds have trouble seeing them because they are not red.
The Paradicsom is from a 2 years old plant I got from Suzanne Vilardi -- all of her plants are wonderful. You can find them as some at nurserys and farmers markets around town. Suzanne and I collaborated on the Caper Growing project in the valley, which successfully resulted in Arizona grown caper plants from seed. Check our Suzanne's site for where to purchase transplants.
![]() |
| Mexican Oregano |
For our Memorial Day BBQ I made Home Grown Red White and Blue Potato Salad and I was tickled that the only thing I did not grow was the avocados to make the oil I used and the salt and pepper. Aren't the colors lovely!
I make a limequat / avocado vinaigrette for these type of salads. Once the potatoes are finished cooking, and drained I put them back in the hot pot and while they are hot I add some oil so that the potatoes absorb the oil better. I wait until they cool, drain off any extra oil, add the limequat juice, salt and pepper (sometimes I add one of the dried oreganos). For this salad I used the red, white and blue potatoes, sweet peppers, celery, Ii'toi onions and sweet basil. It was a hit.
If you would like some other recipe ideas, may I recommend my Niece's new blog. Allison was trained at a Le Cordon Bleu school but after working at commercial kitchens for several years decided a career in the kitchen was not for her, but still loved cooking. So she started a weekly blog of menus and began developing recipes with foods she loves. Check out her blog (At The Kitchen Sink) and tap into her creative cooking spirit.
Please share my blog with family and friends.
Find me on Facebook
My calendars and books are available for purchase on the sidebar here.
Have a fun time in the garden and kitchen!
-- Catherine, The Herb Lady
If you enjoyed this post, subscribe below by entering your email, to get all my posts!
Disclaimer: Clicking on links on this blog may earn me a small commission if you purchase something. Your price does not change.
Wednesday, May 24, 2017
Memorial Day - Honoring and in the Garden, On The Grill and More
![]() |
| Soy Beans - see text below |
Memorial Day is a time to honor our fallen military heroes (Veterans Day honors the living), many of us get out and also fire up the grill and enjoy the great outdoors and backyards.
Pause and honor those who have made it possible to actually have a gathering.
I like "Packages from Home" a local non-profit (Glendale)- they send packages (like much loved snacks) to deployed Military around the world.
Raise your flag and/or participate in a Memorial Day celebration. Here is a link for events and activities around the Valley for 2017. Check out the Pioneer Cemetery event (Pioneer and Military Memorial Park, 14th Avenue and Jefferson Street, Phoenix. Free).
Read up on the Flanders Poppy associated with Memorial Day.
In the Garden.
In the picture above, I show harvested Soy Beans - each bush ripens all at once, so be ready to get the pods when young (if you want edamame) or allow to go completely dry for storage.
Heading into June there is not a lot to sow/plant. Here is the link to my June Planting Tips post.
I tend to be a random / flexible gardener. While I plant/sow on a certain calendar** reference for best success, I also like to have celebration plantings. October 1st is for planting Garlic. January 1st is for planting Potaotes (Irish type). I think I'm going to start a new tradition -- Memorial Day for sowing Blackeyed Peas and Soy Beans, both love the heat going into the summer and give you two things -- food and nitrogen back into the soil. In July you can plant the native Tepary Beans. (How about making the Tepary Bean planting a July 4th tradition!) The Tepary is a southwest native and part of the Monsoon garden as they take off with the beginning of the Monsoon rains and grow well into the summer for harvesting in late summer / early fall.
Check out this cool dense planting technique, which would great for the peas and beans and also for sugar pea sowing in the fall. Any gutter could be used or you could just densely plant in the ground as shown. I thought this was such a great idea I wanted to make sure you saw it. Your soil needs to be healthy and well amended to support the dense growth. If you have had a problem with birds etc. eating or digging up your carefully planted seeds, you will appreciate this method to get the plants going in large quantities to ensure you have a great crop.
Don't forget to get your sweet potatoes planted too. They also love and need all the summer heat to produce well.
At The Grill/In The Kitchen
At the Grill:
BBQ HERBS. With Memorial Day and July 4th coming up we all like to think about cooking outdoors. Some tried and true ways with herbs on the que:
BASTING BRUSHES: If you are basting foods, make a basting brush out of stiff pieces of herbs like rosemary, woody basil or thyme or savory. Allow the brushes to soak a bit in the oil or marinade before using.
SKEWERS: The stiff or woody sprigs of herbs make great skewers. Pierce food to be skewered first, for easy insertion of the herb. Soak herbs for 1 hour before using to prevent the herb from catching fire. Rosemary is frequently used, but try others (my favorite rosemary and pineapple). If the sprigs are a little too flexible, try using 2 or 3 sprigs at once.
HERB SMOKE: Soak the herbs for 1 hour before using and add to coals in the last 15 minutes of cooking.
HERB OILS AND MARINADES. Infuse any of your favorites in olive oil or make marinades with fruit juices. Allow marinades to "work" for 1 hour.
DRY RUBS: Rub herb mixes or make pastes out of the herbs with a bit of olive oil or melted butter, and pat or rub into food before grilling. (Perfect for a butterflied chicken, turkey or pork loin.)
HERB WRAPS: A wrap is food encased in herbs and either grilled in a foil pouch or rested on the grill. If you don't have enough herb to completely wrap the food (like lemon grass leaves). Sear food one minute on each side and lay the herbs across the top and finish cooking without turning. Fish will work very nicely this way.
Make a nice herb flavored potato salad and serve in edible containers like pepper halves or cucumber or zucchini boats.
If you are growing bananas (yes they do grow here in the valley) how about a luscious homemade banana pudding for dessert!
I adapted a basic egg-free vanilla pudding recipe for this treat.
Homemade Banana Pudding
2 cups milk
1/2 cup sugar (I use organic and you can use less if you like)
1/4 cup cornstarch
1/4 teaspoon salt
1 teaspoon vanilla extract
1 tablespoon of butter
1 cup coarsely chopped banana
Shake cornstarch and 1/2 cup of the milk in a capped jar to mix well (no lumps to deal with).
Mash bananas slightly with about 1/4 cup of the milk.
Bring rest of milk, sugar, and salt to high simmer on the stove, stirring constantly. Slowly add milk/cornstarch mixture, stirring constantly. Add milk banana mixture and increase temperature, stirring regularly until the mixture thickens. Remove from heat and add vanilla and butter, stir to mix in well and pour into pan or individual cups. Cool and chill in refrigerator.
We loved how this turned out!
As a child, pudding was one of my favorite treats and still is. Wholesome, nutritious and really great tasting.
I hope your Memorial Day celebrations are fun, safe, memory producing and tasty!
My facebook page.
** My calendars and books are available for purchase on the sidebar here on the blog.
Share this post with family and friends.
-- Catherine, The Herb Lady If you enjoyed this post, subscribe below by entering your email, to get all my posts!
Disclaimer: Clicking on links on this blog may earn me a small commission if you purchase something. Your price does not change.
Subscribe to:
Posts (Atom)