Garden, Plant, Cook!

Monday, March 30, 2015

The Aphids Are Here! The Aphids Are Here!

Dear Folks,

The one down side to getting into our lovely weather in the spring is the aphids like the cool night temperatures also.

The reliable safe soap spray is a way to deal with these soft-bodied pests.  Hard bodied insects like the leaf-footed/squash bug require different measures, such as keeping debris picked up and away from the base of plants and Hard Hosing as soon as you see them.  You can also use neem oil sprays on those pests.

Sunflowers (I learned recently) draw aphids, which is a good thing, but then you need to deal with them.

Here is a composite picture I took of one of my sunflowers Saturday and this Morning (Monday), which shows the before and after of the 1st cycle spraying (more on that below).

I know it is difficult to fully see what is happening but there are many dead or dying aphids in the right half of the picture

SAFE SOAP SPRAY and how to use it most effectively.

1 quart of water
1 teaspoon Dawn dish soap (I recommend the original)*
1 teaspoon of vegetable cooking oil (I keep old no-longer-useable-oils for this purpose).

Mix in spray bottle.

How to use:
1) if the bugs are really bad, hard hose off as best as you can.
2) shake (shaking is important, the ingredients do not stay mixed) the spray bottle as you spray, top and bottom of leaves and down growing center (this is particularly important with the broccoli family)
3) REPEAT!  5 days later and 5 days after that.

If you do not repeat the spraying 5 days apart you will lose the advantage.

What is happening is the 1st spray kills most of the adults and just hatched young.**
The 2nd spray kills those which hatch after 1st spray (the soap/oil does not, unfortunately damage the eggs).
The 3rd spray kills any stragglers.

Watch for new activity and deal with it the same way.  You may have to do this 2 or 3 times before our temperatures rise into the 100 range, when the aphid activity will decline substantially.

They will come back in the fall when the temperatures drop back down into the below 100 range, so keep this spray recipe handy.

*Original Dawn is still used to help sea birds damaged and endangered by oil spills.  I consider it the safest option for this spray and the little that goes into the soil will do no damage.

** Live-bearing aphids, a real problem for the broccoli family, do not lay eggs and are more difficult to control if you do not follow the spraying regime properly.

WHITE FLIES are a form of aphid and can be treated the same way.  The challenge with these type of aphids is that is is almost impossible to control completely, their numbers are in the 10s of thousands, but you can minimize the damage by following the spraying regime, beginning with hard hosing off first.

My Calendar shows the soap spray on March.   While both the print and PDF versions are dated 2015, the information is applicable year to year.

The PDF version is $6 and can be downloaded into all of your devices that have Adobe or other compatible reader, with a single purchase price.

You can find the print version of the calendar and my other publications here.

Do not let the bugs get you down, you can deal with them AND enjoy your garden at this lovely time of year.

Have a best day!


-- Catherine, The Herb Lady

Friday, March 27, 2015

Homemade Sodas

Dear Folks,

I have a "thing" about the amount of garbage sodas for sale - mostly aimed at children.

So here are some great homemade sodas to help you and the family kick the junk habit. (the pictures is from Ms. Dudash's article in The Arizona Republic, March 13, 2015) All have some nutrients, and yes they are sweetened, but you can choose one of the real Stevia products (like Sweetleaf) to substitute for lower calorie (I say lower because many are made with some fruit juice so there is natural sweetness - but you also get Vitamin C along with other small levels of vitamins and in some minerals).

What child does not enjoy options?  You can have the base ready for action whenever there is a group or party.

Your base is a sweet condensed mix, either a 100% frozen juice concentrate (no sugar added), thawed or a flavored (you choose) syrup.  Example:  Many children enjoy orange soda.  All you need is thawed 100% orange juice concentrate to make a glass of orange soda.  There is a 100% frozen juice pineapple orange that is a nice version.

1/4 cup base to 3/4 cup chilled sparkling water, ice if you like and there you have a cold, refreshing glass of wholesome beverage.

The sparkling water can be any you like.  FYI Club soda has sodium in it, seltzer does not.  Many artisanal waters have micro nutrients.

First up is a neat recipe from Michell Dudash who did an article for the Arizona Republic.

This is a base for a Cola, which makes up to 14 glasses.  You store the base until you want a glass.  This is probably the most ingredient in these recipes, but since you are making a base for 14 glasses it is worth the extra time.

http://www.azcentral.com/story/entertainment/dining/recipes/2015/03/24/earl-grey-cola/70384092/

Ms. Dudash also shared some homemade versions of fast food favorites like Chicken Nuggets to get your children enjoying homemade fast food.

http://www.azcentral.com/story/entertainment/dining/2015/03/24/get-healthy-fast-food-copycats/70380966/

Bon Appetit Magazine posted a slide show of 12 homemade sodas.

http://www.bonappetit.com/recipes/slideshow/12-refreshing-homemade-soda-recipes/?slide=1

TIP:  When making the ginger ale - don't throw away the ginger after making the base.  Save the slices, roll them in organic sugar, let air dry and you have candied ginger for nibbling or baking.

TIP:   If you make the lemongrass lime leaf soda and do not have Kaffir lime leaves you can use lemon or lime tree leaves from your own trees, just add 50% more leaves.  All citrus leaves are edible and have the scent and flavor of the fruit.

If you just wish to have some flavor, like the flavored seltzers available, muddle some fruit in the bottom of a glass, maybe add a piece of mint, top with chilled seltzer and ice and you have a refreshing drink.

Now that we are getting into the warm times, you should have some wholesome beverage options available to make refreshing and healthy drinks.

Have a best day,


-- Catherine, The Herb Lady

My publisher's site

For you gardeners - my "perpetual" calendar will give you the information for best gardening success in the desert - when to plant, tip and garden maintenance information.

Thursday, March 26, 2015

Harvest Show & Tell at the Boyce Thompson Arboretum - Plant Sale Coming To End

Dear Folks,

Last Sunday I presented a lecture on the Key to Successful edible gardening in the desert - planting and sowing at the optimal time for the variety.

I brought along a sample of what I harvested from the garden that morning.

Rose, red lettuce, red celery, Syrian Oregano, Conehead Thyme, Spanish Thyme, Bay, Mexican Oregano, White Flowering Rosemary, Lavender, Red Onion (large scallion), White Alpine Strawberry, Limequat, Banana Leaf, Nasturitum Leaves (large and variegated) Edible Flowers: Nasturtium, Johnny Jump-Ups, Blue Sage, Purple Stock, Arugula, Arabian Jasmine, Calendula.

In all of my lectures I like to use my "show and smell" harvests to illustrate not only the wonderful range of scents but the beauty in an edible garden.

The picture also illustrates the timing of growing in the desert.  ALL of these plants have been growing in my gardens through the winter to enable me to harvest on a bright March morning.

My special thanks to Paul Wolterbeek for taking the picture.

My books (beginners guide to edible landscaping and a recipe book using herbs as the base flavor) are available at the gift shop at Boyce Thompson Arboretum.  Check them out the next time you visit the wonderful BTA.

Their spring plant sale is still going on through this coming weekend - March 28 - 29th.

-- Catherine, The Herb Lady

My Publisher's Site

Tuesday, March 17, 2015

Irish Soda Bread Recipe

Dear Folks,

My beef has been corning for 2 weeks, I bought the veggies to go into the crock pot today with the beef and I decided to do a little research on Irish Soda Bread.

As an American of Irish descent (and Polish and English) our family has always fully embraced being Irish and enjoying the holiday for all the hearty food traditions.

Several years ago I started corning my own beef to control the ingredients (I do not use pink salt/aka nitrates) and I wanted to choose different cuts of beef.  Click here for my post on the corning and then cooking recipes.

But I have never made the traditional Irish Soda Bread.  My sister was able to visit Ireland twice, and has made the bread in the past, and raved about the bread severed at the B&B's she stayed at - rustic, brown and hearty.

So to my research - the first recipes which turned up included raisins, sugar, butter, eggs and buttermilk.  Well that sounded like the breads I've bought in the past.  And then I happened on an article about what real Irish bread was.

In a nutshell the traditional Irish bread is one of their staffs of life, along with potatoes, meant to sustain the hard working Irish, and not a dainty served with dinner.

Flour, salt, baking soda (the leavening agent) and sour milk.

The sour milk is an important point.  Anyone who has done research on traditional milk learns that unpasteurized milk goes sour (clabber) - pasteurized milk goes bad.  It is about the natural bacteria present in wholesome fresh from the animal milk vs. processed.

Back in the 1980s a gentleman named Malachi McCormick wrote a book "Irish Country Cooking"and was interviewed around St. Patrick's Day about "Irish Soda Bread" and the buttermilk controversy.

Historically, buttermilk was not widely available in Irish households, he said. To get buttermilk, you had to have a churn, and not all homes did. But sour milk, milk that has curdled, "was a daily act of God" found in even the poorest households. Rather than toss this "spoiled" milk out, Irish cooks used it to make bread.  http://articles.baltimoresun.com/1995-03-19/features/1995078208_1_irish-soda-bread-baking-soda-bread-makers

In talking to my sister she remembered the same article (or similar) and the REAL Irish Soda Bread - which by-the-way, was simply called "Brown Bread".

Today's buttermilk is actually not REAL either, which was the milk, whey and bits left over from churning.  Today's buttermilk is a cultured milk (certainly okay and good) but not the real deal.

So armed, with a reliable recipe from Epicurious  I tweaked the recipe to revert back to the basic Irish concept (whole wheat flour - but I used a white 100% whole wheat flour - not as dark as traditional 100% whole wheat), not caraway seeds (usually another American version), and then I wanted to come up with something to replace the sour milk, and I did not want to do the lemon juice/vinegar in milk routine.

I always have organic yogurt on hand, so I decided to stir in 1/2 cup of organic Greek style yogurt into 1 cup of whole milk.

BINGO!!  I got the most wonderful bread, real bread texture, solid crust and delicious too, spread with organic butter.

This may be our regular bread from now on.  For a number of years I have been working with variations of bread I do not have knead (my hands are simply not up to it).  The texture on this bread is more bread like than the recipes I've created before.

Catherine O'Crowley's Irish Bread

3 1/2 cups unbleached white whole wheat flour (I used King Arthur's)
1 teaspoon baking soda
3/4 teaspoon salt
1/2 cup organic Greek Style Yogurt
1 cup whole milk
Flour for dusting

Preheat oven to 425.  Lightly flour your baking sheet.

Sift flour, salt and baking soda into a bowl.  Stir yogurt and milk to combine.
Create a well in the center of the flour mix and start adding the yogurt / milk mix stirring with a wooden spoon.  Continue adding all the liquid and combine until the dough holds together.  You may need to use your hands to get the last bit of dry melded into the dough.

Shape the dough into a 6-8 inch circle, place on baking sheet and flatten to about 2 inches high.  Use a knife to score a deep X almost all the way to the sides.

Bake for 35 minutes or until the bottom sounds hollow when tapped.

Cool completely on a wire rack.

Serve with good butter, honey, molasses or jam.

Note:  the extra flour on the pan toasted and I reserved in a jar in the freezer for making gravies later on.

I know I can easily add herbs or cheese even raisins to loaves in the future!

I hope you have a wonderful St. Patrick's Day!


-- Catherine, The Herb Lady

My website has links to my calendar (print and PDF versions) and on the About Us page lectures and events coming up!  

Monday, March 02, 2015

Lectures Coming Up - Mark Your Calendars

Dear Folks,

I have 3 lectures coming up this month and next.

Boyce Thompson Arboretum
March 22, 2015
10:30 a.m. - 11:30 a.m.
The Key To Successful Gardening In the Desert

https://www.facebook.com/events/334324350099244 


Chandler Sunset Library
March 28, 2015
10:30 a.m. - Noon
Co-Lecture with Jean Groen
Our Edible Desert
Threes Sisters and A Fourth 

https://www.facebook.com/events/361201717399507 


Celebrate Mesa
April 18, 2015
Noon - 4 p.m.
Details to be announced.


I hope to see you at one of these events.

Get your gardening on!


-- Catherine, The Herb Lady

http://www.herbs2u.net/

Friday, February 27, 2015

Rain Coming - Good time for transplanting

Dear Folks,

With the rain coming in this weekend, it is a good time to get your transplants in - the rain will seal the soil to the roots very well and give the plants a good drink.

FYI - I have tomato and other plants and seedling starts for sale today at the Mesa Farmers Market  9 a.m. - 1 p.m.

This time of year is also prime disturbed weather conditions for hail (warm/cold/wind), so have your frost protection available to cover young plants - I like these poor man's cloches - you can also use 2 liter soda bottles.  Always clean well, so you do not have mold issues.


-- Catherine, The Herb Lady

Tuesday, February 24, 2015

Cardinal Hide 'n Seek, Free shipping on books and calendar expiring soon, Transplants

Dear Folks,

Mr. Cardinal played hide and seek with me among the bare/flowering apricot and plum trees - he was quite talk-a-tive :-)


 They do not visit us often - usually around this time of year or later in spring.  Sometimes with the Mrs. and a juvenile.  Just one of the delights in the garden when you have cover for them.

All of our fruit trees are now at one point or other in bloom so I'm trying to capture these delights of the day.  Our Johnny-Jump-Up lawn is starting to bloom nicely.  This picture was taken last year at this time.  The "pansy forest" is going to be even more dense this year - I will post pictures later in March/April to give you the full effect :-)


Meanwhile, my publisher's offer of free mail shipping or discounted ground shipping expires tomorrow (February 25th) near midnight.

A reminder note about my calendar.  This is the first year I've been able to produce a desert edible specific calendar and I intend to make a new one each year, with new photos and any additional tips I add.  Having said that, I would encourage you to think of this calendar as "perpetual" - all of the information remains the same for each month and through out the year


My Publisher's Free / reduced Shipping Offer

TRANSPLANTING:

With the cooler weather for this week, it is a great time to get more of your transplants in the ground.  I will have transplants and seedling "starts" available at the Friday Mesa Farmers Market each week for the next several weeks.  It is to your benefit to get them in the ground as soon as possible.

Have a great day in the garden,


-- Catherine, The Herb Lady

Wednesday, February 18, 2015

My Publisher is Offering Free Mail Shipping or Discount on Ground

Dear Folks,

My publisher is offering free Mail shipping or 50% off of Ground shipping until February 25, 2015

Don't Miss Out On Free Shipping!
Get free mail shipping or 50% off ground shipping on your order.
Cannot be combined with other offers.
Offer ends February 25th at 11:59pm
Use Code: DBS15

My page on the publisher's site.

Scroll through for pint calendar and books.

-- Catherine, The Herb Lady

Sunday, February 08, 2015

New! MOBILE "Desert Gardening Perpetual Calendar"

Dear Folks,

Many of you know and have purchased (thank you!) my brand new Wall Calendar designed specifically for gardening with edibles in the desert.

With all of the "mobility" tech devices out there, I thought a downloadable version of the calendar would be helpful.

While the calendar is for 2015, all of the month-by-month planting information, gardening maintenance, and tips don't change. The planting and "To-Do" chores are the same next February as this February.

I do plan on bringing out a new Wall Calendar each year with new pictures from our gardens and any additional tips I can pass on to you, however both the wall calendar and the digital calendar can be treated as a PERPETUAL calendar.

So, I created a PDF version of the calendar.


See information below on PDF readers.

WHY purchase a digital edition?

Convenience!  That is the primary reason everyone has a smart phone or eReader handy.

Let's say you are out shopping and think:  "Now what plants / seeds did I need to get this month?"  Check the calendar on your device.

You are discussing things you would like to do in the garden with friends or family and you are away from home - check the calendar on your device!

Your friend or relative knows you garden and asks what to can they plant?   Check the calendar on your device!

The PDF file is $6 (the wall calendar is $16.96 plus shipping).  I think my wall calendar is beautiful and useful (and so do many of you), but something that is even more convenient for you and if it will get you growing more of your own food, I don't mind one bit if you go the less expensive way, plus have a calendar that will work from year to year.  (There is a preview under the picture on the site.)

Desert Gardening Success - Perpetual Calendar


PDFs can be read on any device which has a PDF reader, Adobe supplies these all free as a download.  You can also store the file on all of your devices: phone, ereader and computer

Here is a link for Adobe's free mobile app for smart phones and iPad

http://www.adobe.com/products/reader-mobile.html

Adopbe has a free "digital editions" app for certain other eReaders

http://www.adobe.com/solutions/ebook/digital-editions.html

And, if you do not the Adobe PDF reader on your computer or laptop, you can get it free here.

http://www.adobe.com/products/reader.html

Mac version of the Adobe PDF reader

http://www.adobe.com/support/downloads/product.jsp?platform=macintosh&product=10


If you would like the wall calendar here is the link for it.

You may wish to check out the PDF version of my cookbook 101+ Recipes from The Herb Lady

There is also a preview under the cover picture.


Helping you grow more of our own food, successfully!

Have a great day in the desert garden,


-- Catherine, The Herb Lady

Monday, February 02, 2015

Nasturtiums and a Little Magic Moment in the Garden

Dear Folks,

Thanks to almost 2 inches of rain in 3 days we turned off the irrigation water and probably won't have to start up again for about 2 weeks!  Money saved.

While touring the gardens yesterday on a bright sunny morning I discovered this delightful image - it felt magical with the water drop magnifying the veins of this large nasturtium leaf.

During the Freeze 3 or so weeks ago, many of the nasturtiums took a hit but so many were already germinating and growing under the canopy of the dieback, it does not look like we were frosted at all.

Nasturtiums are some of my favorite edibles.  They happily reseed each year filling all the tree wells and volunteering in other places, like beside the compost cinder block bed etc.  They grow and bloom from fall into early summer.

The flowers, leaves, and immature seeds are totally edible and they are used as a pest-bug deterrent by some.

So how big is "large" -- 7 inches - some slightly bigger!!

I've used my leaves to make "dolma" aka stuffed grape leaves, substituting the nasturtium for grape leaves. On a side note one of these years I'm going to have to try and catch some of our fig leaves when young and make dolma (my research found references to the original dolma did use fig leaves).

Here is the link to my recipe for Nasturtium Leaf Dolma

Flowers and leaves are a great addition to salads.  The immature seeds are a nice bite of horseradish for salads, dressings, sauces or soups.  CAUTION:  Pregnant women should limit the amount of nasturtiums in their diet.

It is not too late to get some nasturtiums growing in your garden.

Nick the seeds slightly with a nail file or similar (don't go too deep), soak over night or for 2 days and plant half to 1 inch down.  Nasturtiums germinate in the dark.

Enjoy these edibles for their beauty and flavor!

-- Catherine, The Herb Lady

Find my wall calendar and books on the publishers site:

You can also find the books on these sites:

Ibook

https://itunes.apple.com/us/artist/catherine-crowley/id372564893?mt=11

amazon - print

http://www.amazon.com/Catherine-Crowley/e/B002C1HWG0/ref=sr_tc_2_0?qid=1367065857&sr=1-2-ent


Barnes & Noble - print and Nook ebook

http://www.barnesandnoble.com/c/catherine-crowley

Kobo

http://store.kobobooks.com/en-US/Search?query=Catherine%20Crowley&fcsearchfield=Author

Thursday, January 29, 2015

Doing The Tough Stuff In The Garden

Dear Folks,

It goes without saying that we love our garden.  We love the trees, veggies, fruits and flowers.  When we have to take put plants it grieves us.  We have an orderly garden, but not a manicured one and it has been our habit when plants we enjoy harvesting from are doing well, we let them be.

The challenge comes when the encroachment of one variety into another requires us to - finally - take action.

Strawberries and asparagus companion very well together.  But after the last couple years of dwindling asparagus harvest we finally had to address the alpine strawberries taking over the asparagus territory. Sigh.

The strawberries encompassed so much of what we call the upper garden we have been able to pick some fruit pretty much every month year-round with about 3 heavy harvesting periods a year.  Sigh again.

So, Deane tackled digging out all the strawberry plants in the asparagus territory.  I saved some for some friends and may bring a bag or two of clumps to the market it they are looking okay then.

The picture shows Deane about half-way through the digging part (dig, shake off dirt, toss in a pile), and the pile of plants which I added to one of our tree wells for composting in-place.  I couldn't add these beloved plants to the dump trailer.

I picked up some replacement asparagus plants yesterday.

I know our remaining strawberry plants will continue to fruit and reproduce.  I actually may thin a little to open up the remaining plants.  Alpines do not produce a lot of runners, but do produce a lot of seed.  We find seedlings in the most amusing places - middle of the lawn, middle of the berm (that one is a hardy one since it gets no direct water!), or tucked at the edge of a tree elsewhere.

And so it goes and grows in our garden.

Enjoy your garden too, and take time to think about what the plants need.

If you need help, I'm always happy to answer your email questions (or in person at the Mesa Farmers Market), or you can find printable help at my publisher's site.


-- Catherine, The Herb Lady

Thursday, January 22, 2015

Gardening By Zone - USDA 9b / Sunset Zone 13

Dear Folks,

Gardening By Zone - Why It Matters!

Living in the desert and loving to garden here is my passion, but also my inspiration to help others garden successfully.  Much of it is based on my/our trowel and error experiences of what worked and how.

It is a serious challenge when a would-be gardener moves here from New Jersey or Minnesota  – where the gardening season is 90 to 120/140 days.  Even Southern Californians have trouble understanding our climate.  They are used to gardening year-round, but get caught up with the heat issue.

In 4-season climates like the Midwest or northeast, you basically looked to your local nursery for when to buy and plant things.

While some of that is true here in the desert, it is also true that nurseries here:  1) carry plants grown elsewhere, and 2) carry plants that people request, which are not always seasonally appropriate.  This is particularly true of the chain nurseries, although they do try to have regional nursery selections available.

I'm not knocking the nurseries - it is a business fact of life - your customer wants a tomato plant in late September or Early October - you give them the plants, even though the production going into fall and winter is either severely limited or non-existent.  Tomatoes like their feet warm and need long, warm/hot all day sunshine to thrive.

So it becomes really important to understand what zone we are in, and to make use of planting data that I or some of the organizations in the Valley (like the County Extension Service) provide.

It is vitally important to understand our zone because ordering plants outside of Arizona may give you very poor results.

For example:  For years Starks Brothers Nurseries, who are known for the quality of their fruit trees, listed the Valley as USDA Zone 8 (I believe they have since corrected this).

The problem became apparent when folks ordered fruit trees (we had a very early experience with this) that their catalogs "said" would grow here, and we watched the trees die, quickly, and never fruit.  Their customer service was spectacular –  they replaced the trees and even offered to give us a 3rd round of replacements, but it was apparent they simply would not thrive here - it is a matter of chill hours.

Deciduous fruit trees that will grow and produce here in the valley are desert adapted bred specifically for our climate.

The Zones

We are in USDA Zone 9b and Sunset Magazine Zone 13.

The Sunset Zone 13 is the more important of the two as Sunset had researched the details of how elevation, microclimates and cold impacts regional gardening.  In Zone 13 we can literally garden year round, with a climate which is 'subtropical' (specifically “subtropical hot desert) and very like the Mediterranean (Jerusalem) and other parts of the world (Alice Springs, Australia – except Alice Springs’ year is reversed from ours).

Move into Sunset Zone 12 and your gardening is reduced to about 300 days of the year instead of 360.

Successful Gardening

Based on the number of gardening days here, the specifics of seed germination, amount of day light hours, and soil and air temperature, gardening successfully here in the desert is about when to plant.

Fruit Trees, for example, do best if planted in the cool fall (October-ish), which allows the roots to get good and strong before summer temperature impact the soil surface temperature.

Chill hours are important for choosing deciduous fruit trees here.  Choose one with more chill hours than your backyard has, and you will likely never get fruit except in those rare winters when we have multiple days of below 30 temperatures - say every 5 or so years!

Even in the Valley here we have microclimates which can create a range of chill hours and frost from as low as 250 hours (some parts of Mesa) to 900 hours (Queen Creek).

It is important to understand the chill hours of your backyard.

Other perennials such as herbs like rosemary, thyme, oregano etc. also do best if planted in the fall.  They will not do much growing the first year because of the limited winter day light hours.  But the plant is busy putting down healthy, deep roots.

Varieties of vegetables and other herbs are divided into cool and warm weather categories.

Cool weather varieties are the root crops (beet, carrot, radish etc.), the cabbage family, all the greens, sugar peas, and herbs such as cilantro and dill.

Warm weather varieties are the beloved tomato, along with eggplant, peppers, tomatillos and herbs such as basil, chives and epazote.

What all this means.

If you get a case of spring fever in early March and start planting brussels sprouts, lettuce, tomatoes and basil, the first two may come up but will stall or die and the last two will do some growing, but should have been planted at the beginning of February, to take advantage of the warming soil, but not the galloping temperatures.

Basil is always the surprise for new-to-the-desert gardener.  In the middle of July, basil planted at the right time in late winter (early February), can turn into a 3 x 3 foot (or bigger) bush!  It loves the heat, but it has to have a deep root system to thrive.

Sunset Zone 13 is not just for the Valley of the Sun.  Below are other cities which are in Zone 13 and gardeners there can benefit from our resources.  (I also, for the sake of ease of finding cities, listed both the Phoenix Metropolitan area as well as the Yuma Metropolitan area.)

My Wall Calendar for gardening in this zone gives month-by-month planting information along with monthly to-do helper tips.

The Maricopa County Extension Service has helpful links for the backyard gardener.

The Valley Permaculture Alliance offers a free question and answer forum and classes for a low fee.

These listed cities and communities (I couldn't resist adding the "ghost towns" as I figure some intrepid souls may be giving a homestead a go there) are based on Sunset's Zone Maps.

Folks who live in the Valley here and have friends or relatives in any of the listed cities, can reliably share gardening tips and information.  I personally consider sharing the love of gardening one of the best connections to family and friends.

I did my best to be accurate here.  If I made a mistake whether including one or excluding one, please let me know.

Phoenix Metropolitan Area:
Apache Junction
Avondale
Buckeye
Carefree
Cave Creek
Chandler
El Mirage
Fountain Hills
Gilbert
Glendale
Goodyear
Guadalupe
Litchfield Park
Mesa
Paradise Valley
Peoria
Queen Creek
San Tan Valley
Scottsdale
Sun City
Sun City West
Sun Lakes
Surprise
Tempe
Tolleson
Youngtown

Yuma, Arizona area Cities and Communities which may also be in Sunset Zone 13
Arizona City (Ghost Town)
Avenue B and C
Aztec
Buckshot
Castle Dome Landing (Ghost Town)
Castle Dome (Ghost Town)
Cocopah Indian Reservation
Colorado City (Ghost Town)
Dateland
Dome (Ghost Town)
Donovan Estates
El Prado Estates
Fillibusters Camp (Ghost Town)
Fort Yuma Indian Reservation
Fortuna (Ghost Town)
Fortuna Foothills
Gadsden
Gila City (Ghost Town)
Hyder (Ghost Town)
Kofa (Ghost Town)
La Laguna (Ghost Town)
Martinez Lake
Mission Camp (Ghost Town)
Mohawk
Orange Grove Mobile Manor
Owl (Ghost Town)
Padre Ranchitos
Pedrick's (Ghost Town)
Polaris (Ghost Town)
Rancho Mesa Verde
Roll
San Luis
Somerton
Tacna
Wall Lane
Wellton
Wellton Hills
Yuma

Other Cities in Sunset Zone 13
Alamorio, California
Bagdad, California
Bard, California
Blythe, California
Bonds Corner, California
Borrego, California
Brawley, California
Cadiz, California
Calexico, California
Calipatria, California
Citrus View, California
Coachella, California
Cross Roads, California
Curlew, California
Danby, California
Date City, California
Desert Springs, California
Desert Center, California
Dixeland, California
Earp, California
Edgar, California
El Centro, California.
Fuller, California
Havasu Lake, California
Herber, California
Holtville, California
Imperial, California
Indian Wells, California
Indio, California.
Mecca, California
Meloland, California
Moss, California
Needles, California
Niland, California
Ocotillo, California
Orita, California
Palm Desert, California
Palm Springs, California
Palo Verde, California
Parker Dam, California
Plaster City, California
Salton, California
San Isidro, California
Sandia, California
Seeley, California
Vidal, California
Westmoreland, California
Wiest, California
Winterhaven, California

I hope you find this information helpful.  I hope everyone grows some or more of their own food.  The reward is far more than excellent food.  The process of nurturing plants to healthy growth, flower and fruit is almost unequal to the overall sense of satisfaction.


There is peace within a garden,
a peace so deep and calm
That when the heart is troubled
it’s like a soothing balm
There’s life within a garden,
a life that still goes on
Filling empty places
when older plants have gone
There’s glory in the garden
every time of year
Spring, summer, autumn, winter,
to fill the heart with cheer
So ever tend your garden,
its beauty to increase
For in it you’ll find solace,
and in it you’ll find peace.

– Rosamond, Lady Langham


I was truly blessed to have a copy of the book in which this poem appeared from Lady Langham's family.  A true reminder of the pleasures of gardening.


-- Catherine, The Herb Lady

http://www.herbs2u.net/

Monday, January 19, 2015

From The Desert Garden, January 17, 2015 - Yes you can growing things in the winter!

Dear Folks,

This collage of pictures taken January 17, 2015 is why we garden in the desert.

Top to bottom:  Red Alpine Strawberry, first Apple Blossom, onions, White Alpine Strawberry, Johnny Jump-Up.

Alpine Strawberries are easy to grow from seed, freely re-seed in place if you let them, and produce fewer runners than their larger relatives.  The reason for growing these beauties is their incredible flavor.  A real WOW in a tiny package.  And they bloom and fruit 3-5 times a year depending on weather conditions.  Right now we have had a crop and more flowers are coming on.

What's a white strawberry?  These delicious varieties are strawberry flavor with a taste of pineapple.  They are more tropical in overall taste. And the birds can't seem them!!!

Birds have difficulty seeing white or yellow fruit.  Plus the alpine growing habit tends to shield even the red fruit under a canopy of leaves.

Our apple tree has a first flower and even more buds and all of the leaves have not fallen off.  This is typical of the desert deciduous trees.  When you have to prune them (should be in December) many or most of the leaves are still on the tree.  The apples are ripe in May and June when I enjoy eating them and making applesauce and sun-drying apple slices.

There are 50 onion plants in the picture and you may be asking why planted so closely?  This is intentional and a great way to have green (scallion) onions all winter.  These were planted as sets on November 11th.  They are the right size now for me to go out and pick every other one when I need a scallion.  By the time late spring / early summer comes, the remaining onions have room to produce the 'bulb" size we want for storage.  (At that point they are pulled and hung to dry in the shade of the trees - just like the garlic which is harvested in April - May - you dry them until the outer skin is papery.)

Last but certainly not least are the Johnny Jump-Ups.  Several years ago I threw seed in our lawn for the winter (we do not winter over-seed) and the results were stunning and delightful.  Since the JJUs freely reseed we have gotten more and more spectacular and visually delightful flower lawns each year.

Besides these goodies, my sugar peas are ready to produce pods, my lettuces (which reseeded from last year) are producing large amounts of greens.  The nasturtiums took a major hit in the freeze 2 weeks ago but the ones that survived are doing great and new ones are coming up to replace the lost ones (another re-seeding favorite).

Getting ready for transplanting, I currently have seedlings for basil, tomatoes, eggplant, and peppers going.  I'm going to start sunflowers, cantaloupe and watermelon this week.

I am pre-soaking the seeds for several days to jump start breaking the dormancy and popping them into jiffy pellets.  I use a variety of containers (mostly re-cycled produce containers) to act as 'green houses'.


 I will be watching the weather for transplanting and have my poor man's cloche (water jug with bottom cut off) ready to protect the transplants overnight if necessary.

I will also have some of these "starts" for sale the beginning of February at the Mesa Community Farmers Market.

The weather is great right now, have fun in your garden!


-- Catherine, The Herb Lady

P. S.  A reminder my "Valley of the Sun Gardening Calendar - 2015" is available to help you be successful in your desert garden.

Thursday, January 15, 2015

In The Garden and In The Kitchen

Dear Folks,

I thought I would share with you some of the things going on in the garden and my kitchen.

First up - I saw a very intriguing recipe for roasting a whole head of cauliflower instead of breaking it up into pieces (done that and they are good), and I found a beautiful organic cauliflower so I dove into the recipe.

I have modified it slightly.  The link to the original recipe will be below my version.  We thought this turned out very well.  I do have to find a very mild version of chili powder as this was just a wee bit too bity for Deane.  The original recipe called for twice as much chile powder and curry powder. I halved the chile and used ground ginger instead of the curry and it was really tasty.  It was even good cold the next day.


Roasted Cauliflower Head

Ingredients
Oil spray or a bit of oil
1 head cauliflower
1 1/2 cups plain Greek yogurt
1 lime, zested and juiced
1 tablespoons chile powder
1 tablespoon cumin
1 tablespoon garlic powder
1 teaspoon ground ginger
2 teaspoons kosher salt
1 teaspoon black pepper

Instructions

Preheat the oven to 400̊ and lightly grease a small baking sheet with vegetable oil. Set aside.

Trim the base of the cauliflower to remove any green leaves and the woody stem.

In a medium bowl, combine the yogurt with the lime zest and juice, chile powder, cumin, garlic powder, curry powder, salt and pepper.

Dunk the cauliflower into the bowl and use a brush or your hands to smear the marinade evenly over its surface. (Excess marinade can be stored in the refrigerator in an airtight container for up to three days and used with meat, fish or other veggies.)

Place the cauliflower on the prepared baking sheet and roast until the surface is dry and lightly browned, 30 to 40 minutes. The marinade will make a crust on the surface of the cauliflower.

Let the cauliflower cool for 10 minutes before cutting it into wedges.


Original Recipe Here

Next I made another version of my seed crackers.  These are great and have a lot of flexibility in your choice of ingredients.  Basically you want 1 cup of ground seeds or nuts or a combination.  I like to add a couple of tablespoons of flax seed.  You had shredded cheese, herbs and spices, a bit of salt and water or liquid to moisten.  You need a cookie, sheet, parchment paper or aluminum foil AND wax paper and a rolling pin.  I use a bullet grinder for grinding the seeds/nuts.

The nice thing about these crackers is they can be baked in the sun too!  In the summer time I just arrange them to dry in the sun like my other sun dried fruits and herbs.  Works great!  You need a 90 degree plus day and exposure to full sun for 6-8 hours.  You may want to flip them over after 4 hours.   If they do not dry completely at the end of the first day, bring them inside overnight to avoid re-moisturizing, then put them out the next day.  At 95-100 degrees they usually dry in about 4 hours!

These can be addicting, but not to worry, they are high in protein and fiber and you can choose any combination of seed, nut, cheese and herb.

My original recipe had a more robust flavor and I was looking for milder here.  And I wanted the lemon flavor to "pop".

Lemon/Rosemary Seed Crackers

1 cup sunflower seeds, ground
2 tablespoons golden flax seeds, ground*
2 tablespoons seasame seeds, leave whole
1/2 teaspoon salt
1/3 cup finely shredded Monterey Jack Cheese
1 tablespoon crushed dried rosemary (if using fresh use 2-3 tablespoons finely chopped)
Zest of 1 lemon
1/2 cup of juice from the lemon (but you may not need all of it).

*Gold flax seeds are milder in flavor than the regular

Heat oven to 350.

I have a bullet grinder but you can use any kind of grinder you need to grind the seeds if not already ground.


Put all the dry ingredients in a bowl and stir, add cheese, stir again, then add lemon juice a little at a time until you have a moist but not soggy "mash" and mix well so everything is moistened.

Spread on aluminum foil, silpat or parchment paper. Cover with a piece of wax paper and roll out to even depth - about 1/8 - 1/4 inch, and even up the sides a bit by squaring off. Use a long straight blade to score - you don't have to cut all the way through - it just makes it easier to break up after they cool.

Bake 15-18 minutes and watch carefully - if they start to brown too much remove.  Let cool completely and break apart. Store in air tight container unrefrigerated.

Better Butter do you know this old favorite introduced by Adele Davis?  If not you should consider making it for your family.  Every dairy company has come up with their version of spreadable "butters".  The problem is they contain a lot of unnecessary ingredients.  Davis' Better Butter was simply a mix of real butter and an oil.

Over the years I have used mostly olive oil, which does give it a distinctive taste, which I liked but Deane, not so much.  I 'discovered' avocado oil a couple of years ago, thanks to one of our great vendors at the Mesa Farmers Market and I use it a lot because of its mild non-distinctive taste.  Plus like olive oil - it is good for you.

The avocado oil lets the sweet taste of the organic butter really shine through.  Why salted butter?  You need a bit of salt to make this taste better than the store bought spreads.

Pictured if My Better Butter and My Triple Fat version for saute, or frying anything.  The round container holds the Triple Fat, the other the Better Butter.

About the triple fat:  I wanted a bit of the taste of bacon, so I routinely save uncured, no nitrates added, bacon fat/drippings*.  I wanted the oil and butter combination too, so I dreamed up this perfect blend of fats.  A tiny amount, maybe a teaspoon, is all you need to add the flavor and slip for cooking.  I have also used on Chicken or Turkey roasts to create, along with a nice selection of herbs, a coating which keeps the poultry moist and flavored at the same time.

Catherine's Better Butter

1/2 cup (1 stick) of room temperature organic butter
1/2 cup of avocado oil

In a high-speed blender (I have used my waring, but I mostly use my Bullet for this job), pour in the oil and cut the butter into 4 or 5 pieces.  Blend until completely emulsified - usually about 15 seconds.  Pour into a container, cap and refrigerate.  This keeps very, very well.

Catherine's Triple Cooking Fat

1/3 cup uncured bacon fat
1/3 cup avocado or olive oil
1/3 cup organic butter

In a small sauce pan, over low heat melt the bacon fat and butter, add oil and stir to combine well. Pour immediately into a jar, cap and refrigerate.  This also keeps very, very well.

*Uncured bacon, for those who understand about the naturally occurring nitrates, these uncured bacon are actually dosed in celery juice or powder, which have naturally occurring nitrates as the "cure".  I'm fine with that since they don't add any more industrial strength nitrates.

In The Garden 

I harvested a bunch of green tomatoes (the plants took a major hit with these freezes) to ripen in the house and hung one of the dead plants with fruit in the trees to continue to ripen.  These can taste pretty good ripened like this, not as great as sun ripened, but usable.


After being out of the loop for almost a year of getting anything meaningful done in the garden I am trying to be better prepared for spring.  I began the day after Christmas starting seeds for transplanting in my garden and also for sale at the Mesa Farmers Market.  With the cold an issue, I pre-soaked each batch of seeds and then popped them into Jiffy Pellets.  To maximize sun, I got a plastic tub to act as my green house and place the tub in the sun during the day, then cover and put in our laundry shed which has the hot water heater in it, to keep them cozy at night.

So far a couple of the basils are up, as is one of the tomatoes, an eggplant and one of the sweet peppers is sprouting.

In a week or two I will start sunflowers, cantaloupe and watermelon (I have an heirloom variety coming that I think will be fun to try).

I expect to have my "Starts" (as I call the Jiffys) ready for sale the first week in February.  These starts are easier for folks as you just pop them in the ground, minimizing transplant shock.

Do you know "Wonderberry" (Solanum burbankii)?  This fun member of the ground cherry family has been happily reseeding in my garden for quite a few years now.  A sturdy relative of the tomato and tomatillo, these tiny berries are sweet with just a hint of 'tomato' flavor in the background.  They pretty much grow year round, finishing fruiting, dried fruits drop on the ground and re-seed to come up again in a couple of months.  They seem to not mind the freeze/frost unlike the tomatoes which took a big hit with the freeze.

I will see if I can have seed for either this Free Seed Share coming up or the next one.  The berries are completely black and shiny when ripe.  You can see a mix of ripe and unripe in the photo.

You can also find the seed for sale at Baker Creek.

I hope you are enjoying your garden and making good things in the kitchen!


-- Catherine, The Herb Lady


My Wall Calendar 

My books


My Publisher Direct


Ibook

https://itunes.apple.com/us/artist/catherine-crowley/id372564893?mt=11

amazon - print

http://www.amazon.com/Catherine-Crowley/e/B002C1HWG0/ref=sr_tc_2_0?qid=1367065857&sr=1-2-ent


Barnes & Noble - print and Nook ebook

http://www.barnesandnoble.com/c/catherine-crowley

Kobo

http://store.kobobooks.com/en-US/Search?query=Catherine%20Crowley&fcsearchfield=Author


Wednesday, January 14, 2015

February Gardening Tips

Dear Folks,

A few tips for this coming month.  February is the last month to plant cool weather annuals like cilantro and dill and is the start of the planting time for Tender Perennials like tomatoes, basil, eggplant, peppers etc.

GARDEN TIPS for February

FROST:  The last frost date averages around February 15th, although we have had frost as late as March 1st or 2nd (usually the result of a late winter storm with hail).

Frost in the Valley at the 1100 or lower elevations is usually limited to ‘soft frost' where simple sheets or paper placed over sensitive plants (or moving potted plants beneath patios or trees) is sufficient to protect them.

For every 1000 feet over 1100 in elevation the last frost day is moved back 10 days and the possibility of hard (killing) frosts starts to occur. At 2000 feet or lower, this is still a rare occurrence.

Getting your edible seedlings in the ground as early as possible provides longer-produce seasons - especially with plants like tomatoes.

Use homemade 'cloche' covers to protect seedlings -- cut the bottom of gallon milk containers or 2 liter soda bottles - clean very well to avoid mold -- place over plants each night until frost danger is past, remove during the day, or if you need to be gone for several days remove the cap to allow excess heat and humidity to escape.

How do you know if we are finished with frost? There are some examples in nature, but you still need to be prepared to cover sensitive plants through the 2nd week in March.

Ant activity in the garden indicates the soil has warmed up sufficiently for them to start gathering food again.

If the mesquite trees have started to bud out, it is unlikely to frost after that.

Be aware that a warm storm can contain some hail through March.

February is the last optimal month for early (before heat) perennial planting.

Fertilize fruit trees now -- Use Valentine's day as the target -- (and again in late May and early September).


Have a great day!


-- Catherine, The Herb Lady

My Wall Calendar 

My books

Ibook

https://itunes.apple.com/us/artist/catherine-crowley/id372564893?mt=11

amazon - print

http://www.amazon.com/Catherine-Crowley/e/B002C1HWG0/ref=sr_tc_2_0?qid=1367065857&sr=1-2-ent


Barnes & Noble - print and Nook ebook

http://www.barnesandnoble.com/c/catherine-crowley

Kobo

http://store.kobobooks.com/en-US/Search?query=Catherine%20Crowley&fcsearchfield=Author


Lulu

http://www.lulu.com/spotlight/herbs2u


Monday, January 05, 2015

Kitchen Trash Gardening!

Dear Folks,

You all know I'm into recycling in its many forms: using leftovers in "made over" ways (like there left over sausage and roasted sweet potato in a stove top frittata for morning breakfast); using grocery produce containers for mini-greenhouses to start seedlings; and composting all veggie parings, coffee grounds, egg shells, etc.

Well here is another way you may not have tried.  Kitchen Trash Gardening. Many root type vegetables can be re-generated to produce more of the food, or at the very least letting it go to flower and catching the seed.  You can produce seed from carrot, radish or beet tops, for instance, by keeping about a 1/2 inch+ of the top and letting it sit in water for a couple of days, then plant.  They will grow and produce flowers and seeds.

Sweet potatoes and regular potatoes are grown from the sprouting tubers.

Today I'm talking celery.

I grow celery in the garden.  For several years I've been growing RedVenture celery.  But I don't always have enough for a meal, particularly a big one like for Thanksgiving stuffing.

So I buy the regular bunches of celery (organic when I can).  I cut the root bottom off with about 1 1/2 to 2 inches of base, soak in water over night or for 2 days, and then plant flush with the soil level.  Voila celery leaves.

In the picture to the right you see, top to bottom, the celery base in water.  Overnight it already starts to sprout from the center.

Then I plant it out and in about a month you are getting fresh celery leaves for harvesting.

Currently I have about 5 heads growing, so I always have fresh leaves for salads, etc.

Near the time when we start galloping into the high summer heat I will harvest and dry the leaves and store for later use.

In theory you could get stalks, but I usually keep the leaves harvested so I've not had long stalks to harvest.

Give it a try, and look at other rooted vegetables you can turn from kitchen garden trash, to producing plants in your garden.

Some of the root based lettuces are possibilities like romaine.

Have a great time in your garden!


-- Catherine, The Herb Lady

Some of my published materials.

2015 Wall Calendar for Desert Gardening - month-to-month planting info and tips

Wall Calendar

My Cookbook

My beginners Guide to gardening with edibles in the desert 

The books are also available in print on Amazon and as ebooks at both the publishers site and ibook store.

Saturday, January 03, 2015

My Desert Gardening Wall Calendar for 2015 is Out!

Dear Folks,

For a long time I have wanted to create a wall calendar to make access to the seasonal gardening information easier and more appealing.

Finally my publisher had a template that would work.  Yippeee!

As this is late getting out, the calendar is discounted and further discounted for a short period of time (through January 12th).  There is a shipping charge.

I hope you like it and it is as helpful as I intend.

I would welcome your comments and critiques.

I will be starting work on the 2016 calendar soon and that will be out on time.

You can click on the "preview" under the picture on the site to see several months, and decide if it is right for you.

I am exploring the idea of a downloadable version - I don't know if that would be of interest but I think it would make a nice option for those who are gravitating to mostly digital.

Valley of The Sun Gardening Calendar - 2015

For my other publications you can look at my 'store' on the publisher's site.

Herbs 2 U Publisher Storefront

Get your growing on!

-- Catherine, The Herb Lady

Saturday, December 27, 2014

2015 Get Your Growing On!

Dear Folks,

As we wind down out of 2014, time for moral support and ideas for getting you into a garden or adding to.

First a recipe:  Most of us know how good brussels sprouts are for you - but a lot of folks don't know how to make these mini-cabbages taste good.  I have enjoyed them roasted - the baking makes the sugars caramelize, but I've been intrigued with the idea of eating them raw.  Bingo a shaved / shredded idea I adapted for Christmas dinner.  I'm in love with this, and hope you enjoy it too.

Shredded Brussels Sprouts Salad

Proportions of ingredients are approximate.  You can add or subtract the ingredients of the  salad itself but keep the dressing ratios together.  You want a bit of tang from the juice.

1 pound of brussels sprouts
2 tart sweet apples like Gala or Sundowner
1/2 cup slivered or sliced almonds
1/4 cup dried cranberries


3 tablespoons lemon or lime juice (juice your fruit, save 1 teaspoon of juice and rind)
3 tablespoons avocado oil or olive oil
1/2 teaspoon salt
crushed black pepper

 Make acidulated water:  Place reserved lemon juice and rind in bowl with water - this is for the apples.

Core apples and dice into cubes and immediately place in the lemon water while you prepare sprouts.

Prep the brussels sprouts by removing any damaged outer leaves, split in half length wise and cut out the core/stem.

Slice each half in fine layers, essential shredding.  Place in large bowl

Drain apples well and add.  Add almonds and cranberries.

Make dressings from juice, oil, salt and pepper. Shake well and pour over salad.  Toss and fold to mix well.

This salad keeps well for a couple of days in the frig. - it it lasts that long.

. . .

Garden
 
Time to plant potatoes.  I always save some potatoes from the spring harvest for replanting next season, and they almost always sprout in the frig during the summer/fall 'sleep' period.  This year's crop went a little wild!  But going into the ground a little earlier than my traditional potato planting on January 1st.

Bury an inch or two below ground in a prepared area.  Have leaves ready to cover and to add to, as the plants begin to grow up.  This ensures the 'taters are never exposed to sunlight, which can produce toxy solanine (that excess green you sometimes see on potatoes).

This is a mix of purple, red and white potoates.  I'm hoping for a good crop in April.  Mine are usually ready to harvest around Easter when I have fun with purple potato and Organic deep orange-yolk eggs from the market for a lovely and tasty potato salad.

. . .

Early starts to late January / early February planting out.

Since I've lost so much time this past year with health distractions of family and mine, I decided to get seeds going early for tomatoes and other going-into-warm planting season things like tomatoes and basil.  Later I will start out cantaloupe, watermelon and sunflowers.

This strange looking idea is my experiment with germinating seeds, quickly so I can see which are viable to pop into my jiffy peat pellets (these discs expand in water).  In the past I've had to wait to see if something germinated in a plug before trying a different seed.  A big waste of space and time.

As I recommend pre-soaking seeds to speed up germination time and increase germination rate, I decided to go one step further and germinate in a little container which allowed me to keep each of the seeds separated so I could easily pluck them out and gently put into the jiffy pellet.

This worked amazingly well and FAST!  This is 6 days from start to ready to put in the plugs.  Typical germination rate without soaking is about 10days to 3 weeks, less if you pre-soak, but 6 days - I'm amazed.

I hope to have what I call "starts" available at the Mesa Farmers Market the first week in February.

I use the plastic containers produce etc. comes in from the store for mini-greenhouses during the cool time of the year.  The rest of the year when I'm starting things I just put out in trays on my racks in direct sun.

Once these are in the jiffy pellets in their mini green houses, I will put them out during the day and move them back into our water heater area to keep them cozy at night.

I will try to remember to post a picture of the next step in jiffy pellets.

. . .

I will be hosting another seed share at the Mesa Farmers Market end of January / beginning of February - date to be determined later.

Permaculture ideas are becoming more and more available both online and in person.

Here is a great 13 reason list of why you should grow some or more of your own food.  I like the short and to-the-point notes;

https://www.openpermaculture.com/magazine/thirteen-reasons-establish-home-permaculture-food-garden

For hands on - you can take a class and tour with Don Titmus over as Rio Salado Permaculture.

He has a one day event coming up the end of January at his Mesa permaculture home.  I have been there and he offers great advice for the beginner gardener as well as some great concepts for those already growing their own.

https://www.facebook.com/events/789635891109865/?source=1&sid_create=3125200881#

Finally, you can join the Valley Permaculture Alliance and participate in forum conversations (free), and check out their classes offered on wide ranging topics of growing food and raising livestock like chickens (small fee).

Valley Permaculture Alliance

You can see some of my conversations at the VPA here.

. . .

My books are available in print or ebook form.  I have a beginner's guide to gardening more successfully in the desert. The heart of the book is a month-by-month planting calendar.

I also have a recipe book to guide you on maximizing flavor with herbs and spices.

Ibook

https://itunes.apple.com/us/artist/catherine-crowley/id372564893?mt=11

amazon - print

http://www.amazon.com/Catherine-Crowley/e/B002C1HWG0/ref=sr_tc_2_0?qid=1367065857&sr=1-2-ent


Barnes & Noble - print and Nook ebook

http://www.barnesandnoble.com/c/catherine-crowley

Kobo

http://store.kobobooks.com/en-US/Search?query=Catherine%20Crowley&fcsearchfield=Author


Lulu

http://www.lulu.com/spotlight/herbs2u


May Your New Year Be Wonderful, Your Family Healthy and Safe, and Your Garden Productive!


-- Catherine, The Herb Lady

Wednesday, December 24, 2014

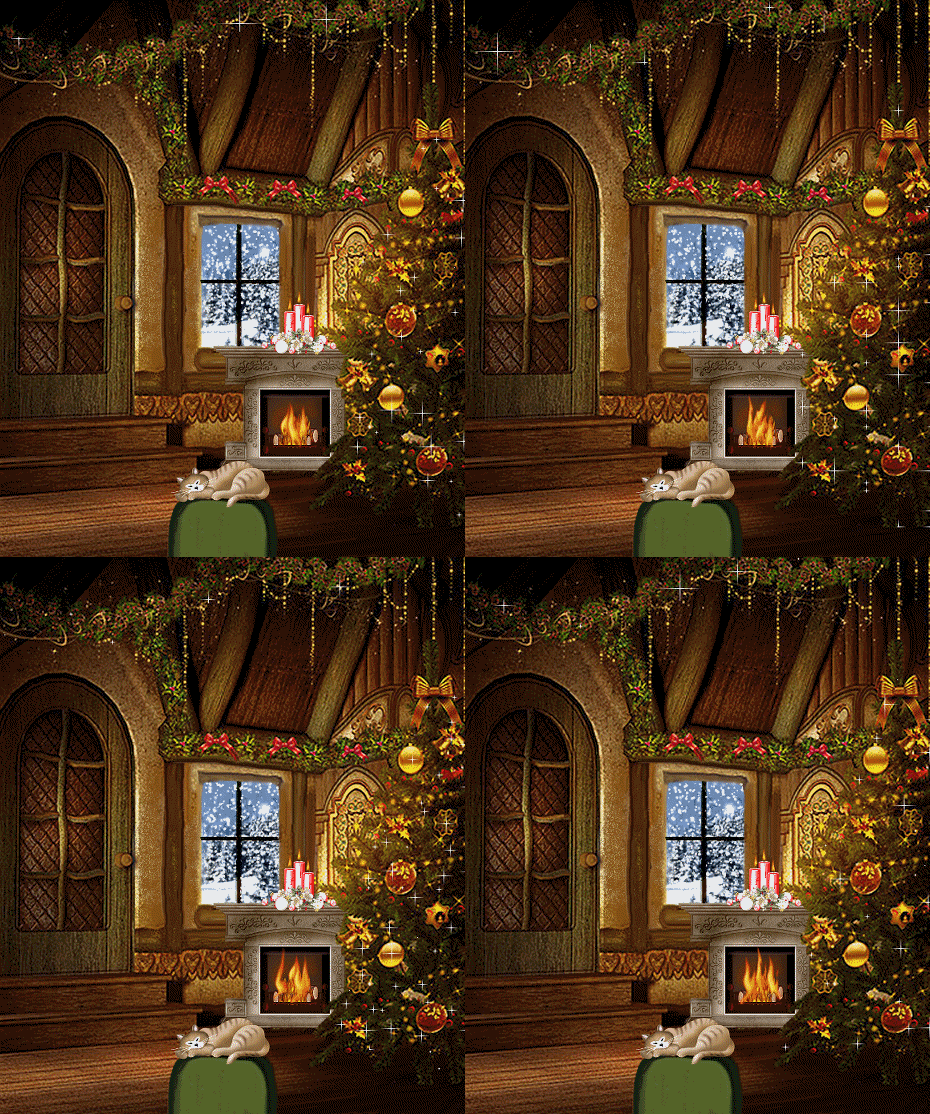
My Dream Cozy Christmas Cottage

Dear Folks,

I asked wonderful Jeni over at Fancy Signatures to build me a cozy Christmas Cottage.

Hope it works and you and enjoy it.


-- Catherine, The Herb Lady

Thursday, December 18, 2014

Let's Say You Want To Start A Food Forest?

Dear Folks,

When the subject of food sources comes up the range of sub-topics is all over the place, but essentially comes down to who produces it and where does a family obtain it?

It is a little to naive, I think, to allow ourselves to be complacent in the who and where.  The important sub-sub-topic is "do I have control" over the who and where?

A number of articles and a video has me trying to put together a simplified concept of growing some or most of your own food - on your property, or sharing the concept with others.

Food Forests are the antithesis of Food Deserts (a term which has come to mean the lack of commercial grocery stores or markets in an urban area - usually a city center but sometimes a blighted neighborhood).

City groups sometimes start food forests to give food to the public at large - notably Seattle Washington and Portland Oregon areas are in the early stages of creating public food forests, where people can literally pick a fruit off of a tree, vine or bush.

So what is a food forest?  Simply put it is a concentrated area producing food on plants.  That it may be part of a park or public thoroughfare is a strong anchoring point to create more appeal.  But it comes down to: Food for Free.  While not entirely free, much labor of love and time, possibly some donated supplies requires the start up and maintenance of the public concept.

I can't say enough how wonderful this idea is and there needs to be more.  If city landscapers are already cleaning and maintaining ornamental plants including litter clean up etc,. the transition to growing edible landscaping in its place is not out of the question (the usual negative is what about the debris, but the ground maintenance people are already cleaning up on a regular basis).

Okay so besides finding a project and volunteering, or starting a public one on your own, what does this have to with home gardeners?

It is about looking at some of the concepts of edible sustainability and food forests in your own back yard.

People get hung up on neat, tidy, orderly gardens.  Doesn't everything need to be in rows or contained, they ask themselves? Shouldn't I have a plan like an orchard setup, or do I have to completely scrape and till my yard to get growing?

Below I've included links to some basic ideas on transforming a backyard or even a couple of backyards into food producing food forests.

These are a combination of very, very old techniques, and keen observation of what nature does.

Some of the ideas you will see are:  nurse planting (using existing vegetation - even weeds - to start plants); density of planting for optimal over-head canopy and shade during the heat; using swales (berms) to keep and hold moisture; using heritage plants; and getting away from the idea that things have to be cookie-cutter orderly..

If you have ever seen an area in the desert where the water obviously drains into a "basin" and looked at the density of the growth vs. areas higher up with sparse growth you will understand more easily the ideas being illustrated.

Density of growth in the desert means less moisture evaporation, less water usage overall and larger more dense plant structures.  All of which equals more production capability.  A forest - but not a forest of orderly trees but a forest of great amounts of FOOD!

I hope these give you lots of ideas.  It is even possible to arrange your food forest in such a way as to need little or no added water over annual rain fall to continue production, after the initial baby-growth stages.

Geoff Lawton is well known to permies for his incredible work on transforming his own land and also showcasing other permaculture concepts.   If the video does not play for you you may need to enter your email.  He does not sell or share this and you will get updates of new video postings which you can always unsubscribe from - personally I want to watch anything he sends!

The use of swales from composting horse manure, native weeds and scrub bush, and making use of existing contours are some of the key concepts here.

http://www.geofflawton.com/fe/75846-high-cold-dry-and-windy

Another component is the way to find water sources in dry areas, and make use of the source - in place.

https://www.youtube.com/watch?v=owlVLwEB11o&list=UUsP1qrocbZejpftk9knjTcQ&index=4

The Kino Heritage Fruit Tree project is one I just learned about and it is fascinating.  These links describe elements of this project and a gentleman named Jesus Garcia who found his life coming full circle from what he thought of as poverty farming in Mexico to sustainable permaculture concepts in Tucson.  Be sure to click on the link for"Tasting History" a vimeo video of Mr. Garcia's journey.

http://www.nytimes.com/2012/11/22/garden/in-tucson-a-search-for-fruit-the-missionaries-knew.html?pagewanted=all&_r=0

The Arizona Sonoran Desert Museum is one of the hosts for the Kino project.

https://www.desertmuseum.org/center/kinofruittrees.php

This nursery is one of those growing the Kino plants.  Native Seed Search is also involved in the project.

 I found myself particularly interested in the Sweet Lime, Quince and the White Pomogrante.

http://www.desertsurvivors.org/Nursery.html

You can read up on one of the community Food Forests Beacon Hill.

And here for one in Colorado.

And finally Brad Lancaster in Tucson, shows water harvesting in urban settings - using run off to grow in concrete islands.

http://www.youtube.com/watch?v=DFbmFnHW2-ghttp://www.youtube.com/watch?v=2iQ-FBAmvBw&list=PL6C0FAFFDAF316814http://www.harvestingrainwater.com/

There is so much information on these concepts on line and on youtube.  I hope you do more of your own research and get planting, or expanding, your own food forest.

Nearly every article recently on food and health gets to the nutrient density of foods for maximum health - and the focal point of the whole topic is real food not processed.

To add to or start your food forest, right now, plant kale and sugar peas - work out from there :-)


-- Catherine, The Herb Lady

Wednesday, December 17, 2014

My 12 Days of Christmas - Worth Re-Posting

Dear Folks,

Back 6 years ago I created a post for each of the 12 days of Christmas.

While many people believe the 12 days lead UP to Christmas Day - in tradition, the 12 days START with Christmas Day going to the Eve of "Little Christmas" - the Epiphany.

That does not limit the thoughts and recipes I share in each day, so click on the links and enjoy.  As these are older posts some of the internal links may no longer be active.

One example are the old articles I wrote for the original East Valley Tribune where I wrote a regular column for about 4 and half years.

One of my goals for 2015 is to go back over those old articles and re-post them here :-)

Have a wonderful holiday season, Merry Christmas and Happy New Year!

-- Catherine, The Herb Lady


http://edibleherbsandflowers.blogspot.com/2008/12/12-days-of-christmas-christmas-day.html

http://edibleherbsandflowers.blogspot.com/2008/12/12-days-of-christmas-2nd-day-of.html

http://edibleherbsandflowers.blogspot.com/2008/12/12-days-of-christmas-3rd-day-of.html

http://edibleherbsandflowers.blogspot.com/2008/12/12-days-of-christmas-4th-day-of.html

http://edibleherbsandflowers.blogspot.com/2008/12/12-days-of-christmas-5th-day-of.html

http://edibleherbsandflowers.blogspot.com/2008/12/12-days-of-christmas-6th-day-of.html

http://edibleherbsandflowers.blogspot.com/2008/12/12-days-of-christmas-7th-day-of.html

http://edibleherbsandflowers.blogspot.com/2009/01/12-days-of-christmas-8th-day-of.html

http://edibleherbsandflowers.blogspot.com/2009/01/12-days-of-christmas-9th-day-of.html

http://edibleherbsandflowers.blogspot.com/2009/01/12-days-of-christmas-10th-day-of.html

http://edibleherbsandflowers.blogspot.com/2009/01/12-days-of-christmas-11th-day-of.html

http://edibleherbsandflowers.blogspot.com/2009/01/12-days-of-christmas-12th-day-of.html