Dear Folks,
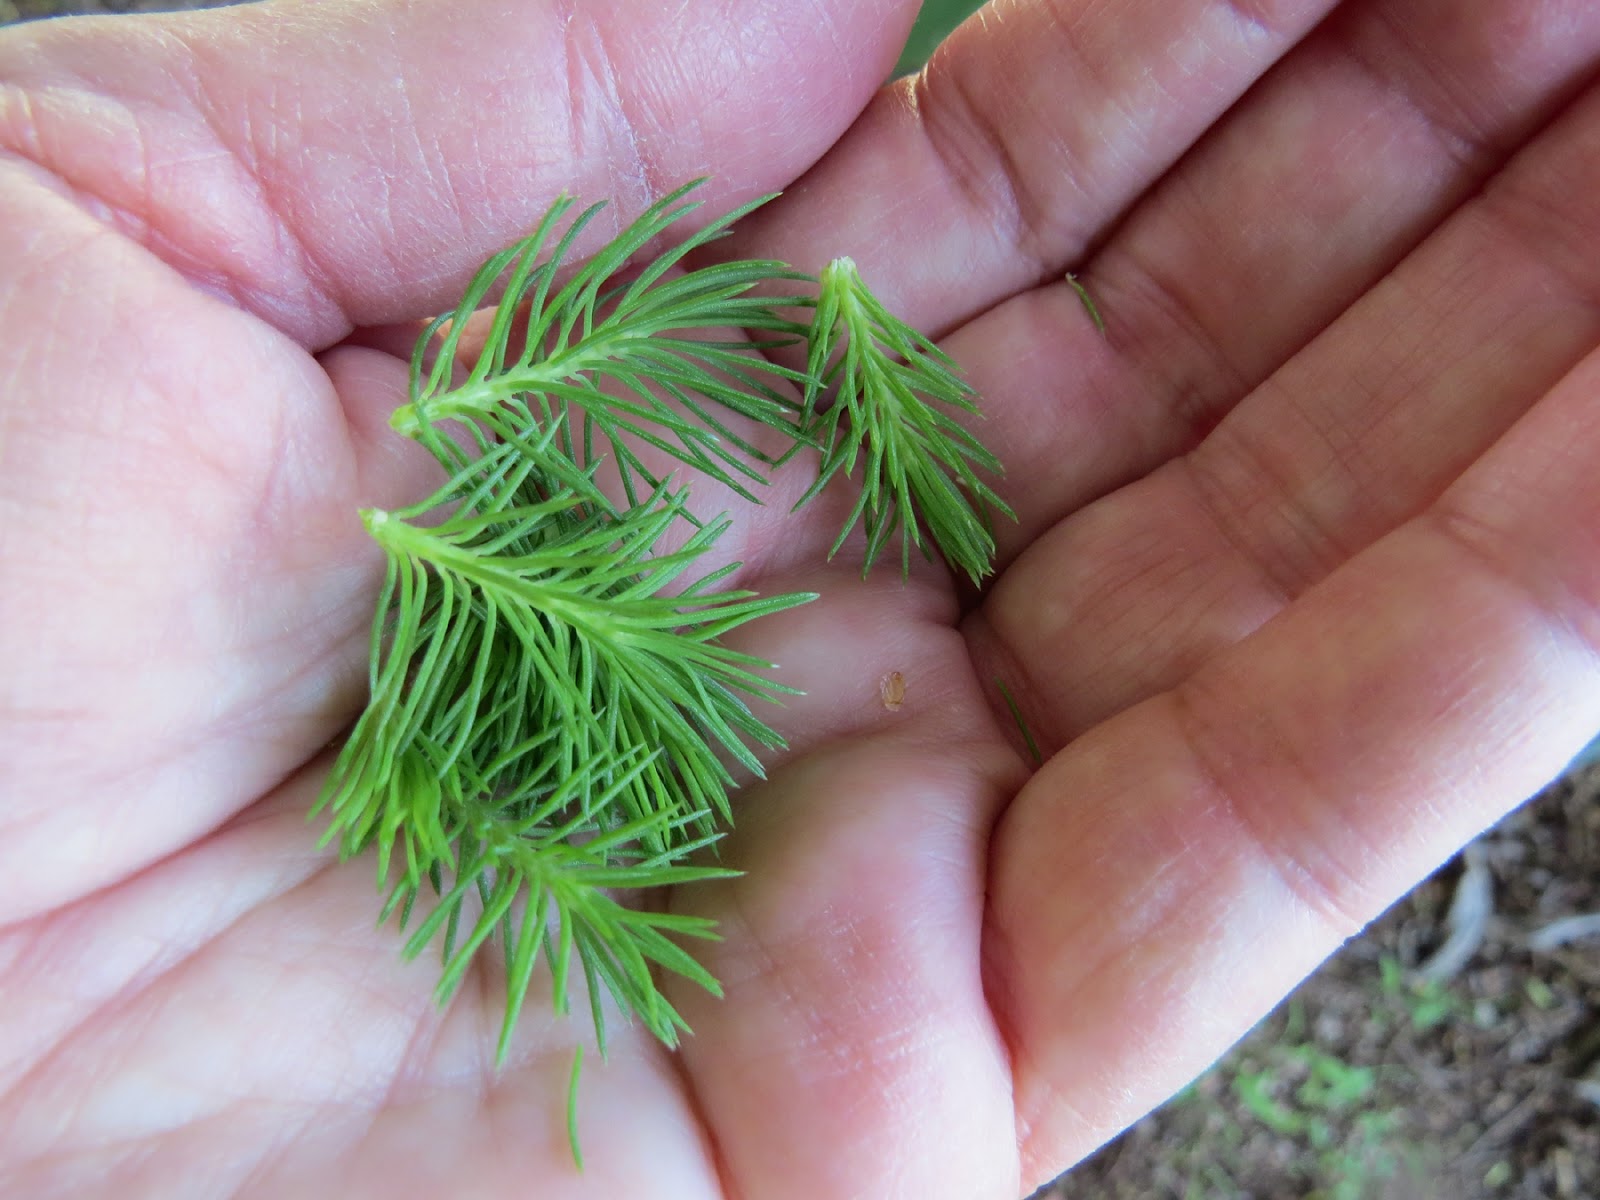
I just plunked some roselle seeds in the garden. (Sow Hibiscus sabdariffa now to have edible leaves for harvesting through the summer (as a lettuce substitute) and the wonderful Vitamin C rich flower calyx in the fall.)
As I was coming back I passed these tasty, tangy pods on one of my plants and grabbed some to show you.
Hint they are not a sugar pea or any kind of pea.
Most people are not aware of this edible seed pod, you usually eat the root!
What is it?
Radish!!
There is even a variety of radish grown specifically for this green edible pod.
You can see information on the "Rat's Tail Radish" on Baker Creek, for more information on that particular variety.
However ALL OF the radish varieties have edible pods. You just need to make sure you get them green and tender, like a sugar pea pod.
I had not harvested this radish and was just ignoring it - the bees love the flowers and suddenly their they were ready for the picking!
What is growing in your garden that you may not recognize as edible?
Have a wonderful, and safe Easter and Passover Weekend,
-- Catherine, The Herb Lady
If you enjoyed this post, subscribe below by entering your email, to get all my posts and share with your friends and family!
Disclaimer: Clicking on links on this blog may earn me a small commission if you purchase something. Your price does not change.
Friday, April 14, 2017
Thursday, April 13, 2017
2 Ingredient Sorbet Results
Dear Folks,
I made the orange juice (our own oranges) and banana sorbet and I thought it turned out great. Like a Granita it was crystalline in texture (think more solid slushy) and we thoroughly enjoyed it.
FYI - I tried posting a picture on Facebook but for some reason I can't post pictures there.
Anyway, I used our Deni Ice Cream maker. If using one of these make sure your liquid is well chilled before hand so the combination of the frozen base and the chilled liquid gives you the best results.
[Second picture below: The banana pieces were mashed and mixed in during the churning process.]
I may try this with some milk, cream or half and half to create a sherbet with a more ice cream consistency. With this combination of fruit and milk I think I will get something closer to an Orange Creamsicle (one of my favorite treats from the Good Humor Man trucks when I was a kid). Oh and maybe I can create a version of the now discontinued "Swiss Chocolate" ice cream which was an orange creamsicle sherbet with chocolate chips in it!!!
If you have not tried using an ice cream maker the final results come out more soft than hard. To harden you need to put into the freezer.
I stirred mine a couple of times during freezing to keep it from turning into a solid frozen juice. With milk or cream it won't be that solid when fully frozen.
The best part is you can mix up your fresh juice and fruit combinations to your and your family preferences. How "cool" is that! (pun intended :-)
-- Catherine, The Herb Lady
Please share with your friends and family who enjoy gardening and cooking. Thank you!
If you enjoyed this post, subscribe below by entering your email, to get all my posts!
Disclaimer: Clicking on links on this blog may earn me a small commission if you purchase something. Your price does not change.
I made the orange juice (our own oranges) and banana sorbet and I thought it turned out great. Like a Granita it was crystalline in texture (think more solid slushy) and we thoroughly enjoyed it.
FYI - I tried posting a picture on Facebook but for some reason I can't post pictures there.
Anyway, I used our Deni Ice Cream maker. If using one of these make sure your liquid is well chilled before hand so the combination of the frozen base and the chilled liquid gives you the best results.
[Second picture below: The banana pieces were mashed and mixed in during the churning process.]
I may try this with some milk, cream or half and half to create a sherbet with a more ice cream consistency. With this combination of fruit and milk I think I will get something closer to an Orange Creamsicle (one of my favorite treats from the Good Humor Man trucks when I was a kid). Oh and maybe I can create a version of the now discontinued "Swiss Chocolate" ice cream which was an orange creamsicle sherbet with chocolate chips in it!!!
If you have not tried using an ice cream maker the final results come out more soft than hard. To harden you need to put into the freezer.
I stirred mine a couple of times during freezing to keep it from turning into a solid frozen juice. With milk or cream it won't be that solid when fully frozen.
The best part is you can mix up your fresh juice and fruit combinations to your and your family preferences. How "cool" is that! (pun intended :-)
-- Catherine, The Herb Lady
Please share with your friends and family who enjoy gardening and cooking. Thank you!
If you enjoyed this post, subscribe below by entering your email, to get all my posts!
Disclaimer: Clicking on links on this blog may earn me a small commission if you purchase something. Your price does not change.
Tuesday, April 11, 2017
Dolma, Stuffed Grape, or Fig, or Nasturtium OR...
![]() |
| Left Nasturtium / Right Fig |
I have written about using my huge nasturtium leaves to make Dolma, the addictive Middle Eastern dish/snack made by stuffing grape leaves with a mixture of grains, maybe meat and herbs.
Several years ago I was sitting at my kitchen table, gazing at my HUGE nasturtium leaves (some 8+ inches across), I started researching Dolma, because I had the idea of using those nasturtium leaves instead of grape leaves.
I was also looking for ways to mimic the already processed grape leaves which are available in cans or jars to make the Dolma. I learned I could make it without the necessity of processing the leaves first - an all-in-one cooking process. Bingo!
Along the way I learned that many of the original Dolma from ancient times were made with fig leaves. Of course! Figs are native to that area of the world, why wouldn't they use the fig leaf. Called "Thrion" Dolma made with fig rather than vine leaves is still found in Greece, Turkey and presumably other areas.
The trick is to get the fig leaves while they are still young and not as leathery as the older leaves*. For the prior two years I missed my opportunity, but this year I actually caught the leaves in time. So I made up a batch of Dolma using half fig and half nasturtium leaves to fill the pot. I had made up a batch of my grain mix (barley and quinoa) and just had to add some shredded carrot and chopped olives. Mix up lemon juice and olive oil and I was ready to fill and cook.
When you pick fig leaves, there is a latex type sap which you want to rinse off, by soaking the leaves for a while. Cut off stem. As you can see, I left the fig leaf intact to allow for rolling.
My Basic Dolma Recipe.
This basic recipe is so easily adapted to your preferences. I like Barley/Quinoa to boost the protein, but you can use any grain or combination you like. You can add meat if you like. Keep the lemon juice/oil proportions pretty much as noted, the 'tang' of the lemon is what gives a lot of flavor to the finished product. [The carrots are to keep the dolmas packed tight for cooking - nice extra flavored snack!]
Comparison of Nasturtium to Fig? I think I liked my nasturtium a bit more than the fig, but I would certainly make it again, just because I have fig trees!
Many leaves can be used to make Dolma. Find leaves you love and give the recipe a try. What unique leaf would you try or have tried??
* My friend Cricket Aldridge has a site (gardenvariety.life) where she posts wonderful ideas for using your garden bounty. She introduced me to the idea of using dried fig leaves for tea. Wonderful! I have a jar of my dried fig leaves for use when I want to add to my cup of tea. Older leaves, that are in perfect condition, can be used for this. Since I missed the young leaves for Dolma last year I made up for it by grabbing nice older leaves to dry and store.
Have a great day in the garden and kitchen!
P.S. If you missed my post on drying herbs and more here is the link.
-- Catherine, The Herb Lady
Like my facebook page and please share this blog if you enjoyed this post.
Find my books and garden calendars for purchase on the sidebar here on the blog.
If you enjoyed this post, subscribe below by entering your email, to get all my posts!
Disclaimer: Clicking on links on this blog may earn me a small commission if you purchase something. Your price does not change.
Sunday, April 09, 2017
Sharing Blueberry Seed Saving and 2 Ingredient Healthy Sorbet Tips
Dear Folks,
My blueberries are coming along nicely.
I am a little under the weather right now so I don't have a lot of creative oophm, but I saw this cool video on saving blueberry seeds I thought I would share with you and also a fun 2 ingredient really healthy sorbet recipe I received from one of the newsletters I get in my email.
Both of these things I want to try.
The blueberry seed saving technique is similar to how you save tomatoes. The idea is to get all the pulp away from the seed so you can get just the seed. While the video does not show storing them, that is exactly what can be done once the seeds are dried and stored properly.
I had never thought of trying to get seeds from my blueberries, I just scarf them up as soon as they are ripe in late May and June (blueberries ripen over time). Now I will let some intentionally get over ripe to harvest seed, chill and plant. I've been meaning to add more blueberry plants to the my container gardens (they need to be in containers here in the valley because you need to help keep the soil acidic), so wouldn't it be cool to get plants from the one I already have!
How to save blueberry seeds
Orange Juice and Bananas = Sorbet!!
I love sorbet!! Any kind of fruit. This recipe overcomes one of the challenges of making sorbet or ice cream for that matter. Sweetness.
You need to add more sugar or choice of sweetener than you think when you freeze things. Cold reduces the sweet taste. This combination, I'm sure, solves that challenge.
I receive Tori Avey's e-newsletter with wonderful recipe ideas focused on her interest in cooking and culinary history. So many great ideas on her site so I encourage you to subscribe and receive her email recipes.
While Tori is using store bought orange juice and bananas, I am going to use some of our own fresh squeezed juice and if my timing is right some of my own bananas! Or if I can't wait store bought bananas.
Tori notes freezing the ingredients and then using your food processor to churn them into this healthy treat. I actually have one of those ice cream makers which uses a drum you freeze ahead of time, so my plan is to, when I'm up for it, blend the fruit and juice and then churn in the frozen drum.
Have a best day!
-- Catherine, The Herb Lady
If you enjoyed this post, subscribe below by entering your email, to get all my posts!
Disclaimer: Clicking on links on this blog may earn me a small commission if you purchase something. Your price does not change.
My blueberries are coming along nicely.
I am a little under the weather right now so I don't have a lot of creative oophm, but I saw this cool video on saving blueberry seeds I thought I would share with you and also a fun 2 ingredient really healthy sorbet recipe I received from one of the newsletters I get in my email.
Both of these things I want to try.
The blueberry seed saving technique is similar to how you save tomatoes. The idea is to get all the pulp away from the seed so you can get just the seed. While the video does not show storing them, that is exactly what can be done once the seeds are dried and stored properly.
I had never thought of trying to get seeds from my blueberries, I just scarf them up as soon as they are ripe in late May and June (blueberries ripen over time). Now I will let some intentionally get over ripe to harvest seed, chill and plant. I've been meaning to add more blueberry plants to the my container gardens (they need to be in containers here in the valley because you need to help keep the soil acidic), so wouldn't it be cool to get plants from the one I already have!
How to save blueberry seeds
Orange Juice and Bananas = Sorbet!!
I love sorbet!! Any kind of fruit. This recipe overcomes one of the challenges of making sorbet or ice cream for that matter. Sweetness.
You need to add more sugar or choice of sweetener than you think when you freeze things. Cold reduces the sweet taste. This combination, I'm sure, solves that challenge.
I receive Tori Avey's e-newsletter with wonderful recipe ideas focused on her interest in cooking and culinary history. So many great ideas on her site so I encourage you to subscribe and receive her email recipes.
While Tori is using store bought orange juice and bananas, I am going to use some of our own fresh squeezed juice and if my timing is right some of my own bananas! Or if I can't wait store bought bananas.
Tori notes freezing the ingredients and then using your food processor to churn them into this healthy treat. I actually have one of those ice cream makers which uses a drum you freeze ahead of time, so my plan is to, when I'm up for it, blend the fruit and juice and then churn in the frozen drum.
Have a best day!
-- Catherine, The Herb Lady
If you enjoyed this post, subscribe below by entering your email, to get all my posts!
Disclaimer: Clicking on links on this blog may earn me a small commission if you purchase something. Your price does not change.
Wednesday, April 05, 2017
Drying Herbs and More for Storage
Dear Folks,
There are many discussions on drying herbs and other foods. It is the perfect way to preserve many kinds of foods for long term storage and later use.
Herbs in particular present a couple of unique challenges.
1) Flavor and Aroma, and
2) Color
One need only look at a dried leaf from a tree to understand the color issue. Dead and dried the leaf is brown, tan or white.
The other, far more important, issue is the flavor and aroma of the herb when dried. After all that is the point of preserving herbs. You want that full amount (or as much as possible) of the essential oils to flavor your food and entice you and your family to dinner.
Some herb essential oils are more sensitive to heat. Thin leafed varieties such as cilantro or parsley don't hold up to cooking or heat as well. The stems of parsley can used to make chicken soup for instance, but if you want to add the leaves the general instructions usually say to add at the last.
TIP: Whenever you are using herbs in cooking, add half for the cooking process and add the other half just before serving.
Back to drying. Check the internet and the recommendations will be: Hang to dry in the kitchen or a dry place; dry in the microwave, or oven (on low); use an electric dehydrator; or the sun.
My preferred method of drying herbs is in the refrigerator.
You may have purchased "freeze-dried" herbs like chives at the store. Freeze-Drying is NOT using the freezer.
Freeze-Drying refers to rapidly removing the moisture from the air at a low (above freezing) temperature to preserve the food.
Our modern refrigerators do this quite nicely, although not at the level of commercial units. I'm sure you have forgotten something in the frig which was open, only to be discovered later as a "dried" whatever-it-used-to-be.
Credit the constant removal of excess moisture in your refrigerator for this result.
Freeze drying herbs does two wonderful things to your herbs: it maintains most or all of the color AND it keeps those wonderful essential oils, thus the flavor and aroma, more intact.
Over the years, after using paper towels or paper plates in various locations (depending on where I had room) for drying the herbs, I finally hit on an upper shelf which is over the meat/cheese keeper drawer and the exact length of cooling racks. Perfect!! Now I can dry two levels of herbs, with or without the paper towels (I use the paper if the leaves are small so they do not drop through).
[Pictured: Chervil on the left, parsley on the right. In the jars already is dill on the left and cilantro on the right.]
Process:
1) Pick the herbs after the sun has been on them for at least an hour, and after any dew has dried off.
DON"T pick on a cool, damp, overcast morning. The essential oils re-treat in the cold making the herb less flavorful and can even make them taste awful. Picking them after the sun has been on them means all those wonderful oils are now at their peak in the leaves.
2) Rinse well to get dust and any critters off them. Spin dry or shake very well.
3) DO NOT CHOP - you will dry (and store) them whole, stems and all. This keeps the flavor and aroma more intact.
When you go to use the dried herbs later, crushing those dried leaves will immediately tell you the flavor is still there.
4) Spread out on a tray, paper towel or plate and label with the herb and date. You will use that information later when you package up the dried herbs.
5) Expect the process to take 1-3 weeks or so depending on how thick the leaves are and how much you are drying. If you are drying a large bunch, turn and rotate as needed to expose all surfaces.
To PREVENT mold the herbs must be perfectly dry before storing in jars.
6) When finished, put in jars with as little crushing as possible to preserve those great flavors. Label and store in your cool, dry, dark pantry. Try to keep them away from the stove where the heat and light can reduce the lifespan of all that flavor.
7) What about the stems? The stems make great flavoring options for soups, stews and stirfrys. Just bundle together while cooking, and remove before serving, as you would a bay leaf. Dried mint stems make nice stirrers for coffee, hot chocolate or tea.
You could certainly use ziplock bags, but I prefer to use jars which can be reused over and over again.
You can dry vegetables in the same way. If you have a bumper crop of carrots, peppers, onions and garlic they can all be dried, after being rinsed and chopped up. It tickles me no end to go into MY pantry to get some dried garlic for use, garlic I grew and dried.
HOW LONG will these last? I have dried Oreganos and Stevia, and more that are over 2 years old and are as fragrant (and tasty) as the day I stored them. A rule of thumb for any dried herb or spice is 6 - 12 months. Go by taste and scent. If you stored and dried them properly they do not go bad, they just start to loose them "oomph" requiring more to achieve the same flavoring.
My BACKUP drying method is our wonderful, intense sun.
[Pictured: My red onion harvest, chopped and on the trays and then fully dried - they can shrink quite a bit.]
Any day the air temperatures are going to be in the mid-80s or higher with a clear bright sun, is a good day to dry in the sun. I use the sun drying for large volumes of herbs or vegetables. Although it would be great to have a refrigerator dedicated to drying, that is not going to happen :-) So the sun helps me out.
I have a set of electric dehydrator trays (Only no motor) I picked up at a yard sale some years ago to expand the amount of drying space.
Place your rinsed herbs or chopped vegetables on trays, lined with aluminum foil or parchment paper (metal trays helps the drying process), and place in the sun. Cover lightly with either paper towels or one of those picnic net covers. Depending on how much you are drying it may take more than 1 day. BUT bring in the trays at night to keep the food from reabsorbing moisture.
You can even get creative with your drying. Dry several herbs together, in small amounts. When they are finished drying, crush together to form your own blend. SMALL amounts means you will use these blends up before the crushed herbs loose their oomph.
Taking the combination possibilities one step further dried, celery, carrots, onions, bell pepper, and herbs together to create my own salt-free vegetable bouillon, which turned out so awesome I which I had the ability to send you a sniff of it! I used my spice grinder to get it down to a nice coarse powder.
Read up on my prior post on sun drying here
And how I sun dried my Roselle here..
AND last but not least -- if you have enjoyed "kale chips" or other leafy green dried chips, they are easily made in the sun. Rinse, tear into pieces, toss with just the tiniest bit of oil, sprinkle of salt (Parmesan cheese if you like) spread out on a tray in the sun and when dried you have wonderful chips (which you will probably devour in about 2 minutes like I did!).
Actually that was not the last -- I have also made crackers in the sun. Nice to have the sun do some 'cooking' instead of heating up the house with the oven.
Lemon/Rosemary Seed Crackers
1 cup sunflower seeds, ground
2 tablespoons golden flax seeds, ground*
2 tablespoons seasame seeds, leave whole
1/2 teaspoon salt
1/3 cup finely shredded Monterey Jack Cheese
1 tablespoon crushed dried rosemary (if using fresh use 2-3 tablespoons finely chopped)
Zest of 1 lemon
1/2 cup of juice from the lemon (but you may not need all of it).
*Gold flax seeds are milder in flavor than the regular
I have a bullet grinder but you can use any kind of grinder you need to grind the seeds if not already ground.
Put all the dry ingredients in a bowl and stir, add cheese, stir again, then add lemon juice a little at a time until you have a moist but not soggy "mash" and mix well so everything is moistened.
Spread on aluminum foil, silpat or parchment paper. Cover with a piece of wax paper and roll out to even depth - about 1/8 - 1/4 inch, and even up the sides a bit by squaring off. Use a long straight blade to score (or pizza wheel) - you don't have to cut all the way through - it just makes it easier to break up after they cool.
Place in the sun. You may need to flip them to ensure drying all the way. These are ADDICTIVE!
I hope this gives you some great ideas for preserving your bounty to enjoy later on. One of the great things about gardening in the Desert is we can grow, use and store all through the year, following our seasonal harvests. We don't have to jam it all in at one crazed time in the fall.
If you like posts, please share.
You can also like my facebook page.
Have a great day in the garden and kitchen!
-- Catherine, The Herb Lady
P.S. Links for purchasing my books and calendars are on the sidebar here on the blog.
If you enjoyed this post, subscribe below by entering your email, to get all my posts!
Disclaimer: Clicking on links on this blog may earn me a small commission if you purchase something. Your price does not change.
There are many discussions on drying herbs and other foods. It is the perfect way to preserve many kinds of foods for long term storage and later use.
Herbs in particular present a couple of unique challenges.
1) Flavor and Aroma, and
2) Color
One need only look at a dried leaf from a tree to understand the color issue. Dead and dried the leaf is brown, tan or white.
The other, far more important, issue is the flavor and aroma of the herb when dried. After all that is the point of preserving herbs. You want that full amount (or as much as possible) of the essential oils to flavor your food and entice you and your family to dinner.
Some herb essential oils are more sensitive to heat. Thin leafed varieties such as cilantro or parsley don't hold up to cooking or heat as well. The stems of parsley can used to make chicken soup for instance, but if you want to add the leaves the general instructions usually say to add at the last.
TIP: Whenever you are using herbs in cooking, add half for the cooking process and add the other half just before serving.
Back to drying. Check the internet and the recommendations will be: Hang to dry in the kitchen or a dry place; dry in the microwave, or oven (on low); use an electric dehydrator; or the sun.
My preferred method of drying herbs is in the refrigerator.
You may have purchased "freeze-dried" herbs like chives at the store. Freeze-Drying is NOT using the freezer.
Freeze-Drying refers to rapidly removing the moisture from the air at a low (above freezing) temperature to preserve the food.
Our modern refrigerators do this quite nicely, although not at the level of commercial units. I'm sure you have forgotten something in the frig which was open, only to be discovered later as a "dried" whatever-it-used-to-be.
Credit the constant removal of excess moisture in your refrigerator for this result.
Freeze drying herbs does two wonderful things to your herbs: it maintains most or all of the color AND it keeps those wonderful essential oils, thus the flavor and aroma, more intact.
Over the years, after using paper towels or paper plates in various locations (depending on where I had room) for drying the herbs, I finally hit on an upper shelf which is over the meat/cheese keeper drawer and the exact length of cooling racks. Perfect!! Now I can dry two levels of herbs, with or without the paper towels (I use the paper if the leaves are small so they do not drop through).
[Pictured: Chervil on the left, parsley on the right. In the jars already is dill on the left and cilantro on the right.]
Process:
1) Pick the herbs after the sun has been on them for at least an hour, and after any dew has dried off.
DON"T pick on a cool, damp, overcast morning. The essential oils re-treat in the cold making the herb less flavorful and can even make them taste awful. Picking them after the sun has been on them means all those wonderful oils are now at their peak in the leaves.
2) Rinse well to get dust and any critters off them. Spin dry or shake very well.
3) DO NOT CHOP - you will dry (and store) them whole, stems and all. This keeps the flavor and aroma more intact.
When you go to use the dried herbs later, crushing those dried leaves will immediately tell you the flavor is still there.
4) Spread out on a tray, paper towel or plate and label with the herb and date. You will use that information later when you package up the dried herbs.
5) Expect the process to take 1-3 weeks or so depending on how thick the leaves are and how much you are drying. If you are drying a large bunch, turn and rotate as needed to expose all surfaces.
To PREVENT mold the herbs must be perfectly dry before storing in jars.
6) When finished, put in jars with as little crushing as possible to preserve those great flavors. Label and store in your cool, dry, dark pantry. Try to keep them away from the stove where the heat and light can reduce the lifespan of all that flavor.
7) What about the stems? The stems make great flavoring options for soups, stews and stirfrys. Just bundle together while cooking, and remove before serving, as you would a bay leaf. Dried mint stems make nice stirrers for coffee, hot chocolate or tea.
You could certainly use ziplock bags, but I prefer to use jars which can be reused over and over again.
You can dry vegetables in the same way. If you have a bumper crop of carrots, peppers, onions and garlic they can all be dried, after being rinsed and chopped up. It tickles me no end to go into MY pantry to get some dried garlic for use, garlic I grew and dried.
HOW LONG will these last? I have dried Oreganos and Stevia, and more that are over 2 years old and are as fragrant (and tasty) as the day I stored them. A rule of thumb for any dried herb or spice is 6 - 12 months. Go by taste and scent. If you stored and dried them properly they do not go bad, they just start to loose them "oomph" requiring more to achieve the same flavoring.
[Pictured: My red onion harvest, chopped and on the trays and then fully dried - they can shrink quite a bit.]
Any day the air temperatures are going to be in the mid-80s or higher with a clear bright sun, is a good day to dry in the sun. I use the sun drying for large volumes of herbs or vegetables. Although it would be great to have a refrigerator dedicated to drying, that is not going to happen :-) So the sun helps me out.
I have a set of electric dehydrator trays (Only no motor) I picked up at a yard sale some years ago to expand the amount of drying space.
Place your rinsed herbs or chopped vegetables on trays, lined with aluminum foil or parchment paper (metal trays helps the drying process), and place in the sun. Cover lightly with either paper towels or one of those picnic net covers. Depending on how much you are drying it may take more than 1 day. BUT bring in the trays at night to keep the food from reabsorbing moisture.
You can even get creative with your drying. Dry several herbs together, in small amounts. When they are finished drying, crush together to form your own blend. SMALL amounts means you will use these blends up before the crushed herbs loose their oomph.
Taking the combination possibilities one step further dried, celery, carrots, onions, bell pepper, and herbs together to create my own salt-free vegetable bouillon, which turned out so awesome I which I had the ability to send you a sniff of it! I used my spice grinder to get it down to a nice coarse powder.Read up on my prior post on sun drying here
And how I sun dried my Roselle here..
AND last but not least -- if you have enjoyed "kale chips" or other leafy green dried chips, they are easily made in the sun. Rinse, tear into pieces, toss with just the tiniest bit of oil, sprinkle of salt (Parmesan cheese if you like) spread out on a tray in the sun and when dried you have wonderful chips (which you will probably devour in about 2 minutes like I did!).
Actually that was not the last -- I have also made crackers in the sun. Nice to have the sun do some 'cooking' instead of heating up the house with the oven.
Lemon/Rosemary Seed Crackers
1 cup sunflower seeds, ground
2 tablespoons golden flax seeds, ground*
2 tablespoons seasame seeds, leave whole
1/2 teaspoon salt
1/3 cup finely shredded Monterey Jack Cheese
1 tablespoon crushed dried rosemary (if using fresh use 2-3 tablespoons finely chopped)
Zest of 1 lemon
1/2 cup of juice from the lemon (but you may not need all of it).
*Gold flax seeds are milder in flavor than the regular
I have a bullet grinder but you can use any kind of grinder you need to grind the seeds if not already ground.
Put all the dry ingredients in a bowl and stir, add cheese, stir again, then add lemon juice a little at a time until you have a moist but not soggy "mash" and mix well so everything is moistened.
Spread on aluminum foil, silpat or parchment paper. Cover with a piece of wax paper and roll out to even depth - about 1/8 - 1/4 inch, and even up the sides a bit by squaring off. Use a long straight blade to score (or pizza wheel) - you don't have to cut all the way through - it just makes it easier to break up after they cool.
Place in the sun. You may need to flip them to ensure drying all the way. These are ADDICTIVE!
I hope this gives you some great ideas for preserving your bounty to enjoy later on. One of the great things about gardening in the Desert is we can grow, use and store all through the year, following our seasonal harvests. We don't have to jam it all in at one crazed time in the fall.
If you like posts, please share.
You can also like my facebook page.
Have a great day in the garden and kitchen!
-- Catherine, The Herb Lady
P.S. Links for purchasing my books and calendars are on the sidebar here on the blog.
If you enjoyed this post, subscribe below by entering your email, to get all my posts!
Disclaimer: Clicking on links on this blog may earn me a small commission if you purchase something. Your price does not change.
Friday, March 31, 2017
Asparagus - Patience Pays Off!
Dear Folks,
I call Asparagus the Patience Plant because you plant them and don't get to even first taste them for about 2 years, but then down the road, you get to harvest bonanzas like those pictured here.
Let me discuss some planting basics and then talk about eating them - right from the garden - raw!
Here in the valley, we plant asparagus "crowns" during the winter - usually December/January, but you can still get them in February.
Figure our where you want the bed. Plan on 6 or so plants per person in your home. They will be planted in 1, 2 or more rows depending on your available space. I recommend running the rows east to west to ensure sun ALL year long.
Prepare the soil by digging at least 18 inches down and amend with compost if you have not already.
For each row dig out 12 inches of and reserve half of it in a place where you can easily get to it. You will be adding it back in little by little as the plants grow. Take half of the soil and mound to create a pyramid down the center of the row.
Asparagus plants/crowns are sold as bare root and it is mostly bare root with a small crown which is the growing part. Spread the roots over the soil row, Get all the plants positioned and add some of the reserved soil back in to completely cover the roots and just barely cover the crown. Water in well and maintain a watering schedule that does not allow the beds to completely dry out.
In late January to early February you will see the first growth. Pictured is one that is about 3 days old. Once they break the soil surface they can grow several inches in a day.. You want to cut them when they are no more than 8 inches or so tall and use a sharp knife to cut down at soil level.
The first year you will NOT CUT any - however hard that is. You need to let the plants grow and create the ferny growth I call "feathers". This growth needs to continue for a full year and you will cut it all back, to the ground, in December.
[Pictured: The "feathers" begin to turn umber in color going into December which signals it is time to cut them down. If you have grown the houseplant asparagus fern you will recognize the form these take - wild and woolly looking but that it what is feeding the plant roots.]
When the new growth starts in the SECOND year, you can harvest for 1 week, then repeat allowing the plants to grow all year, cut back in December.
In the THIRD year you can harvest for 2 weeks.
Beginning in the FOURTH year you can harvest for 6 weeks and there after each year 6 weeks (maybe cheat a bit and harvest or an additional week). BUT you must let the plants grow through out each year to feed energy back into the roots.
These beds can last for many, many years giving you a bounty harvest, rewarding you for your patience the first several years.
Our beds are over 10 years old. The cut spears shown above are from our oldest plants. The gardens got a little overwhelmed by our strawberries a couple of years ago (more on that below*) and we had to add some new plants and they are just getting going.
*Strawberries are the perfect companion plants for an asparagus bed. With the rows of asparagus planted east to west, the strawberries grow lush and thick to the south. BUT they can begin taking over the asparagus so you need to diligent in keeping the strawberries from smothering the asparagus.
Never in his life, did Deane EVER think he would eat an asparagus raw, but when I asked him to try one cut straight from the garden some years ago he was amazed at the sweet and wonderful taste. He grew up with all vegetables cooked to death, and while he still likes them they way I cook them in a bit of fat or roasted on the grill, he does truly enjoy them raw in salads.
So... raw in salads, sauteed, steamed or roasted - check. How about a vegetable Lasagna? Check! [Pictured: I did a huge vegetable lasagna several years ago with asparagus (showing the asparagus layer before adding more layers) and squash from the garden along with a bunch of herbs - oh yum!]
I have enough we are BBQ'ing this weekend so I will make some asparagus bundles on the grill. Take 3-5 spears, some fresh basil leaves and wrap all in one piece of bacon, anchor with toothpicks (don't forget to remove them before serving) and grill on direct heat, turning to completely cook the bacon - about 5 minutes total - and you have a outstanding side dish.
In the mean time I had extra so I decided to ferment some. Lacto fermenting is a preserving technique I have been using for some years since I figured out how to do it simply. Just brine (2 teaspoons of either sea salt or kosher salt - not iodized salt - to each cup of water, dissolved thoroughly. Put whatever veggie you want to ferment in clean jars, cover with brine (cool if you heated to dissolve the salt), weight down with a pickle weight or a small mason jar with a bit of water, lightly cover with cloth or plastic wrap and put aside on the counter - our of breezes and temperature changes - and the fermented/pickled veggies will be done in 5 to 15 days depending. You can sample along the way. Once to your taste, remove weight, cap and store in the refrigerator. [Pictured: I am using a Krautsource fermenting cap. I find this useful with large veggies, not so good with small cut pieces like cabbage for sauerkraut where I like my jar in a jar method -- see next pictures which show my sauerkraut.]
Lacto Fermenting aka brining/pickling is an Old, Old method of preservation. The good old fashioned pickle barrel pickles were made this way, just soaked in a brine solution, which helped to preserve them.
You could leave your capped finished fermented veggies in a cool pantry, but most folks now a-days are not comfortable with un-canned foods.
Why use the brine to preserve rather than vinegar?
Because lacto fermentation creates healthy gut bacteria, similar to yogurt culturing.
With sauerkraut, for instance, the brining brings a tangy, but not tart almost sweet taste to the cabbage, which my family and I love over the overly-vinegary store bought versions.
These brined veggies can last for months or longer (if they last that long) in the refrigerator.
This brining gets good bacteria - naturally present on garden vegetables - to culture. You will see bubbles forming in the jar - this is gas created by the fermentation and means the fermenting is going on. When there are no more or few bubbles it means the process is finished or just about finished and you can cap, refrigerate and enjoy.
Fermenting also tames the sulfur taste and action in the cabbage family.
If you are not growing asparagus, consider planting a bed next December and add this great edible to your garden bounty.
If you enjoyed the post and my blog, please share with your friends and family. Thank you!
Find me on facebook and like my page.
My books and calendars are for sale in links on the sidebar here on the blog.
-- Catherine, The Herb Lady
If you enjoyed this post, subscribe below by entering your email, to get all my posts!
Disclaimer: Clicking on links on this blog may earn me a small commission if you purchase something. Your price does not change.
I call Asparagus the Patience Plant because you plant them and don't get to even first taste them for about 2 years, but then down the road, you get to harvest bonanzas like those pictured here.
Let me discuss some planting basics and then talk about eating them - right from the garden - raw!
Here in the valley, we plant asparagus "crowns" during the winter - usually December/January, but you can still get them in February.
Figure our where you want the bed. Plan on 6 or so plants per person in your home. They will be planted in 1, 2 or more rows depending on your available space. I recommend running the rows east to west to ensure sun ALL year long.
Prepare the soil by digging at least 18 inches down and amend with compost if you have not already.
For each row dig out 12 inches of and reserve half of it in a place where you can easily get to it. You will be adding it back in little by little as the plants grow. Take half of the soil and mound to create a pyramid down the center of the row.
Asparagus plants/crowns are sold as bare root and it is mostly bare root with a small crown which is the growing part. Spread the roots over the soil row, Get all the plants positioned and add some of the reserved soil back in to completely cover the roots and just barely cover the crown. Water in well and maintain a watering schedule that does not allow the beds to completely dry out.
In late January to early February you will see the first growth. Pictured is one that is about 3 days old. Once they break the soil surface they can grow several inches in a day.. You want to cut them when they are no more than 8 inches or so tall and use a sharp knife to cut down at soil level.
The first year you will NOT CUT any - however hard that is. You need to let the plants grow and create the ferny growth I call "feathers". This growth needs to continue for a full year and you will cut it all back, to the ground, in December.
[Pictured: The "feathers" begin to turn umber in color going into December which signals it is time to cut them down. If you have grown the houseplant asparagus fern you will recognize the form these take - wild and woolly looking but that it what is feeding the plant roots.]
When the new growth starts in the SECOND year, you can harvest for 1 week, then repeat allowing the plants to grow all year, cut back in December.
In the THIRD year you can harvest for 2 weeks.
Beginning in the FOURTH year you can harvest for 6 weeks and there after each year 6 weeks (maybe cheat a bit and harvest or an additional week). BUT you must let the plants grow through out each year to feed energy back into the roots.
These beds can last for many, many years giving you a bounty harvest, rewarding you for your patience the first several years.
Our beds are over 10 years old. The cut spears shown above are from our oldest plants. The gardens got a little overwhelmed by our strawberries a couple of years ago (more on that below*) and we had to add some new plants and they are just getting going.
*Strawberries are the perfect companion plants for an asparagus bed. With the rows of asparagus planted east to west, the strawberries grow lush and thick to the south. BUT they can begin taking over the asparagus so you need to diligent in keeping the strawberries from smothering the asparagus.
Never in his life, did Deane EVER think he would eat an asparagus raw, but when I asked him to try one cut straight from the garden some years ago he was amazed at the sweet and wonderful taste. He grew up with all vegetables cooked to death, and while he still likes them they way I cook them in a bit of fat or roasted on the grill, he does truly enjoy them raw in salads.
So... raw in salads, sauteed, steamed or roasted - check. How about a vegetable Lasagna? Check! [Pictured: I did a huge vegetable lasagna several years ago with asparagus (showing the asparagus layer before adding more layers) and squash from the garden along with a bunch of herbs - oh yum!]
I have enough we are BBQ'ing this weekend so I will make some asparagus bundles on the grill. Take 3-5 spears, some fresh basil leaves and wrap all in one piece of bacon, anchor with toothpicks (don't forget to remove them before serving) and grill on direct heat, turning to completely cook the bacon - about 5 minutes total - and you have a outstanding side dish.
In the mean time I had extra so I decided to ferment some. Lacto fermenting is a preserving technique I have been using for some years since I figured out how to do it simply. Just brine (2 teaspoons of either sea salt or kosher salt - not iodized salt - to each cup of water, dissolved thoroughly. Put whatever veggie you want to ferment in clean jars, cover with brine (cool if you heated to dissolve the salt), weight down with a pickle weight or a small mason jar with a bit of water, lightly cover with cloth or plastic wrap and put aside on the counter - our of breezes and temperature changes - and the fermented/pickled veggies will be done in 5 to 15 days depending. You can sample along the way. Once to your taste, remove weight, cap and store in the refrigerator. [Pictured: I am using a Krautsource fermenting cap. I find this useful with large veggies, not so good with small cut pieces like cabbage for sauerkraut where I like my jar in a jar method -- see next pictures which show my sauerkraut.]
Lacto Fermenting aka brining/pickling is an Old, Old method of preservation. The good old fashioned pickle barrel pickles were made this way, just soaked in a brine solution, which helped to preserve them.
You could leave your capped finished fermented veggies in a cool pantry, but most folks now a-days are not comfortable with un-canned foods.Why use the brine to preserve rather than vinegar?
Because lacto fermentation creates healthy gut bacteria, similar to yogurt culturing.
With sauerkraut, for instance, the brining brings a tangy, but not tart almost sweet taste to the cabbage, which my family and I love over the overly-vinegary store bought versions.
These brined veggies can last for months or longer (if they last that long) in the refrigerator.
This brining gets good bacteria - naturally present on garden vegetables - to culture. You will see bubbles forming in the jar - this is gas created by the fermentation and means the fermenting is going on. When there are no more or few bubbles it means the process is finished or just about finished and you can cap, refrigerate and enjoy.
Fermenting also tames the sulfur taste and action in the cabbage family.
If you are not growing asparagus, consider planting a bed next December and add this great edible to your garden bounty.
If you enjoyed the post and my blog, please share with your friends and family. Thank you!
Find me on facebook and like my page.
My books and calendars are for sale in links on the sidebar here on the blog.
-- Catherine, The Herb Lady
If you enjoyed this post, subscribe below by entering your email, to get all my posts!
Disclaimer: Clicking on links on this blog may earn me a small commission if you purchase something. Your price does not change.
Wednesday, March 29, 2017
Sugar Peas - How Do I Love Thee - Let Me Count The Ways!
Dear Folks,
I harvested some sugar peas for dinner yesterday and decided I needed to tell you how wonderful and versatile this great vegetable is.
Sugar Peas, Snap Peas, Snow Peas - are varieties of edible pod peas which differ from the English or Spring Pea (Pisum sativum). The pod is tender even at the advanced stage of the peas shown in the picture. [Pictured: More mature pods with one open, a purple variety with blush splashes and the same plant's purple flower.]
Pisum sativum var. saccharatum is commonly known as the snow pea.
Pisum sativum var. macrocarpon ser. cv. is known as the sugar or snap pea
– Wikipedia
[Pictured below: From the garden sugar pea pods, cherry tomatoes, I'itoi onions and basil along with DeCio Sweet Potato Pasta and some meat.]
The nutrient density of this veggie is just about perfect. Low calorie, high protein and fiber. (Note: the protein is incomplete, but easily remedied by eating with other foods such as grains, meat or dairy.)
1 cup of chopped pods has 41 calories, 2.74 gms of protein and 2.5 of fiber and vitamins and minerals including potassium, calcium and Vitamins A and C.
1 cup of matured peas (shucked from still green pods) has approx 117 calories, 7.86 protein and 7.4 fiber, but higher sugars than English (Garden) peas.
Source: Agricultural Research Service, United States Department of Agriculture, National Nutrient Database for Standard Reference, Release 27.
From the growing tip all the way through the dried pea, this incredible edible is just too wonderful to not grow and use completely.
The tender growing tip (about 6 inches) can be used in stir frys or chopped into salads. Likewise the flowers can be added to salads and more (of course you loose the pod down the road) but the plants just "want" to grow more anytime you harvest on a regular basis.
The flat younger pods are the mostly widely known and used. They frequently do not even make into our house.
As the pods mature, the peas start to plump up and grow bigger. In my pasta dish I chopped them up and added them to the pan for a few minutes to just soften, but I can eat these whole and raw.
If you want to shuck them as you would English Peas, by all means do so, but don't discard the pod. I think it is still really tasty even raw, but if you prefer, chop and added to soups, stews and stir frys.
Next allow some of the pods to completely mature to dry brown, papery stage and harvest for:
1) Storing and use as you would any dry pea, and
2) Store for sowing next fall.
Allow the plant to go completely dry and brown before removing from the garden so the nitrogen fixing abilities of the plant, add some nitrogen back into the soil.
Sow sugar peas starting in last summer all the way through mid-March or so every 2-4 weeks. Each plant can produce for months and will produce constantly if you keep the pods harvested.
If you did not grow sugar peas this year, considering adding to your fall sowing plans. You will enjoy them, your family (particularly children grazing through garden) and you garden soil - will all love you!
Have a great day in the garden and kitchen with your bounty!
-- Catherine, The Herb Lady
Like My Facebook Page
You will find links to purchase my books and calendars on the sidebar here on the blog.
If you enjoyed this post, subscribe below by entering your email, to get all my posts!
Disclaimer: Clicking on links on this blog may earn me a small commission if you purchase something. Your price does not change.
I harvested some sugar peas for dinner yesterday and decided I needed to tell you how wonderful and versatile this great vegetable is.
Sugar Peas, Snap Peas, Snow Peas - are varieties of edible pod peas which differ from the English or Spring Pea (Pisum sativum). The pod is tender even at the advanced stage of the peas shown in the picture. [Pictured: More mature pods with one open, a purple variety with blush splashes and the same plant's purple flower.]
Pisum sativum var. saccharatum is commonly known as the snow pea.
Pisum sativum var. macrocarpon ser. cv. is known as the sugar or snap pea
– Wikipedia
[Pictured below: From the garden sugar pea pods, cherry tomatoes, I'itoi onions and basil along with DeCio Sweet Potato Pasta and some meat.]
The nutrient density of this veggie is just about perfect. Low calorie, high protein and fiber. (Note: the protein is incomplete, but easily remedied by eating with other foods such as grains, meat or dairy.)
1 cup of chopped pods has 41 calories, 2.74 gms of protein and 2.5 of fiber and vitamins and minerals including potassium, calcium and Vitamins A and C.
1 cup of matured peas (shucked from still green pods) has approx 117 calories, 7.86 protein and 7.4 fiber, but higher sugars than English (Garden) peas.
Source: Agricultural Research Service, United States Department of Agriculture, National Nutrient Database for Standard Reference, Release 27.
From the growing tip all the way through the dried pea, this incredible edible is just too wonderful to not grow and use completely.
The tender growing tip (about 6 inches) can be used in stir frys or chopped into salads. Likewise the flowers can be added to salads and more (of course you loose the pod down the road) but the plants just "want" to grow more anytime you harvest on a regular basis.
The flat younger pods are the mostly widely known and used. They frequently do not even make into our house.
As the pods mature, the peas start to plump up and grow bigger. In my pasta dish I chopped them up and added them to the pan for a few minutes to just soften, but I can eat these whole and raw.
If you want to shuck them as you would English Peas, by all means do so, but don't discard the pod. I think it is still really tasty even raw, but if you prefer, chop and added to soups, stews and stir frys.
Next allow some of the pods to completely mature to dry brown, papery stage and harvest for:
1) Storing and use as you would any dry pea, and
2) Store for sowing next fall.
Allow the plant to go completely dry and brown before removing from the garden so the nitrogen fixing abilities of the plant, add some nitrogen back into the soil.
Sow sugar peas starting in last summer all the way through mid-March or so every 2-4 weeks. Each plant can produce for months and will produce constantly if you keep the pods harvested.
If you did not grow sugar peas this year, considering adding to your fall sowing plans. You will enjoy them, your family (particularly children grazing through garden) and you garden soil - will all love you!
Have a great day in the garden and kitchen with your bounty!
-- Catherine, The Herb Lady
Like My Facebook Page
You will find links to purchase my books and calendars on the sidebar here on the blog.
If you enjoyed this post, subscribe below by entering your email, to get all my posts!
Disclaimer: Clicking on links on this blog may earn me a small commission if you purchase something. Your price does not change.
Wednesday, March 22, 2017
Summer "Greens" - Start Planning for Lettuce Replacements.
Dear Folks,
I've been enjoying sweet potato greens from early Summer to late Fall for several years but wanted to have a greater selection.
Last summer I actively tried to make sure I had a variety of lettuce replacement greens in my gardens.
The beauty of growing sweet potatoes (the one pictured is one of the purple varieties) is the multiple uses of this edible plant. Happy sweet potatoes can produce yards and yards of vines and leaves, so you can harvest some leaves all summer long, then harvest the tubers in the fall. A win/win for foodies. The leaves and stems can be cooked as you would spinach. The cut vines and leaves have a bit of a sap which can be irritating to some folks. Just rinse in cool water. I love them raw too.
Plant sweet potato slips May through the beginning of July. You can use the same bed as your regular potatoes after harvesting the regular ones in late April through early June. The two types of potatoes grow in opposite temperature ranges. NOTE: Only the sweet potato leaves are edible the Irish/Russet plants (Solano family) have toxic leaves.
Last Spring, a friend gifted me some Egyptian Spinach seeds (aka Molokia --Corchorus olitorius, C. capsularis) and I fell in love with the leaves. The plant is a type of jute (yes the "rope" fiber made from the long stems) but the edible leaves are:
"a very popular green vegetable in Egypt, where it is considered a 'national dish' and a very ancient one. Legend has it that an early Pharaoh who had become seriously ill consulted a healer who told him to begin a diet of Molokia in order to be cured. The Pharaoh did so, and ever after the herb has been held in high esteem. It is most commonly known in the West by its original Egyptian name, or by the term 'Jews' Mallow.'" -- http://aggie-horticulture.tamu.edu/newsletters/hortupdate/2012/sept/molokia.html
Sow Egyptian Spinach seeds near the end of April.
The next lettuce substitute is another multi-edible plant "Roselle" the Hibiscus variety most known for its Vitamin C rich, cranberry-tangy flower calyx. If you have enjoyed "red hibiscus" or "hibiscus" in tea you have had the calyx "Roselle."
But I want to point out the lovely leaves, which also have a milder tangy flavor and are delicious. Also known as Sorrell or Flor de Jamaica, Hibiscus Sabdariffa LOVES our summer heat and full sun and can be a 6+ foot wide bush by the end of the summer. The flower calyx are ready in late fall, but the leaves can be enjoyed all summer long. (Sow the seeds around the end of April.)
Lastly the ubiquitous purslane (Portulaca oleracea), the weed usually hated by gardeners, but a heat loving vegetable. There are some "domestic" types of purslane propagated specifically for home edible garden use.
Known in Spanish as "Verdolagas" it is most known as a pot herb and used in stir-fry type dishes.
Purslane has a succulent, slightly tangy tasting leaf and is high in Vitamin A, C and Potassium. It is frequently prepared with pork using the entire tender stem and leaf.
Using These Leaves
All of the leaves of these plants can be used in salads and on sandwiches in place of common lettuce.
When I make soups or stews I like to sliver the leaves and add directly to the soup or stew just before removing from the heat.
Or, I will place a portion (1/2 cup or more) of all of the mixed greens in the bowl and ladle over OR top the soup / stew in the bowl with the mixture.
Wild Mustard is a member of the broccoli family. The young plant pictured has a nice mildish spicy bite and can be used in any number of ways: salads, as a herb mix "pesto" type sauce in soups and stews.
And a picture of a more mature plant where the tiny yellow flower is more visible. These older plants can be quite spicy-mustardy-hot.
A new to me edible weed is one that is a pest in the gardens. A trailing weed that can be very invasive the Hoary (Hairy) Bowlesia Incana is from the Parsley/Carrot family. While visiting the Desert Kitchen FB page (link above) there was a question on this plant and I recognized the name, but then learned it is edible. Hey, if you have a pest plant in the garden rather than compost, eat it! The taste is mild.
-- Catherine, The Herb Lady
If you enjoyed this post, subscribe below by entering your email, to get all my posts!
Disclaimer: Clicking on links on this blog may earn me a small commission if you purchase something. Your price does not change.
I've been enjoying sweet potato greens from early Summer to late Fall for several years but wanted to have a greater selection.
Last summer I actively tried to make sure I had a variety of lettuce replacement greens in my gardens.
The beauty of growing sweet potatoes (the one pictured is one of the purple varieties) is the multiple uses of this edible plant. Happy sweet potatoes can produce yards and yards of vines and leaves, so you can harvest some leaves all summer long, then harvest the tubers in the fall. A win/win for foodies. The leaves and stems can be cooked as you would spinach. The cut vines and leaves have a bit of a sap which can be irritating to some folks. Just rinse in cool water. I love them raw too.
Plant sweet potato slips May through the beginning of July. You can use the same bed as your regular potatoes after harvesting the regular ones in late April through early June. The two types of potatoes grow in opposite temperature ranges. NOTE: Only the sweet potato leaves are edible the Irish/Russet plants (Solano family) have toxic leaves.
Last Spring, a friend gifted me some Egyptian Spinach seeds (aka Molokia --Corchorus olitorius, C. capsularis) and I fell in love with the leaves. The plant is a type of jute (yes the "rope" fiber made from the long stems) but the edible leaves are:
"a very popular green vegetable in Egypt, where it is considered a 'national dish' and a very ancient one. Legend has it that an early Pharaoh who had become seriously ill consulted a healer who told him to begin a diet of Molokia in order to be cured. The Pharaoh did so, and ever after the herb has been held in high esteem. It is most commonly known in the West by its original Egyptian name, or by the term 'Jews' Mallow.'" -- http://aggie-horticulture.tamu.edu/newsletters/hortupdate/2012/sept/molokia.html
Sow Egyptian Spinach seeds near the end of April.
The next lettuce substitute is another multi-edible plant "Roselle" the Hibiscus variety most known for its Vitamin C rich, cranberry-tangy flower calyx. If you have enjoyed "red hibiscus" or "hibiscus" in tea you have had the calyx "Roselle."
But I want to point out the lovely leaves, which also have a milder tangy flavor and are delicious. Also known as Sorrell or Flor de Jamaica, Hibiscus Sabdariffa LOVES our summer heat and full sun and can be a 6+ foot wide bush by the end of the summer. The flower calyx are ready in late fall, but the leaves can be enjoyed all summer long. (Sow the seeds around the end of April.)
Lastly the ubiquitous purslane (Portulaca oleracea), the weed usually hated by gardeners, but a heat loving vegetable. There are some "domestic" types of purslane propagated specifically for home edible garden use.
Known in Spanish as "Verdolagas" it is most known as a pot herb and used in stir-fry type dishes.
Purslane has a succulent, slightly tangy tasting leaf and is high in Vitamin A, C and Potassium. It is frequently prepared with pork using the entire tender stem and leaf.
Using These Leaves
All of the leaves of these plants can be used in salads and on sandwiches in place of common lettuce.
When I make soups or stews I like to sliver the leaves and add directly to the soup or stew just before removing from the heat.
Or, I will place a portion (1/2 cup or more) of all of the mixed greens in the bowl and ladle over OR top the soup / stew in the bowl with the mixture.
Speaking of Weeds - look into using other common weeds like mallow (mild lettuce flavor) and wild mustard (spicy mustard taste).
NOTE: You should always try small amounts of plants which are new to you and your family to determine allergic issues.
Over at The Desert Kitchen Facebook page, they post on using the wild edible plants found all over the Valley along with recipes for things growing in our backyards. Instead of Kale Chips, how about "Mallow Chips"?
Mallow -- the picture is of the Common Mallow (cheese weed named for the shape of the edible seed) and Hollyhock (bottom photo) for visual comparison. The shape of the leaves is similar but the mallow has a more deeply scalloped edge. They are from the same plant family (Malva). The mallow leaf has a mild flavor.
Wild Mustard is a member of the broccoli family. The young plant pictured has a nice mildish spicy bite and can be used in any number of ways: salads, as a herb mix "pesto" type sauce in soups and stews.
And a picture of a more mature plant where the tiny yellow flower is more visible. These older plants can be quite spicy-mustardy-hot.
A new to me edible weed is one that is a pest in the gardens. A trailing weed that can be very invasive the Hoary (Hairy) Bowlesia Incana is from the Parsley/Carrot family. While visiting the Desert Kitchen FB page (link above) there was a question on this plant and I recognized the name, but then learned it is edible. Hey, if you have a pest plant in the garden rather than compost, eat it! The taste is mild. If you missed my blog post on April Planting - here is the link.
The beauty of edible landscaping are the fun options through the various seasons using all of the bounty available, whether intentionally planted or volunteer!
My PDF for planting times on 48 culinary herbs is just $5, click here for more information and a preview.
-- Catherine, The Herb Lady
If you enjoyed this post, subscribe below by entering your email, to get all my posts!
Disclaimer: Clicking on links on this blog may earn me a small commission if you purchase something. Your price does not change.
Saturday, March 18, 2017
This Is Not An Olive, But It Might Be a Really Nice Option!
![]() |
| Brined and cut baby peaches. |
I posted about thinning our peach tree (it is that time of year), and it has always been a sad thing just because of discarding all that potential fruit. The point is to have bigger resulting fruit and to ease the weight on the branches.
I mentioned discovering, several years ago, that these thinned baby peaches can be pickled, after reading about the tradition of Liguria, Italy to pickle baby peaches, baby almonds and similar immature fruit. Here is the thinning and recipe post from several years ago.
This works because the pit is not fully formed when the peaches are thinned when they are 3/4 of an inch or smaller.
I tried the recommended sweet / spicy pickle and it turned out good. I am just not a huge fan of sweet pickles.
Since I have been doing my own home lacto-fermentation (brining) of various vegetables, I thought, why not try this with the baby peaches. It worked wonderfully well with my caper berries last spring/summer.
I am here to tell you this is going to be one of my new favorite additions to all things I would add olives or capers to!!
I have started to keep brine ready for just this kind of opportunity. It keeps well, just remember to use a plastic lid on the glass jar because it is corrosive, it is only salt and water but still can pit any metal that is not stainless steel.
The baby peaches are bitter. The brining removes the bitterness and makes them a salty, crunchy olive-like vegetable.
To make the brine:
1 cup of water
2 teaspoons of kosher or sea salt (NOT iodized salt)
Bring the water to boil or very hot and dissolve the salt in it. Make sure the salt is completely dissolved. You can use immediately after it is cooled or just store in your pantry for later use.
The easiest way to brine is to have two mason jars of different sizes, example: one quart jar and one 8 oz jar. The smaller jar will fit into the larger one to weigh down the peaches. This is important at they need to be kept under the liquid at all times while fermenting.
Mine took 5 days.
Make sure the jars are very clean, have a dish towel or piece of plastic wrap handy (this will keep the dust out while it is fermenting). [PICTURED is a jar of my sauerkraut to illustrate the jar-in-a-jar with plastic cover..]
1. Rinse the baby peaches and remove the stem.
2. Fill the jar with the peaches, up to the shoulder and cover by a 1/2 inch with the brine. Fill the smaller jar with about 1/4 cup of water (for weight) and insert into the brining jar. Place on a plate in case any liquid spills over. Lightly cover with the towel or plastic Place on your counter away from drafts and the stove/oven - this keeps the temperature constant.
You may see bubbles of gas escaping - this is part of the process. Taste after 5 days, if you still detect bitterness let them sit longer. Once they are were you like them, remove the small jar and cover, cap with a plastic lid label and store in the refrigerator. They will last for months and months.
If you have to thin your trees I hope you give this a try to make removing all those baby fruit your gardening skills helped grow, a win/win -- bigger resulting juicy peaches and a tasty addition to your pantry.
-- Catherine, The Herb Lady
If you enjoyed this post, subscribe below by entering your email, to get all my posts!
Disclaimer: Clicking on links on this blog may earn me a small commission if you purchase something. Your price does not change.
Friday, March 17, 2017
Around the Garden - St. Patrick's Day
Dear Folks,
The path in the garden between two Navel Orange trees is a covered in a confetti of orange blossom petals, and the heady fragrance surrounds us when we walk to the deck
Today I will pull my home corning beef out of the refrigerator where it has been brining for 2 weeks and toss it, potatoes and carrots into the big crock pot and cook up dinner for this evening.
This year I am going to cook the cabbage separately, sauteing it on the stove to keep a little crunch in it, before adding to the corned beef dinner serving bowl. I've posted about home corning beef before - here is a link to one post. If you want to try this you need to five yourself 10-14 days (I like 2 weeks) for the beef to brine.
Back to the garden . . .
For Christmas a dear friend sent me a live Dwarf Alberta Spruce Tree in a pot. For years I have been saying I want to try growing a Christmas Tree (I was thinking Fir) for the wonderful fragrance. Well now I have an opportunity. I chose a spot in our gardens which has shade a good portion of the day, After enjoying for the holidays, we planted it on January 2, 2017. And now about 2.5 months later it has new growth!! So pleased at this point. The real test it going to be the intense summer heat. We shall see.
Did you know many of these types of trees are edible? The tips are the part of pine, spruce and fir which are enjoyed. In my picture here you can see the bright green tips mentioned in this blogger's note.
The key to cooking with the tips of evergreen trees is to harvest them when they first begin to emerge from their brown papery casings. At this stage, spruce tips are very tender and have a fresh flavor that tastes lightly of resin with hints of citrus. http://www.laurieconstantino.com/how-to-harvest-spruce-tips-with-recipes-for-using-spruce-tips-or-pine-tips-or-fir-tips/
I may try a couple of the tips to experiment with, but since I am hoping the tree does well here, I don't want to take too much of the new growth, it is going to be the parts that will hopefully adapt to my gardens. I picked a few this morning to try with the cabbage for today's dinner.
I am trying tomatoes and the wonderful Bradford Watermelon in two new spots this year (I have tomatoes and basils in another area as well). I started seedlings in December in my greenhouse.
The Bradford is an incredible heirloom with flavor so sweet it goes all the way to the rind. The skin is so tender it was too fragile to ship and the watermelon was "lost" until a food writer searching for it was contacted by descendants of the original grower.
My plant last year put out about 20 feet of vine and several truly memorable fruit. This year I'm trying several plants in a different location with a different watering pattern.
The two tomato types are a cherry a yellow pear (I think - I did not mark which ones :-)
Two of my Elephant Garlic plants have scapes, which I will cut off and use. Elephant Garlic (Allium ampeloprasum var. ampeloprasum) while a member of the onion family is actually related to the Leek (think leek on steroids and a Leek is a Scallion on steroids :-) Anyway the Elephant Garlic which produces a huge head of cloves is actually milder than the true Garlic (Allium Sativum). I am growing both, but the Elephant is producing scapes first.
While checking the garden this morning and taking pictures, I stepped over to the Pink Grapefruit tree area. If the Navel Oranges decorated the path under them with flower petals, the grapefruit decided to drop most of its old leaves!
This is great because I need leaf litter/mulch to top my potato bed (to keep the growing tubers in the dark).
And I now have 3 sets of Banana Bunches!!!!!
I am thrilled as all of these are ripening at the right time for maximum flavor and harvesting. It will be 1-4 months before they begin to turn yellow. (From flower to ripe is usually about 4 months.) This is the Ice Cream Banana variety Musa acuminata × balbisiana (ABB Group) 'Blue Java'. The ice cream reference is to the creamy consistency of the fruit and the mild vanilla flavor (yes to both although not everyone tastes the vanilla).
I've grown the plants for many years and we have enjoyed the fruit in limited amounts mostly because the ripening began going into the cold fall and winter.
The first bunch flowered sometime in December and we spotted the fruit in early January, The second one flowered in February and the most recent one early March sometime.
Needlesstosay I need to figure out how to enjoy all the fruit as it ripens. Besides fresh I may have to make homemade real banana pudding!
I hope you enjoy a glimpse of my gardens and that it inspires you on your own edible garden journey.
Happy St. Patrick's Day!
-- Catherine, The Herb Lady
If you enjoyed this post, subscribe below by entering your email, to get all my posts!
Disclaimer: Clicking on links on this blog may earn me a small commission if you purchase something. Your price does not change.
The path in the garden between two Navel Orange trees is a covered in a confetti of orange blossom petals, and the heady fragrance surrounds us when we walk to the deck
Today I will pull my home corning beef out of the refrigerator where it has been brining for 2 weeks and toss it, potatoes and carrots into the big crock pot and cook up dinner for this evening.
This year I am going to cook the cabbage separately, sauteing it on the stove to keep a little crunch in it, before adding to the corned beef dinner serving bowl. I've posted about home corning beef before - here is a link to one post. If you want to try this you need to five yourself 10-14 days (I like 2 weeks) for the beef to brine.
Back to the garden . . .
For Christmas a dear friend sent me a live Dwarf Alberta Spruce Tree in a pot. For years I have been saying I want to try growing a Christmas Tree (I was thinking Fir) for the wonderful fragrance. Well now I have an opportunity. I chose a spot in our gardens which has shade a good portion of the day, After enjoying for the holidays, we planted it on January 2, 2017. And now about 2.5 months later it has new growth!! So pleased at this point. The real test it going to be the intense summer heat. We shall see.
Did you know many of these types of trees are edible? The tips are the part of pine, spruce and fir which are enjoyed. In my picture here you can see the bright green tips mentioned in this blogger's note.
The key to cooking with the tips of evergreen trees is to harvest them when they first begin to emerge from their brown papery casings. At this stage, spruce tips are very tender and have a fresh flavor that tastes lightly of resin with hints of citrus. http://www.laurieconstantino.com/how-to-harvest-spruce-tips-with-recipes-for-using-spruce-tips-or-pine-tips-or-fir-tips/
I may try a couple of the tips to experiment with, but since I am hoping the tree does well here, I don't want to take too much of the new growth, it is going to be the parts that will hopefully adapt to my gardens. I picked a few this morning to try with the cabbage for today's dinner.I am trying tomatoes and the wonderful Bradford Watermelon in two new spots this year (I have tomatoes and basils in another area as well). I started seedlings in December in my greenhouse.
The Bradford is an incredible heirloom with flavor so sweet it goes all the way to the rind. The skin is so tender it was too fragile to ship and the watermelon was "lost" until a food writer searching for it was contacted by descendants of the original grower.
My plant last year put out about 20 feet of vine and several truly memorable fruit. This year I'm trying several plants in a different location with a different watering pattern.
The two tomato types are a cherry a yellow pear (I think - I did not mark which ones :-)
Two of my Elephant Garlic plants have scapes, which I will cut off and use. Elephant Garlic (Allium ampeloprasum var. ampeloprasum) while a member of the onion family is actually related to the Leek (think leek on steroids and a Leek is a Scallion on steroids :-) Anyway the Elephant Garlic which produces a huge head of cloves is actually milder than the true Garlic (Allium Sativum). I am growing both, but the Elephant is producing scapes first.
While checking the garden this morning and taking pictures, I stepped over to the Pink Grapefruit tree area. If the Navel Oranges decorated the path under them with flower petals, the grapefruit decided to drop most of its old leaves!
This is great because I need leaf litter/mulch to top my potato bed (to keep the growing tubers in the dark).
And I now have 3 sets of Banana Bunches!!!!!
I am thrilled as all of these are ripening at the right time for maximum flavor and harvesting. It will be 1-4 months before they begin to turn yellow. (From flower to ripe is usually about 4 months.) This is the Ice Cream Banana variety Musa acuminata × balbisiana (ABB Group) 'Blue Java'. The ice cream reference is to the creamy consistency of the fruit and the mild vanilla flavor (yes to both although not everyone tastes the vanilla).
I've grown the plants for many years and we have enjoyed the fruit in limited amounts mostly because the ripening began going into the cold fall and winter.
The first bunch flowered sometime in December and we spotted the fruit in early January, The second one flowered in February and the most recent one early March sometime.
Needlesstosay I need to figure out how to enjoy all the fruit as it ripens. Besides fresh I may have to make homemade real banana pudding!
I hope you enjoy a glimpse of my gardens and that it inspires you on your own edible garden journey.
Happy St. Patrick's Day!
-- Catherine, The Herb Lady
If you enjoyed this post, subscribe below by entering your email, to get all my posts!
Disclaimer: Clicking on links on this blog may earn me a small commission if you purchase something. Your price does not change.
Subscribe to:
Posts (Atom)