Dear Folks,
Yesterday I had the pleasure of attending the GroPhx Summit by The Urban Farm U.
The speakers covered a range of topics from taking control of your food sources (your backyard and gardens) to Seed Sharing, Community Food Banks utilizing gardens, training food entrepaneurs, to raising chickens and goats, to building food communities one street at a time.
Greg Peterson started off the day with a great presentation on Food Systems and how YOU can make it sustainable.
How about the idea of having one community garden per street in a city?
My major take away from this day was this:
The SINGLE most important thing YOU can do in your garden this year (besides plant, harvest and use/share) is to SAVE your seeds each season. I am going to do a separate post on seed saving/sharing because it is so important.
AND remember my Free Seed Share/Swap is this coming Friday (October 2nd) at the Mesa Community Farmers Market.
For me the other important take-away is how I am going to try and get involved with local food bank(s) to find a way to teach their clients to grow some of their own food - if even in a large pot. SNAP benefits can be used to purchase seed and plants that grow food. Spending a small amount of their benefits on food seeds and plants can provide more Food $ value down the road, and maybe, just maybe they can grow enough to have leftover to sell.
Speakers:
Greg Peterson - Urban Farmer and Local Enthusiast. Greg's Urban Farm U has online classes, free webinars (check for those coming up soon), books, and other helping tools and resources for getting your backyard farm/garden going and growing.
Kari Spencer - Master Gardener and Farmer at her "The MicroFarm Project" growing food and raising chickens and goats for eggs and milk.
Michael McDonald, from the Community Food Bank in Tucson talked about how they are incorporating food growing, food entrepreneur training, and food markets into the system of Food Banks to create a true community to tackle all the issues surrounding poverty, poor diet and poor economic communities.
Chad Hudspetch of Endless Food Systems talked about Aquaponics - fish driven food systems to grow food. While many people raise the fish for food you can use the same concept to raise fish just for your own enjoyment. The fish waste feeds the plants and the plant beds clean the water. A Win/Win for growing your veggies.
Bill McDorman of Rocky Mountain Seed Alliance detailed the loss of heirloom seeds, the concentration of commercial seed supplies to just a few - mostly chemical companies and the need for ALL OF US to share seed from our gardens, both locally and regionally to sustain precious varieties and keep us all in control of the future of seeds. While Seed Banks and Seed Vaults are part of the idea, the real seed storage is located right in your back yard, in your gardens, waiting for you to harvest the next generation of regionally adapted food seeds. MORE In my next post.
THERE is a cool opportunity to get seeds in bulk at the end of October. The Great American SeedUp sponsored by The Urban Farm. Tickets are just $5 and they sell out fast!
Scott Murray, a 32-year Organic Farmer spoke on "Intensive Innovative Organic Production:" and how he has consulted on and built backyard to large farm projects utilizing organic methods and intensive and innovative ideas to secure the best food results. One of the very fascinating new projects is growing coffee trees in an avocado orchard - in San Diego, California area. Super concept!
Jake Mace provide a short Tai Chi exercise after lunch to loosen everyone up.
Check out the Speaker Bios here.
Two more organizations were present:
Whole Foods sponsored the breakfast for attendees to promote their WholekidsFoundation.org which provides grants for school gardens, funds school salad bars and has a Healthy Teacher program to show teachers how to cook healthy, to set examples for their students.
IMPORTANT: The WKF is now accepting applications for the School Garden Grants, so if your child's school wants to start or add to an existing one, get the info ASAP>
Our LocalFirst folks have a new tool for you to FIND FOOD. Good Food Finder AZ is where you can search for any source for food, whether farmers market, restaurant, distributor etc. Check it out!
It was a great day for all those who attended to get started or increase their participation and control over their food supply.
. . .
Not part of the summit, this came to me in my email and I had to share this. THE BEST homemade DIY Chicken Feeder - No Spill (or very little). If you have or are considering getting chickens you do need to see this video.
. . .
GET GROWING IN October:
My planting info for October:
Beginning of Primary Planting Season -- Heavy planting possibilities:
Anise; Bay, Greek (Sweet); Beans, Fava; Beets; Bok Choy; Broccoli; Brussels Sprouts; Cabbage; Cabbage, Ornamental; Caraway; Carrots; Cauliflower; Celery; Chard; Chervil; Cilantro; Dill; Endive (and Chicory); Fennel, Leaf; Fruit Trees; Garlic; Kale, Ornamental; Kale; Kohlrabi; Lavender; Lemon Grass; Lemon Verbena; Lettuce (arugula, leaf lettuce etc.); Marjoram; Mints; Mustard; Myrtle; Onions, Green; Onions; Oregano, Greek; Oregano, Mexican; Parsley; Parsnip; Peas, Sugar & English; Potato seeds (not seed potatoes - use seeds) ("seed potatoes" or cut pieces of potato should be planted Nov 1-Jan 1); Radishes; Rosemary; Sage; Savory; Spinach; Tarragon, Mexican; Tarragon, French; Thyme; Turnips
EDIBLE FLOWERS TO PLANT: Calendula; Carnation (Dianthus); Cornflower (Bachelor Buttons); English Daisy; Evening Primrose (Oenothera Berlandieri); Hollyhock; Jasmine Sambac (Arabian); Johnny-Jump Up; Marigolds, including Tangerine Scented (Tagetes Lemonii), Citrus Scented (Tagetes Nelsonii); Nasturtiums; Pansies; Primrose; Scented Geraniums; Shungiku Chrysanthemum; Snapdragons; Stocks (Matthiola); Sweet William (Dianthus); Sweet Alyssum; Violet
Aphids are a major problem with cabbage family - forestall infestations. Add a fingertip of Dawn to 1 quart of water. Shake, pour 1/4 cup down center of each plant once a week.
Check out my wall calendar for all the rest of the month-by-month planting help When to plant all the veggies, fruits, herbs and edible flowers.
-- Catherine, The Herb Lady
Disclaimer: Clicking on links on this blog may earn me a small commission if you purchase something. Your price does not change.
Sunday, September 27, 2015
Monday, September 21, 2015
Growing Stevia, Last Day for Shipping Discounts from My Publisher - and Sun Tea with Stevia
Dear Folks,
Today, September 21st it the last day of my publishers Free Mail Shipping OR 50% off Ground Shipping Offer.
Enter code: FGA915 when checking out and choose either Free Mail Shipping OR 50% off Ground.
My Publisher
This is also the lowest price this year (through September 30th) for my 2016 Edible Landscaping Planting Wall Calendar
Take advantage of these 2 discounts - perhaps a good time to think of gifts for the holidays. :-)
My Edible Landscaping Book.
Or, My Cookbook.
. . .
Sun Tea with Stevia
I am not a commercial soda drinker, but I like seltzer and sparkling waters. I will make homemade sodas with fruit concentrates (such as from my jam canning) or use frozen unsweetened juice concentrates (1/4 juice to 3/4 cold sparkling water).
But when I can make sun tea (when the sun is nice and hot/bright) I make a concentration of organic green tea and some of my dried Stevia and add it to seltzer..
Sun Tea / Stevia Concentrate
Pint Jar
4 bags of Organic Green Tea (use any tea you prefer)
1/4 cup of dried stevia
Set out in sun for 6-10 hours.
Strain and refrigerate for use.
Empty a can of seltzer (12 ounces) into a tall glass and top with the green tea/stevia extract. Sip and enjoy.
. . .
Stevia may be one of the Holy Grails of edible plants in the desert garden. A true sub-tropical it seriously does not like the cold, and dies back each winter. I have been blessed that this plant has come back for 4+ years and occasionally seedlings pop up in the spring. I am in one of the low-chill hour areas of the Valley, which may help in maintaining the live roots through the winter.
I try to take full advantage of its heavy production and dry it for use later. As an element, not an essential oil, the chemical compound (Steviol glycosides) which gives it the incredible sweet taste, is very, very durable. I have 3 year old dried stevia I'm using up for this sun tea and it is still going strong for sweetness.
You can make your own liquid sweetener by adding Stevia to boiling water and let steep for 20-30 minutes. Strain (save the leaves - you can get another steeping like reusing a tea bag), and refrigerate. Use within a week.
I dry the stevia on paper towels in the refrigerator then transfer to mason jars for storage.
Stevia can be grown from seed but is a real challenge as many of the seeds are simply not viable.
More and more I am seeing Stevia plants for sale in the nurserys in the Spring.
GROWING Stevia -- Find a good sunny spot with regular watering. Come late fall when the plant starts to flower and go to seed (you can try and catch the seed) wait for it to start to die back and mound leaves around the base and keep your fingers crossed. I DO NOT remove the old dead stems until well into late spring. I may prune back some of the dead top stuff but I do not mess with the root base, since she has been so good to me I don't want to disturb the roots by yanking on the stems.
Pictured is the Stevia emerging March 7th, then on March 29th, and last taken July 1st - the plant is 18 inched+ tall and at this point (September 21st) the flower heads are starting to dry out a bit. (Time to harvest more for drying :-)
-- Catherine, The Herb Lady
Disclaimer: Clicking on links on this blog may earn me a small commission if you purchase something. Your price does not change.
Today, September 21st it the last day of my publishers Free Mail Shipping OR 50% off Ground Shipping Offer.
Enter code: FGA915 when checking out and choose either Free Mail Shipping OR 50% off Ground.
My Publisher
This is also the lowest price this year (through September 30th) for my 2016 Edible Landscaping Planting Wall Calendar
Take advantage of these 2 discounts - perhaps a good time to think of gifts for the holidays. :-)
My Edible Landscaping Book.
Or, My Cookbook.
. . .
Sun Tea with Stevia
I am not a commercial soda drinker, but I like seltzer and sparkling waters. I will make homemade sodas with fruit concentrates (such as from my jam canning) or use frozen unsweetened juice concentrates (1/4 juice to 3/4 cold sparkling water).
But when I can make sun tea (when the sun is nice and hot/bright) I make a concentration of organic green tea and some of my dried Stevia and add it to seltzer..
Sun Tea / Stevia Concentrate
Pint Jar
4 bags of Organic Green Tea (use any tea you prefer)
1/4 cup of dried stevia
Set out in sun for 6-10 hours.
Strain and refrigerate for use.
Empty a can of seltzer (12 ounces) into a tall glass and top with the green tea/stevia extract. Sip and enjoy.
. . .
Stevia may be one of the Holy Grails of edible plants in the desert garden. A true sub-tropical it seriously does not like the cold, and dies back each winter. I have been blessed that this plant has come back for 4+ years and occasionally seedlings pop up in the spring. I am in one of the low-chill hour areas of the Valley, which may help in maintaining the live roots through the winter.
I try to take full advantage of its heavy production and dry it for use later. As an element, not an essential oil, the chemical compound (Steviol glycosides) which gives it the incredible sweet taste, is very, very durable. I have 3 year old dried stevia I'm using up for this sun tea and it is still going strong for sweetness.
You can make your own liquid sweetener by adding Stevia to boiling water and let steep for 20-30 minutes. Strain (save the leaves - you can get another steeping like reusing a tea bag), and refrigerate. Use within a week.
I dry the stevia on paper towels in the refrigerator then transfer to mason jars for storage.
Stevia can be grown from seed but is a real challenge as many of the seeds are simply not viable.
More and more I am seeing Stevia plants for sale in the nurserys in the Spring.
GROWING Stevia -- Find a good sunny spot with regular watering. Come late fall when the plant starts to flower and go to seed (you can try and catch the seed) wait for it to start to die back and mound leaves around the base and keep your fingers crossed. I DO NOT remove the old dead stems until well into late spring. I may prune back some of the dead top stuff but I do not mess with the root base, since she has been so good to me I don't want to disturb the roots by yanking on the stems.
Pictured is the Stevia emerging March 7th, then on March 29th, and last taken July 1st - the plant is 18 inched+ tall and at this point (September 21st) the flower heads are starting to dry out a bit. (Time to harvest more for drying :-)
-- Catherine, The Herb Lady
Disclaimer: Clicking on links on this blog may earn me a small commission if you purchase something. Your price does not change.
Tuesday, September 15, 2015
Around The Garden - Upcoming Events
Dear Folks,
Strolling through the garden the other day I snapped these pictures.
Part of the reason for showing you these is to remind you that most of them have been growing all summer, through the 115+ heat and up and down humidity.
Top to bottom:
Jerusalem Artichokes aka Sun Chokes
Garlic Chive Flowers
Ginger
Horseradish
Limequat fruit and flower
Sugar Peas sprouting (I sowed them September 2nd)
Purple Sugar Cane
I share pictures through out the year to hopefully inspire you to experiment with new-to-you plants or ones you did not think could be grown here.
. . .
On October 3rd, I am giving a free lecture at Chandler Sunset Library
Grow Herbs - Add Flavor To Your Table!
On October 24th, I will be participating in the Annual Herb Festival at the Boyce Thompson Arboretum. I will be giving an informal Talk/Q&A at my table in the afternoon.
This is also the last weekend of the BTA's Fall Plant Sale , so come on out!
BTA Events
November 21st is this years Author Day at the BTA, More details to be announced, but I will be participating along with other regional and related authors at a day to come out, enjoy the last of the fall color and get to know myself and other authors.
Arboretum Book Festival
. . .
Link to my publications
Have fun in the garden.
-- Catherine, The Herb Lady
Disclaimer: Clicking on links on this blog may earn me a small commission if you purchase something. Your price does not change.
Strolling through the garden the other day I snapped these pictures.
Part of the reason for showing you these is to remind you that most of them have been growing all summer, through the 115+ heat and up and down humidity.
Top to bottom:
Jerusalem Artichokes aka Sun Chokes
Garlic Chive Flowers
Ginger
Horseradish
Limequat fruit and flower
Sugar Peas sprouting (I sowed them September 2nd)
Purple Sugar Cane
I share pictures through out the year to hopefully inspire you to experiment with new-to-you plants or ones you did not think could be grown here.
. . .
On October 3rd, I am giving a free lecture at Chandler Sunset Library
Grow Herbs - Add Flavor To Your Table!
On October 24th, I will be participating in the Annual Herb Festival at the Boyce Thompson Arboretum. I will be giving an informal Talk/Q&A at my table in the afternoon.
This is also the last weekend of the BTA's Fall Plant Sale , so come on out!
BTA Events
November 21st is this years Author Day at the BTA, More details to be announced, but I will be participating along with other regional and related authors at a day to come out, enjoy the last of the fall color and get to know myself and other authors.
Arboretum Book Festival
. . .
Link to my publications
Have fun in the garden.
-- Catherine, The Herb Lady
Disclaimer: Clicking on links on this blog may earn me a small commission if you purchase something. Your price does not change.
Monday, September 14, 2015
El Nino and Water Harvesting.
Dear Folks,
Many of the predictions for this coming winter are that El Nino is expected to be one of the strongest on record. That means the probability of more rain. Which is great! However, is your property set up to take full advantage of it?
Brad Lancaster is THE water harvesting guru and expert on water management in the Southwest.
Below is his wonderful short video on why it is important to manage your property for maximum rainfall retention benefit.
I want to stress the importance of the point he is making about HOW you set up your gardens. In 4-season areas with high rainfall gardening tends to be done ON TOP of mounds or rows to maximize drainage.
Here in the desert with an average of 7 or inches of rain per year we need to:
1) Maximize water retention in the root zone, and
2) Make sure soil salts are washed AWAY from the root zone by flooding the beds.
Brad's muffin tin illustration is superb to illustrate all of this. It is easy to understand that water runs off hills, but settles in depressions.
He further shows just how much water a non-hill garden captures.
Brad Lancaster water harvesting illustration.
Check out Brad's books at Amazon.com
I urge you to try to really understand just how much water runs off your property.
Deane bermed our entire property except for the driveway, so most of the water falling on our property stays on, soaking into the soil. As a result we are able to forgo routine watering (a week's time or more) when we get a .5 inch of rain, depending on temperatures.
-- Catherine, The Herb Lady
For maximum success in your desert gardening consider my Wall-Calendar designed specifically for gardening in the desert with month-by-month planting detail, gardening information and maintenance tips.
2015 is currently discounted
2016 Calendar is now out!
Many of the predictions for this coming winter are that El Nino is expected to be one of the strongest on record. That means the probability of more rain. Which is great! However, is your property set up to take full advantage of it?
Brad Lancaster is THE water harvesting guru and expert on water management in the Southwest.
Below is his wonderful short video on why it is important to manage your property for maximum rainfall retention benefit.
I want to stress the importance of the point he is making about HOW you set up your gardens. In 4-season areas with high rainfall gardening tends to be done ON TOP of mounds or rows to maximize drainage.
Here in the desert with an average of 7 or inches of rain per year we need to:
1) Maximize water retention in the root zone, and
2) Make sure soil salts are washed AWAY from the root zone by flooding the beds.
Brad's muffin tin illustration is superb to illustrate all of this. It is easy to understand that water runs off hills, but settles in depressions.
He further shows just how much water a non-hill garden captures.
Brad Lancaster water harvesting illustration.
Check out Brad's books at Amazon.com
I urge you to try to really understand just how much water runs off your property.
Deane bermed our entire property except for the driveway, so most of the water falling on our property stays on, soaking into the soil. As a result we are able to forgo routine watering (a week's time or more) when we get a .5 inch of rain, depending on temperatures.
-- Catherine, The Herb Lady
For maximum success in your desert gardening consider my Wall-Calendar designed specifically for gardening in the desert with month-by-month planting detail, gardening information and maintenance tips.
2015 is currently discounted
2016 Calendar is now out!
Tuesday, September 08, 2015
Watermelon Rind Jam
Dear Folks,
Last week I saw an article on the internet about using more of the watermelon - works for me, I love using most of any food. If it is plant-based I compost cast-off parts but if there is a fun, tasty or healthy way to eat I want to know about it.
Watermelon Rind has been one of those hmmm kind of things for me. I have tried both candying and pickling it and it was "okay" but not something I want to do on a regular basis.
Also as I get more into really clean food, I want to use something either I have grown or purchased from farmers market where I know the growers.
Soooooo I had our final Black Tail Mountain watermelon sitting in the frig and decided to try making jam from the rind.
The basic recipe calls for skinning the rind, and here a comment in the referenced article said - why not use the skin also, so I did, doing my best to sliver it up. NOTE TO SELF - when using a potato peeler on round objects - cut said objects into sections so you can actually get the peeler to cut into instead of sliding around like a balloon!
The first part of the picture is the ingredients displayed - the original recipe calls for sliced limes - I have limequats.
It is a simple jam recipe - mix, cook down, can.
After we tasted it I asked 'himself' (Deane) what he thought and while the jam was sweet, the watermelon flavor was illusive, but the rind proved too crunch for Deane to really enjoy the jam. If I decide to make again, I will pre-boil the peel down to soft stage before adding to jam mix and proceeding with making the jam - or I may just leave it out
Unlike pickled or candied rind - I would make this again, just have something different in my jam pantry.
My Watermelon Rind Jam
8 cups diced white rind (1/2 Black Tail Mountain Watermelon rind chopped) Peel and sliver peel first
1 1/2 cups sugar
6 limequats seeded and slivered
Scoop out watermelon - a little "meat" is okay on the rind. Cut into sections, and peel, slivering the peel.
Dice rind
In a glass bowl mix rind, peel, lime and sugar, cover and let sit overnight in the frig.
There will be a LOT of liquid as the sugar mascerates the rind (draws out the liquid)..
Pour all of it into your cooking pot and bring to a boil uncovered, then reduce to a medium simmer to cook off the liquid - you are looking for a thickened texture with most of the liquid cooked out. Stir often and make sure you do not burn it - it takes about 35-50 minutes to reduce down. You can mash down with a potato masher to create more texture contrasts, as the rind does stay more solid than other types of jam fruits.
If you are going to can get your canning equipment ready and the pot boiling.
I canned half pints for 12 minutes. It made two - 8 ounce jars.
The original article is here.
The original article mentioned using all of the watermelon except the seeds. STOP! The seeds, like all melon and squash family members are edible. Roasted them tossed with a bit of oil and salt, spread on baking sheet in a 300 degree oven for 30-60 minutes. Stir a couple of times and watch to not let them burn, you are looking for browned. Enjoy!
Using a watermelon seed to skin is something to consider and give a go at different ways to enjoy this beloved fruit. (If the watermelon is an heirloom variety - don't forget to save some of the seeds for sowing next January.)
AND one more recipe idea using some of the melon fruit itself. This recipe is called a pudding, but is more like a "lemon curd". Also the recipe calls for seeding, crushing and straining the fruit to get ONLY the juice. If I make this recipe I will use all of the pulp. (Again, why discard anything!)
http://food52.com/recipes/36704-watermelon-pudding-gelo-d-anguria
. . .
My recipe book is available in print or as a PDF
-- Catherine, The Herb Lady
Last week I saw an article on the internet about using more of the watermelon - works for me, I love using most of any food. If it is plant-based I compost cast-off parts but if there is a fun, tasty or healthy way to eat I want to know about it.
Watermelon Rind has been one of those hmmm kind of things for me. I have tried both candying and pickling it and it was "okay" but not something I want to do on a regular basis.
Also as I get more into really clean food, I want to use something either I have grown or purchased from farmers market where I know the growers.
Soooooo I had our final Black Tail Mountain watermelon sitting in the frig and decided to try making jam from the rind.
The basic recipe calls for skinning the rind, and here a comment in the referenced article said - why not use the skin also, so I did, doing my best to sliver it up. NOTE TO SELF - when using a potato peeler on round objects - cut said objects into sections so you can actually get the peeler to cut into instead of sliding around like a balloon!
The first part of the picture is the ingredients displayed - the original recipe calls for sliced limes - I have limequats.
It is a simple jam recipe - mix, cook down, can.
After we tasted it I asked 'himself' (Deane) what he thought and while the jam was sweet, the watermelon flavor was illusive, but the rind proved too crunch for Deane to really enjoy the jam. If I decide to make again, I will pre-boil the peel down to soft stage before adding to jam mix and proceeding with making the jam - or I may just leave it out
Unlike pickled or candied rind - I would make this again, just have something different in my jam pantry.
My Watermelon Rind Jam
8 cups diced white rind (1/2 Black Tail Mountain Watermelon rind chopped) Peel and sliver peel first
1 1/2 cups sugar
6 limequats seeded and slivered
Scoop out watermelon - a little "meat" is okay on the rind. Cut into sections, and peel, slivering the peel.
Dice rind
In a glass bowl mix rind, peel, lime and sugar, cover and let sit overnight in the frig.
There will be a LOT of liquid as the sugar mascerates the rind (draws out the liquid)..
Pour all of it into your cooking pot and bring to a boil uncovered, then reduce to a medium simmer to cook off the liquid - you are looking for a thickened texture with most of the liquid cooked out. Stir often and make sure you do not burn it - it takes about 35-50 minutes to reduce down. You can mash down with a potato masher to create more texture contrasts, as the rind does stay more solid than other types of jam fruits.
If you are going to can get your canning equipment ready and the pot boiling.
I canned half pints for 12 minutes. It made two - 8 ounce jars.
The original article is here.
The original article mentioned using all of the watermelon except the seeds. STOP! The seeds, like all melon and squash family members are edible. Roasted them tossed with a bit of oil and salt, spread on baking sheet in a 300 degree oven for 30-60 minutes. Stir a couple of times and watch to not let them burn, you are looking for browned. Enjoy!
Using a watermelon seed to skin is something to consider and give a go at different ways to enjoy this beloved fruit. (If the watermelon is an heirloom variety - don't forget to save some of the seeds for sowing next January.)
AND one more recipe idea using some of the melon fruit itself. This recipe is called a pudding, but is more like a "lemon curd". Also the recipe calls for seeding, crushing and straining the fruit to get ONLY the juice. If I make this recipe I will use all of the pulp. (Again, why discard anything!)
http://food52.com/recipes/36704-watermelon-pudding-gelo-d-anguria
. . .
My recipe book is available in print or as a PDF
-- Catherine, The Herb Lady
Saturday, September 05, 2015
Oatmeal & Eggs - It's What's For Dinner, or Breakfast or Lunch
Dear Folks,
I have written about author Leanne Brown and her kickstarter first book called "Good & Cheap: Eat Well on $4 a Day."
I downloaded her PDF of the first book (and gave a donation).
She has now published the first public release of the book for the general public and is in Phoenix for a book signing at the Phoenix location of Changing Hands (300 West Camelback Road) (602-274-0067).
Book Signing by Ms. Brown at Phoenix Changing Hands, September 15th
I continue to be so impressed with her approach on how to solve the ongoing dilemma of eating healthfully on a budget.
I encourage you to buy her book - you are also in turn creating a donated book to a worthy person or family as she donates a book for each one sold.
This is a keeper of a cookbook.
The recipe which initially caught my eye in the first book was her Fried Egg on Oatmeal! My kind of good-for-you-satisfying-food. I have made savory oatmeal before -- you just need to think oatmeal (Old Fashioned kind cooks up in 5 MINUTES!) instead of rice, potatoes, pasta or polenta. In fact my earlier post on her book and this recipe contains nutrient comparisons between polenta and oatmeal (also how to cook the perfect fried egg).
I did make the oatmeal / egg recipe but did not take a picture. So last night thinking about giving her book another plug I made it for our dinner. (Deane says he wants it for Breakfast next time and it is certainly suitable for any meal.)
A 'keeper' as Deane says, satisfying, tasty and the cost was less than $1.00 for our two meals (2 eggs, 1 cup of oatmeal plus flavorings). I used dried onion and Mexican Oregano from my garden, salt and pepper, and a small amount of my homemade butter spread (made from organic butter and avocado oil) and a bit of grated Parmesan cheese.
So here is the picture and my recipe version of Ms. Brown's Oatmeal & Fried Egg meal.
About the picture. My egg is done a bit more than Ms. Brown's - from top to bottom the oatmeal plated, topped with the cheese, and then the egg added (note the crisp edges on my egg because of the butter in my recipe). The last picture is taken from Ms. Brown's first book - the PICTURE that caught my eye immediately wanting make this recipe.
Oatmeal & Egg
Makes 2 Servings
1 cup old fashioned oatmeal
1 3/4 cups water
1 tablespoon dried onion
1 teaspoon dried Mexican oregano
Salt and Pepper
2 tablespoons finely grated Parmesan cheese
1 teaspoon butter spread divided
2 eggs
Set up small frying pan to cook eggs in - have lid handy, and heat the pan on medium high while you cook the oatmeal (the pan has to be screaming hot to cook the eggs).
In a pot add onion, oregano and sprinkle of salt, stir in water, oatmeal and 1/3 teaspoon of butter. Bring to a boil then reduce to simmer stirring regularly - think polenta stirring, until thickened and water is absorbed - about 5 minutes.
Divide the oatmeal onto two plants and top with 1 tablespoon each of grated cheese.
Crack eggs in a small dish and add salt and pepper.
Add rest of butter to pan and swirl to coat, immediately slide eggs in, cover and set timer for 1 minute. When timer goes off remove covered pan to cool burner and set timer again for 1 minute. The 1 minute increments can vary up to 1:20 for each step depending on the size of the eggs and how hot the pan is.
Rest 1 egg on each mound of oatmeal and enjoy!
Normally monochromatic dishes are not what I recommend - you know the mantra of have a rainbow on your plate. The next time I make this dish I will fold in slivered greens and fresh basil to make it colorful.
You can certainly saute some colorful peppers in the pot before adding the oatmeal ingredients. Make it fun, delicious and CHEAP!
I am not able to make the book signing (darn) but a friend is going and will purchase a copy for me.
I hope you try this recipe, read up on Ms. Brown's story, buy the book and share this post with friends, family and anyone you think can find help with Good & Cheap recipes.
-- Catherine, The Herb Lady
I have written about author Leanne Brown and her kickstarter first book called "Good & Cheap: Eat Well on $4 a Day."
I downloaded her PDF of the first book (and gave a donation).
She has now published the first public release of the book for the general public and is in Phoenix for a book signing at the Phoenix location of Changing Hands (300 West Camelback Road) (602-274-0067).
Book Signing by Ms. Brown at Phoenix Changing Hands, September 15th
I continue to be so impressed with her approach on how to solve the ongoing dilemma of eating healthfully on a budget.
I encourage you to buy her book - you are also in turn creating a donated book to a worthy person or family as she donates a book for each one sold.
This is a keeper of a cookbook.
The recipe which initially caught my eye in the first book was her Fried Egg on Oatmeal! My kind of good-for-you-satisfying-food. I have made savory oatmeal before -- you just need to think oatmeal (Old Fashioned kind cooks up in 5 MINUTES!) instead of rice, potatoes, pasta or polenta. In fact my earlier post on her book and this recipe contains nutrient comparisons between polenta and oatmeal (also how to cook the perfect fried egg).
I did make the oatmeal / egg recipe but did not take a picture. So last night thinking about giving her book another plug I made it for our dinner. (Deane says he wants it for Breakfast next time and it is certainly suitable for any meal.)
A 'keeper' as Deane says, satisfying, tasty and the cost was less than $1.00 for our two meals (2 eggs, 1 cup of oatmeal plus flavorings). I used dried onion and Mexican Oregano from my garden, salt and pepper, and a small amount of my homemade butter spread (made from organic butter and avocado oil) and a bit of grated Parmesan cheese.
So here is the picture and my recipe version of Ms. Brown's Oatmeal & Fried Egg meal.
About the picture. My egg is done a bit more than Ms. Brown's - from top to bottom the oatmeal plated, topped with the cheese, and then the egg added (note the crisp edges on my egg because of the butter in my recipe). The last picture is taken from Ms. Brown's first book - the PICTURE that caught my eye immediately wanting make this recipe.
Oatmeal & Egg
Makes 2 Servings
1 cup old fashioned oatmeal
1 3/4 cups water
1 tablespoon dried onion
1 teaspoon dried Mexican oregano
Salt and Pepper
2 tablespoons finely grated Parmesan cheese
1 teaspoon butter spread divided
2 eggs
Set up small frying pan to cook eggs in - have lid handy, and heat the pan on medium high while you cook the oatmeal (the pan has to be screaming hot to cook the eggs).
In a pot add onion, oregano and sprinkle of salt, stir in water, oatmeal and 1/3 teaspoon of butter. Bring to a boil then reduce to simmer stirring regularly - think polenta stirring, until thickened and water is absorbed - about 5 minutes.
Divide the oatmeal onto two plants and top with 1 tablespoon each of grated cheese.
Crack eggs in a small dish and add salt and pepper.
Add rest of butter to pan and swirl to coat, immediately slide eggs in, cover and set timer for 1 minute. When timer goes off remove covered pan to cool burner and set timer again for 1 minute. The 1 minute increments can vary up to 1:20 for each step depending on the size of the eggs and how hot the pan is.
Rest 1 egg on each mound of oatmeal and enjoy!
Normally monochromatic dishes are not what I recommend - you know the mantra of have a rainbow on your plate. The next time I make this dish I will fold in slivered greens and fresh basil to make it colorful.
You can certainly saute some colorful peppers in the pot before adding the oatmeal ingredients. Make it fun, delicious and CHEAP!
I am not able to make the book signing (darn) but a friend is going and will purchase a copy for me.
I hope you try this recipe, read up on Ms. Brown's story, buy the book and share this post with friends, family and anyone you think can find help with Good & Cheap recipes.
-- Catherine, The Herb Lady
Sunday, August 30, 2015
Watermelon Rind Jam - More Re-Cycled Foods.
Dear Folks,
I saw this posted on Yahoo from Food52 and had to share another great use for food scraps normally discarded.
I'm pickled and candied watermelon rind and honestly they were okay, but I'm not hurrying to make more.
I have the last of the Black Tail Mountain Watermelons I was planning on cutting open today and then I saw this recipe and I'm going to make it. (Normally I do compost all kitchen scraps that are not used for making stock.)
Do read the whole article. The peel is discarded in the basic recipe, but the article author did try a version with peel, so you may want to try both version, perhaps split the basic mix in half and add peels to one half and see what you think.
Food52 has launched a "Cooking with Scraps" column - you may with to check out. This is the kind of side cooking ideas I just love.
And one more recipe for watermelon - a "watermelon pudding" which is described as similar to lemon curd. Love the idea - they strain the pulp out - I might try it with the pulp (again not to waste anything).
And finally the watermelon seeds. If it is an heirloom you may wish to save the seeds for replanting (here in the desert plant watermelon in January or February).
OR
You can roast them just like pumpkin seeds. Rinse well, dry, toss with a bit of oil and a dash of salt. Spread on a baking sheet and bake at 350 for 10-15 minutes, stirring half way through. Watch so they do not burn.
All the melon cucumber seeds can be roasted - some may be too small to bother with, but why toss them out when you can make a fun snack.
Talk about using ALL the fruit - this is a winner of a set of options for the beloved watermelon!
-- Catherine, The Herb Lady
If you would like more recipes check out my cookbook "101+ Recipes from The Herb Lady"
Lulu (my publisher site)
http://www.lulu.com/spotlight/herbs2u
Ibook
https://itunes.apple.com/us/artist/catherine-crowley/id372564893?mt=11
amazon - print
http://www.amazon.com/Catherine-Crowley/e/B002C1HWG0/ref=sr_tc_2_0?qid=1367065857&sr=1-2-ent
Barnes & Noble - print and Nook ebook
http://www.barnesandnoble.com/c/catherine-crowley
Kobo
http://store.kobobooks.com/en-US/Search?query=Catherine%20Crowley&fcsearchfield=Author
I saw this posted on Yahoo from Food52 and had to share another great use for food scraps normally discarded.
I'm pickled and candied watermelon rind and honestly they were okay, but I'm not hurrying to make more.
I have the last of the Black Tail Mountain Watermelons I was planning on cutting open today and then I saw this recipe and I'm going to make it. (Normally I do compost all kitchen scraps that are not used for making stock.)
Do read the whole article. The peel is discarded in the basic recipe, but the article author did try a version with peel, so you may want to try both version, perhaps split the basic mix in half and add peels to one half and see what you think.
Olia Hercules' Watermelon Rind Jam
Ingredients:-
- 500 grams (1 pound) watermelon skin, tough thin green rind peeled and discarded, white skin finely chopped
- 300 grams (10 ounces) golden caster sugar (or substitute superfine sugar or demerara or turbinado, ground fine in the food processor)
- 4 limes, halved and thinly sliced (optional, see note in Author Notes above)
-
- Mix all the ingredients together in a container, cover with cling film, and leave in the refrigerator overnight.
- Cook the mixture in a non-reactive saucepan over low heat, making sure the sugar melts before it boils, for 50 minutes or until the watermelon skin turns translucent.
- Pour into 2 warm sterilized 450-milliliter (3/4-pint) jars, seal and let cool. Store in the refrigerator. It should keep unopened for several months.
Food52 has launched a "Cooking with Scraps" column - you may with to check out. This is the kind of side cooking ideas I just love.
And one more recipe for watermelon - a "watermelon pudding" which is described as similar to lemon curd. Love the idea - they strain the pulp out - I might try it with the pulp (again not to waste anything).
And finally the watermelon seeds. If it is an heirloom you may wish to save the seeds for replanting (here in the desert plant watermelon in January or February).
OR
You can roast them just like pumpkin seeds. Rinse well, dry, toss with a bit of oil and a dash of salt. Spread on a baking sheet and bake at 350 for 10-15 minutes, stirring half way through. Watch so they do not burn.
All the melon cucumber seeds can be roasted - some may be too small to bother with, but why toss them out when you can make a fun snack.
Talk about using ALL the fruit - this is a winner of a set of options for the beloved watermelon!
-- Catherine, The Herb Lady
If you would like more recipes check out my cookbook "101+ Recipes from The Herb Lady"
Lulu (my publisher site)
http://www.lulu.com/spotlight/herbs2u
Ibook
https://itunes.apple.com/us/artist/catherine-crowley/id372564893?mt=11
amazon - print
http://www.amazon.com/Catherine-Crowley/e/B002C1HWG0/ref=sr_tc_2_0?qid=1367065857&sr=1-2-ent
Barnes & Noble - print and Nook ebook
http://www.barnesandnoble.com/c/catherine-crowley
Kobo
http://store.kobobooks.com/en-US/Search?query=Catherine%20Crowley&fcsearchfield=Author
Wednesday, August 26, 2015
Garlic and Potatoes - Time to plan for planting this fall and later
Dear Folks,
This is the time of year to start looking for 'seed potatoes' and garlic bulbs to plant.
SATURDAY - August 29th is "More Herbs, Less Salt Day" - another reason to get growing more flavorful herbs and foods in your garden!
Garlic is planted October 1st - no later than October 31st to achieve the nice heads for April harvest.
Potatoes are planted Early December and no later than late January (I traditionally plant my potatoes on January 1st to celebrate the new year).
NOTE: Sweet potatoes are planted the opposite time to Irish potatoes - you plants the sweets late May to early July for October/November harvest.
If you have not saved some potatoes or garlic heads for re-planting (I keep in separate cardboard boxes chilling out in my frig for re-planting later - and yes, they will sprout but that is just fine), I have several sources the I like for purchasing seed potatoes (these are small potatoes grown and harvested specifically for planting).
Baker Creek has a nice selection of garlic to choose from.
I've ordered great garlic and potatoes from Potato Garden before - they are not shipping until mid-October - just an FYI - they do not have a listed email right now -- 1-877-313-7783
I have also gotten organic potatoes from the markets for replanting out. If large, cut into pieces with a couple of "eyes" on each piece and let air dry for a couple of days before planting out.
. . .
My 2016 Desert Gardening Wall Calendar helps you be more successful in the garden with month-by-month planting info.
The calendar is now discounted 10% off the list price of $19.95.
The fall gardening info is helpful NOW!
Have a great day in the garden!
-- Catherine, The Herb Lady
This is the time of year to start looking for 'seed potatoes' and garlic bulbs to plant.
SATURDAY - August 29th is "More Herbs, Less Salt Day" - another reason to get growing more flavorful herbs and foods in your garden!
Garlic is planted October 1st - no later than October 31st to achieve the nice heads for April harvest.
Potatoes are planted Early December and no later than late January (I traditionally plant my potatoes on January 1st to celebrate the new year).
NOTE: Sweet potatoes are planted the opposite time to Irish potatoes - you plants the sweets late May to early July for October/November harvest.
If you have not saved some potatoes or garlic heads for re-planting (I keep in separate cardboard boxes chilling out in my frig for re-planting later - and yes, they will sprout but that is just fine), I have several sources the I like for purchasing seed potatoes (these are small potatoes grown and harvested specifically for planting).
Baker Creek has a nice selection of garlic to choose from.
I've ordered great garlic and potatoes from Potato Garden before - they are not shipping until mid-October - just an FYI - they do not have a listed email right now -- 1-877-313-7783
I have also gotten organic potatoes from the markets for replanting out. If large, cut into pieces with a couple of "eyes" on each piece and let air dry for a couple of days before planting out.
. . .
My 2016 Desert Gardening Wall Calendar helps you be more successful in the garden with month-by-month planting info.The calendar is now discounted 10% off the list price of $19.95.
The fall gardening info is helpful NOW!
Have a great day in the garden!
-- Catherine, The Herb Lady
Monday, August 24, 2015
August 24th - Last Day For Shipping Discount
Dear Folks,
This is the last day to take advantage of the shipping discount by my publisher.
Enter code FGA815 to receive free mail shipping or 50% off ground on my 2016 Wall Calendar or any of my books.
http://www.lulu.com/spotlight/herbs2u
AND the calendar is 10% off until the end of September
-- Catherine, The Herb Lady
This is the last day to take advantage of the shipping discount by my publisher.
Enter code FGA815 to receive free mail shipping or 50% off ground on my 2016 Wall Calendar or any of my books.
http://www.lulu.com/spotlight/herbs2u
AND the calendar is 10% off until the end of September
-- Catherine, The Herb Lady
Thursday, August 20, 2015
My Publisher Shipping Discount - Good through August 24 - just in time for my calendar release.
Dear Folks,
Just in - free mail shipping or 50% off ground
My publisher just added a discount on shipping - free mail or 50% off ground - use code FGA815 - good through August 24th
-- Catherine, The Herb Lady
http://www.lulu.com/shop/catherine-the-herb-lady-and-deane-stanton-photographer/edible-landscaping-in-the-desert-2016/calendar/product-22323929.html
Just in - free mail shipping or 50% off ground
My publisher just added a discount on shipping - free mail or 50% off ground - use code FGA815 - good through August 24th
-- Catherine, The Herb Lady
http://www.lulu.com/shop/catherine-the-herb-lady-and-deane-stanton-photographer/edible-landscaping-in-the-desert-2016/calendar/product-22323929.html
2016 Wall Calendar is Now Available! - Edible Landscaping In the Desert.
Dear Folks,
My Wall Calendar is Now available!

Through the end of September buy at a 10% discount off the $19.95 price ($17.96, plus tax and shipping).
I am excited to get 2016 out in time for you to use not only next year, but for this coming fall gardening information.
As with my 2015 calendar, you have month-by-month planting detail, gardening tips and timely maintenance information. And pictures from my gardens.
I hope you enjoy this year's calendar and I welcome your comments. Order here.
-- Catherine, The Herb Lady
My Wall Calendar is Now available!

Through the end of September buy at a 10% discount off the $19.95 price ($17.96, plus tax and shipping).
I am excited to get 2016 out in time for you to use not only next year, but for this coming fall gardening information.
As with my 2015 calendar, you have month-by-month planting detail, gardening tips and timely maintenance information. And pictures from my gardens.
I hope you enjoy this year's calendar and I welcome your comments. Order here.
-- Catherine, The Herb Lady
Wednesday, August 19, 2015
Planting an 18th Century Herb Garden
Dear Folks,
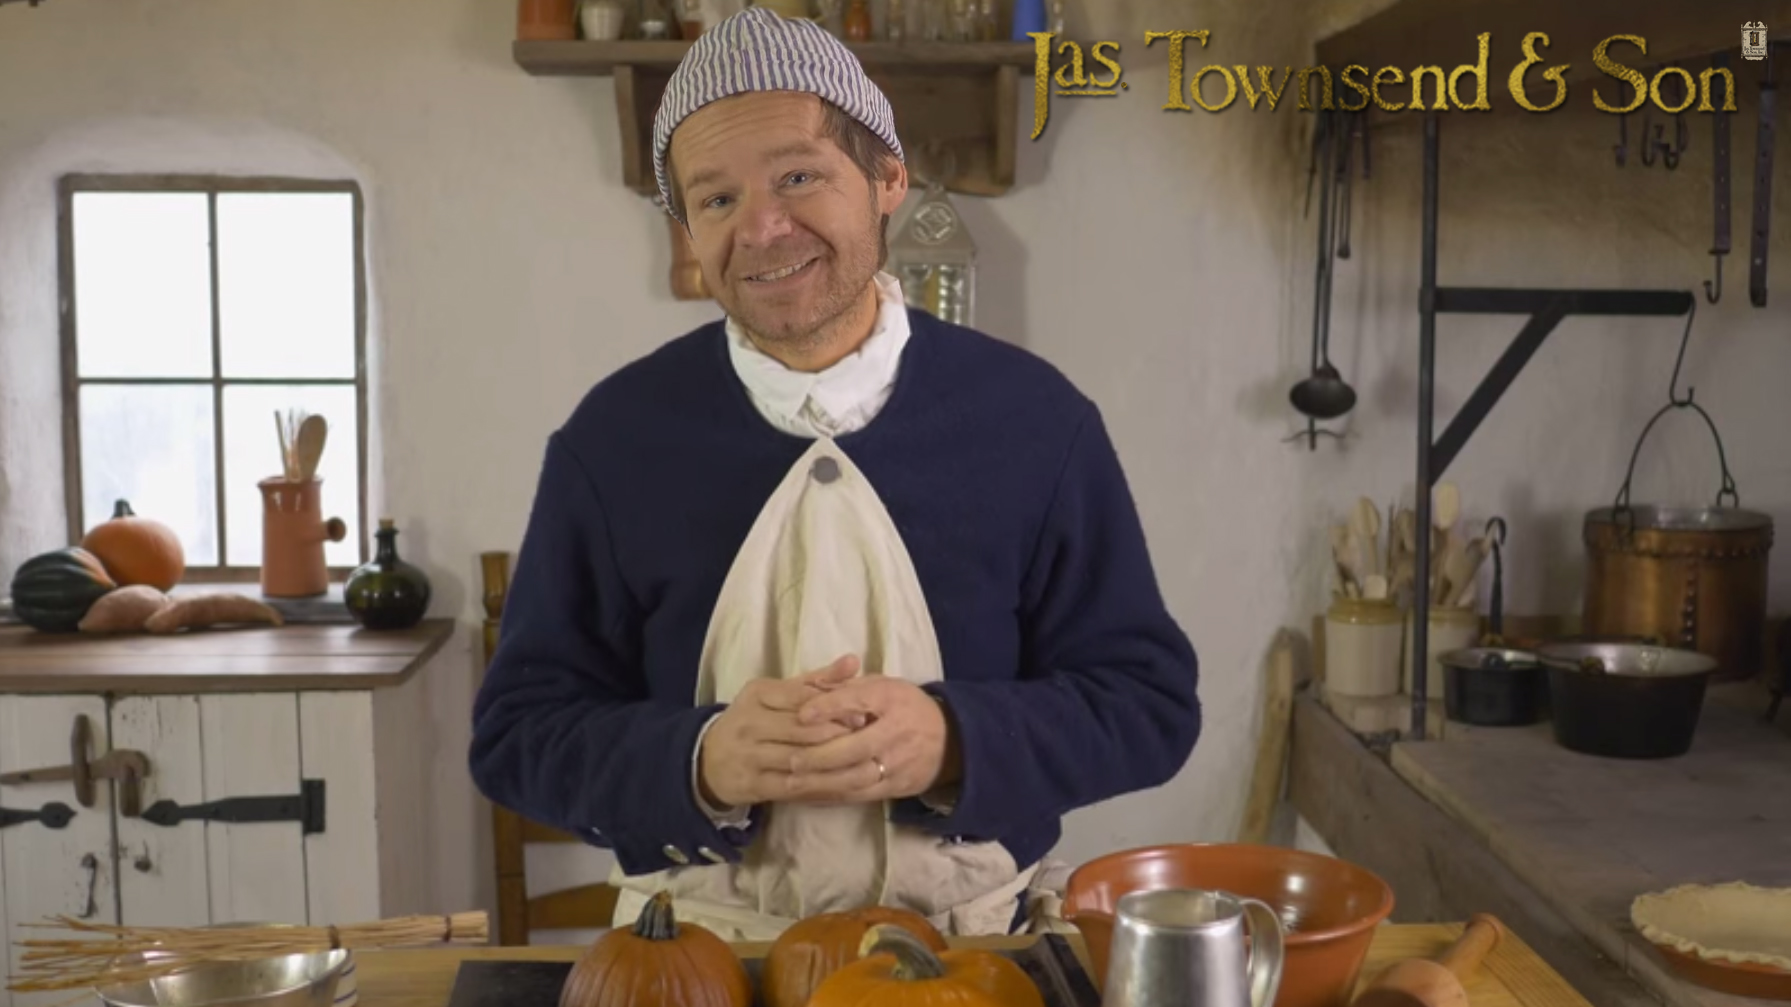
There is a really nice series on Youtube called "Jas. Townsend & Son" featuring everything about the 18th Century from clothing to food.
Two episodes feature planting an 18th Century Herb Garden which I thought you all might enjoy watching. They are each about 5 minutes long.
https://www.youtube.com/watch?v=jP96AP3Epjg
https://www.youtube.com/watch?v=JDFpAIAkPXs
Enjoy!
. . .
Speaking of Herbs -- watch for the release of my 2016 Wall Calendar!!
-- Catherine, The Herb Lady
http://www.herbs2u.net/
There is a really nice series on Youtube called "Jas. Townsend & Son" featuring everything about the 18th Century from clothing to food.
Two episodes feature planting an 18th Century Herb Garden which I thought you all might enjoy watching. They are each about 5 minutes long.
https://www.youtube.com/watch?v=jP96AP3Epjg
https://www.youtube.com/watch?v=JDFpAIAkPXs
Enjoy!
. . .
Speaking of Herbs -- watch for the release of my 2016 Wall Calendar!!
-- Catherine, The Herb Lady
http://www.herbs2u.net/
Sunday, August 02, 2015
The Great Caper Caper Mystery - Solved!!
Dear Folks,
Note: Suzanne has these special plants for sale until her inventory is gone for now. See her contact info near the end is you are interested in plants.
This picture shows the mother plant in different stages of flower bud (this is the caper your purchase in the condiment aisle) through flower, baby berry to ready to pick and brine berry (the berries are showing up a lot more in restaurants).
The Caper Caper Mystery – How To Get Caper Seeds to Germinate And How To Grow Capers in The Phoenix Metro Area.
I have know Suzanne Vilardi of Vilardi Gardens now for several years, and we wound up with a quest – how to get Caper (Capparis spinosa) to grow successfully here.
In September 2011, I purchased some caper seeds from a reliable source and proceeded to try and germinate them in my usual fashion - pre-soaked for a couple of days and seeded into jiffy pellets and placed in trays. None ever germinated. I chalked it up to the wrong time of year and planned to try again.
Fast forward to October 2012, and I met up with Suzanne at The Urban Farm Nursery and she offered me 2 caper plants she had been growing, and thought I might have good luck with them.
On October 27, 2012 those 2 mother plants went in the ground at my home. One has always done better than the other and is currently in excess of 4 feet across - I have not pruned her, wanting to see what she would do.
In Early 2013 Suzanne and I had a discussion about the difficult of germinating caper seeds, notoriously difficult to break the “super-dormancy” they go into once dried.
The 2 plants were doing okay, having come through their first winter here, however we knew it would be a while before we had any flower etc result from the plants
Suzanne offered to get a fresh packet of seeds and Gibberellic Acid (GA), which is used to assist germination of seeds, and asked if I could trial this process. I agreed.
On March 1, 2013, I prepared the seeds with 2 solutions of GA 500 and 1000 (which were recommended in the accompanying literature).
I also decided to run a comprehensive evaluation and choose multiple other methods of breaking the dormancy through extreme solutions, and one trial of just pre-soaking overnight.
I made solutions using Limequat juice, Pink Grapefruit juice, Beer, Hot Water, Boiling Water (then chilled in the refrigerator) and freezing. – in all 8 different methods were tried.
There were 6 seeds in each method.
The results were more than disappointing. Of all of the batches 1 seed each came up from the Limequat solution and the boiling water/chill. However neither seedling survived more than a couple of weeks.
I was traveling in late 2013 and early 2014 and pictures in May 2014 show the one primary Mother plant doing very well. While assisting a relative with health problems I was back and forth and did not see the flower, but we discovered the first Fruit on August 8, 2014 – SUCCESS!!
The fruit split (the ripened-ready-to-harvest-seed stage) in early October and I mailed the seeds off to Suzanne.
Suzanne: “The fresh seeds were planted in propagation trays mid-October, 2014, with a few emerging about 45 days later and the rest over 90 days, with near 100% germination.“
Suzanne transplanted into 4 inch pots in March, 2015.
In early June I picked up 9 plants to trial for optimal location.
The happiest of the surviving plants (4 did not make it) are in full sun in amended well draining soil given deep watering.
Catherine recommends the following growing conditions and has made these observations:
1) Well draining amended soil.
2) Full or most day sun.
3) Deep watering, then allow to dry out some before watering again.
4) The plants may frost back or go dormant in the winter depending on amount of hard freeze.
5) Flowering begins in late April or early May and continues into late July or early August.
6) Container growing is possible. A large (20-24") container is recommended for optimal growth possibility. The original Mother Plant is now approximately 4 feet across.
The picture is one of the transplants taken July 30, 2015 from a 4” pot transplanted on June 9, 2015.

We believe the Caper plant will do well here in the Phoenix Desert region, and can produce flowers and fruit when the above conditions are followed.
For questions contact
Suzanne Vilardi of Vilardi Gardens – suz@vilardigardens.com
or
Catherine, The Herb Lady – catherine@herbs2u.net
-- Catherine, The Herb Lady
Note: Suzanne has these special plants for sale until her inventory is gone for now. See her contact info near the end is you are interested in plants.
This picture shows the mother plant in different stages of flower bud (this is the caper your purchase in the condiment aisle) through flower, baby berry to ready to pick and brine berry (the berries are showing up a lot more in restaurants).
The Caper Caper Mystery – How To Get Caper Seeds to Germinate And How To Grow Capers in The Phoenix Metro Area.
I have know Suzanne Vilardi of Vilardi Gardens now for several years, and we wound up with a quest – how to get Caper (Capparis spinosa) to grow successfully here.
In September 2011, I purchased some caper seeds from a reliable source and proceeded to try and germinate them in my usual fashion - pre-soaked for a couple of days and seeded into jiffy pellets and placed in trays. None ever germinated. I chalked it up to the wrong time of year and planned to try again.
Fast forward to October 2012, and I met up with Suzanne at The Urban Farm Nursery and she offered me 2 caper plants she had been growing, and thought I might have good luck with them.
On October 27, 2012 those 2 mother plants went in the ground at my home. One has always done better than the other and is currently in excess of 4 feet across - I have not pruned her, wanting to see what she would do.
In Early 2013 Suzanne and I had a discussion about the difficult of germinating caper seeds, notoriously difficult to break the “super-dormancy” they go into once dried.
The 2 plants were doing okay, having come through their first winter here, however we knew it would be a while before we had any flower etc result from the plants
Suzanne offered to get a fresh packet of seeds and Gibberellic Acid (GA), which is used to assist germination of seeds, and asked if I could trial this process. I agreed.
On March 1, 2013, I prepared the seeds with 2 solutions of GA 500 and 1000 (which were recommended in the accompanying literature).
I also decided to run a comprehensive evaluation and choose multiple other methods of breaking the dormancy through extreme solutions, and one trial of just pre-soaking overnight.
I made solutions using Limequat juice, Pink Grapefruit juice, Beer, Hot Water, Boiling Water (then chilled in the refrigerator) and freezing. – in all 8 different methods were tried.
There were 6 seeds in each method.
The results were more than disappointing. Of all of the batches 1 seed each came up from the Limequat solution and the boiling water/chill. However neither seedling survived more than a couple of weeks.
I was traveling in late 2013 and early 2014 and pictures in May 2014 show the one primary Mother plant doing very well. While assisting a relative with health problems I was back and forth and did not see the flower, but we discovered the first Fruit on August 8, 2014 – SUCCESS!!
The fruit split (the ripened-ready-to-harvest-seed stage) in early October and I mailed the seeds off to Suzanne.
Suzanne: “The fresh seeds were planted in propagation trays mid-October, 2014, with a few emerging about 45 days later and the rest over 90 days, with near 100% germination.“
Suzanne transplanted into 4 inch pots in March, 2015.
In early June I picked up 9 plants to trial for optimal location.
The happiest of the surviving plants (4 did not make it) are in full sun in amended well draining soil given deep watering.
Catherine recommends the following growing conditions and has made these observations:
1) Well draining amended soil.
2) Full or most day sun.
3) Deep watering, then allow to dry out some before watering again.
4) The plants may frost back or go dormant in the winter depending on amount of hard freeze.
5) Flowering begins in late April or early May and continues into late July or early August.
6) Container growing is possible. A large (20-24") container is recommended for optimal growth possibility. The original Mother Plant is now approximately 4 feet across.
The picture is one of the transplants taken July 30, 2015 from a 4” pot transplanted on June 9, 2015.

We believe the Caper plant will do well here in the Phoenix Desert region, and can produce flowers and fruit when the above conditions are followed.
For questions contact
Suzanne Vilardi of Vilardi Gardens – suz@vilardigardens.com
or
Catherine, The Herb Lady – catherine@herbs2u.net
-- Catherine, The Herb Lady
Wednesday, July 29, 2015
"Bacon" and "Steak" - Great Taste, Surprising Ingredients!
Dear Folks,
I've been playing with my food again!
A recipe for "eggplant bacon" caught my eye a couple of weeks ago and low and behold my beautiful eggplants are finally producing. My favorite "Casper" the white eggplant and another heirloom which is new-to-me "Listada de Grandia" (from Spain). Just gorgeous - don't you agree?
Both of these lovely fruit are less seedy and sweeter than the big Italian variety. I've grown the Casper for years and I am now adding the Listada as a regular member of my garden.
One of the many great things about eggplant is its "meat" like taste, so the "bacon" concept seemly like a great recipe to try.
I looked at quite a few recipes, many or most of them were Vegan, and called for good, but not necessarily easily found ingredients. So I adapted the idea to the ingredients I used for overall convenience.
Almost all of the recipes called for the eggplants to be sliced length-wise and I chose to do rounds. I will go with the long slices next time for sure.
Marinating longer will give greater flavor and any unused marinade can be stored in the refrigerator as you would a salad dressing. I've got more eggplants ready so I will be making up another batch in the next couple of days.
These are addictive!!! The taste and texture are meaty like bacon with many of the flavors you expect from a maple/smoked bacon. A real winner and a "keeper" as Deane and I like to say.
My Eggplant "Bacon"
Marinade: (makes a 1/2 cup)
1/8 cup (2 tablespoons) soy
1/8 cup apple cider vinegar
1/8 cup maple syrup
1/8 cup olive oil
1/2 teaspoon paprika
Pinch (1/16 teaspoon) liquid Hickory Smoke
Eggplants, cap trimmed off and sliced about 1/8 to 1/4 inch thick. A mandolin will make the slices even.
A ziplock bag works well for this. The 2 eggplant made about a cup and half of slices, the marinade would easily cover 4 cups. Fully zip the bag and lay on its side to marinate, turning once or twice.
Pre-heat oven to 325**
Slice eggplant and marinate for at least 20 minutes or longer. Reserve left over marinade for another time.
Drain (reserve marinade) spread out on baking sheet lined with aluminum foil (or parchment paper).
Bake for approximately 25-35 minutes, flipping the slices about half way through. You are looking for crispy but not burnt.
** I made this batch at 375 and baked for about 22 minutes but the center pieces wanted to burn, so I am recommending lower temperature for longer baking. (Low and Slow).
As I said - addictive!!
Next Up "Venison Ground Steak"
Several Years ago I wrote about "Emergency Steak" a recipe out of World War II during the rationing days, when the cooking shows on the radio (yes there were cooking shows then), talked about trying to give your family a "steak" without that specific meat available.
Most folks probably know this as "Hamburger Steak" or "Chopped Steak". Unlike a hamburger or a meatloaf the aim was to have a "not ground" solid steak-like texture, so the idea was to create a large flat 'patty', which was not "over-worked" or over-cooked.
Deane was gifted with some venison from a friend the other day and some of it was already thawing when he got home so I had to put my "cooking" hat on quickly.
Venison, if you are not used to cooking with it, is extremely lean and needs "help" so it does not overcook and turn into shoe-leather.
At the same time for safety concerns I do not go 'rare' when cooking Venison as we might when doing hamburgers or steak with grass-fed beef.
So I opted for a Venison Ground Steak.
I frequently use a grated potato in my burgers etc. to compensate for low fat - the potato helps keep the meat moist while baking or grilling.
"Venison Ground Steak"
1 pound of ground venison
onion, celery leaf, rosemary, garlic, ground black pepper (portioned to the amount of meat, so you can adjust up or down)
Potato, small to medium size
1/3 cup of finely grated Parmesan Cheese
We grilled this, but it can be done in the oven at 350 for about 15 minutes.
Arrange grill for direct heat.
Take a piece of aluminum foil and punch 6 or more holes in it.
Scrub potato, leave peel on, and grate. It is best to use a smaller grate than appears in the picture [the fork is to show size] (I was multitasking that day and already stuck the smaller grate in the soapy water and was running out of time :-)
Sprinkle the meat with the seasonings, then the cheese and then the potato and gently work in by folding several times.
Lay out on the aluminum foil in a flat patty about 3/4 - 1 inch thick.
Place foil/meat on the grill, cover and check at 10 minutes. If cooked through it is done. Don't over cook.
Enjoy!
-- Catherine, The Herb Lady
You can find my books at my publishers site.
Or, on Amazon.
I've been playing with my food again!
A recipe for "eggplant bacon" caught my eye a couple of weeks ago and low and behold my beautiful eggplants are finally producing. My favorite "Casper" the white eggplant and another heirloom which is new-to-me "Listada de Grandia" (from Spain). Just gorgeous - don't you agree?
Both of these lovely fruit are less seedy and sweeter than the big Italian variety. I've grown the Casper for years and I am now adding the Listada as a regular member of my garden.
One of the many great things about eggplant is its "meat" like taste, so the "bacon" concept seemly like a great recipe to try.
I looked at quite a few recipes, many or most of them were Vegan, and called for good, but not necessarily easily found ingredients. So I adapted the idea to the ingredients I used for overall convenience.
Almost all of the recipes called for the eggplants to be sliced length-wise and I chose to do rounds. I will go with the long slices next time for sure.
Marinating longer will give greater flavor and any unused marinade can be stored in the refrigerator as you would a salad dressing. I've got more eggplants ready so I will be making up another batch in the next couple of days.These are addictive!!! The taste and texture are meaty like bacon with many of the flavors you expect from a maple/smoked bacon. A real winner and a "keeper" as Deane and I like to say.
My Eggplant "Bacon"
Marinade: (makes a 1/2 cup)
1/8 cup (2 tablespoons) soy
1/8 cup apple cider vinegar
1/8 cup maple syrup
1/8 cup olive oil
1/2 teaspoon paprika
Pinch (1/16 teaspoon) liquid Hickory Smoke
Eggplants, cap trimmed off and sliced about 1/8 to 1/4 inch thick. A mandolin will make the slices even.
A ziplock bag works well for this. The 2 eggplant made about a cup and half of slices, the marinade would easily cover 4 cups. Fully zip the bag and lay on its side to marinate, turning once or twice.
Pre-heat oven to 325**
Slice eggplant and marinate for at least 20 minutes or longer. Reserve left over marinade for another time.
Drain (reserve marinade) spread out on baking sheet lined with aluminum foil (or parchment paper).
Bake for approximately 25-35 minutes, flipping the slices about half way through. You are looking for crispy but not burnt.
** I made this batch at 375 and baked for about 22 minutes but the center pieces wanted to burn, so I am recommending lower temperature for longer baking. (Low and Slow).
As I said - addictive!!
Next Up "Venison Ground Steak"
Several Years ago I wrote about "Emergency Steak" a recipe out of World War II during the rationing days, when the cooking shows on the radio (yes there were cooking shows then), talked about trying to give your family a "steak" without that specific meat available.
Most folks probably know this as "Hamburger Steak" or "Chopped Steak". Unlike a hamburger or a meatloaf the aim was to have a "not ground" solid steak-like texture, so the idea was to create a large flat 'patty', which was not "over-worked" or over-cooked.
Deane was gifted with some venison from a friend the other day and some of it was already thawing when he got home so I had to put my "cooking" hat on quickly.
Venison, if you are not used to cooking with it, is extremely lean and needs "help" so it does not overcook and turn into shoe-leather.
At the same time for safety concerns I do not go 'rare' when cooking Venison as we might when doing hamburgers or steak with grass-fed beef.
So I opted for a Venison Ground Steak.
I frequently use a grated potato in my burgers etc. to compensate for low fat - the potato helps keep the meat moist while baking or grilling.
"Venison Ground Steak"
1 pound of ground venison
onion, celery leaf, rosemary, garlic, ground black pepper (portioned to the amount of meat, so you can adjust up or down)
Potato, small to medium size
1/3 cup of finely grated Parmesan Cheese
We grilled this, but it can be done in the oven at 350 for about 15 minutes.
Arrange grill for direct heat.
Take a piece of aluminum foil and punch 6 or more holes in it.
Scrub potato, leave peel on, and grate. It is best to use a smaller grate than appears in the picture [the fork is to show size] (I was multitasking that day and already stuck the smaller grate in the soapy water and was running out of time :-)
Sprinkle the meat with the seasonings, then the cheese and then the potato and gently work in by folding several times.
Lay out on the aluminum foil in a flat patty about 3/4 - 1 inch thick.
Place foil/meat on the grill, cover and check at 10 minutes. If cooked through it is done. Don't over cook.
Enjoy!
-- Catherine, The Herb Lady
You can find my books at my publishers site.
Or, on Amazon.
Wednesday, July 22, 2015
Seasonal Favorites: Corn and Tomato Soup
Dear Folks,
I developed this recipe after watching a cooking show some years ago about adding tomatoes to soup, but keeping them intact - not breaking them up. I loved the combination of flavors of the corn kernels, tomato chunks and rosemary. The recipe is from my cookbook "101+ Recipes From The Herb Lady"
Corn Tomato Rosemary Soup
The key to this soup is to keep the tomatoes from breaking up. It should be a soup with tomatoes in it, not a tomato soup. A light soup that celebrates fresh corn and tomatoes.
2 ripe tomatoes*, seeded and chopped
3 cups chicken or light vegetable broth
1 tablespoon of fresh lime or lemon juice
2 ears fresh corn kernels (or 1-11/2 cups of kernels — can use frozen)
1/2 teaspoon of dried rosemary, crushed (about a teaspoon of minced fresh)
Cut corn from cob. Core, seed and chop tomato into 1/4 inch chunks. Bring broth to a boil with half of rosemary, add corn and tomato and reduce to simmer until corn is tender (about 5 minutes). Remove from heat, add lime juice and rest of rosemary. Serve and enjoy.
*Meaty tomatoes like Roma work best.
. . .
I posted on my blog several years ago some great ideas for corn, both planting and using. Make sure to read the tip on using corn silk!
This is planting time for fall corn. Remember: Plant only one variety of corn per season so you can keep the variety pure for saving seed for re-planting.
corn-planting-tips-in-desert
-- Catherine, The Herb Lady
You can find my cookbook at my publisher's site
And Amazon
I developed this recipe after watching a cooking show some years ago about adding tomatoes to soup, but keeping them intact - not breaking them up. I loved the combination of flavors of the corn kernels, tomato chunks and rosemary. The recipe is from my cookbook "101+ Recipes From The Herb Lady"
Corn Tomato Rosemary Soup
The key to this soup is to keep the tomatoes from breaking up. It should be a soup with tomatoes in it, not a tomato soup. A light soup that celebrates fresh corn and tomatoes.
2 ripe tomatoes*, seeded and chopped
3 cups chicken or light vegetable broth
1 tablespoon of fresh lime or lemon juice
2 ears fresh corn kernels (or 1-11/2 cups of kernels — can use frozen)
1/2 teaspoon of dried rosemary, crushed (about a teaspoon of minced fresh)
Cut corn from cob. Core, seed and chop tomato into 1/4 inch chunks. Bring broth to a boil with half of rosemary, add corn and tomato and reduce to simmer until corn is tender (about 5 minutes). Remove from heat, add lime juice and rest of rosemary. Serve and enjoy.
*Meaty tomatoes like Roma work best.
. . .
I posted on my blog several years ago some great ideas for corn, both planting and using. Make sure to read the tip on using corn silk!
This is planting time for fall corn. Remember: Plant only one variety of corn per season so you can keep the variety pure for saving seed for re-planting.
corn-planting-tips-in-desert
-- Catherine, The Herb Lady
You can find my cookbook at my publisher's site
And Amazon
Tuesday, July 14, 2015
Eat Well - and Cheap!
Dear Folks,
Leanne Brown has released a 2nd edition of her awesome book "Good and Cheap." She has added 20 more recipes.
I cannot say enough good things about this book and her work. If you want to maximize your food dollar - this is THE book for you.
The other part of her books project is the charitable part - she donates a book to a person in need for every book sold. How cool is that!
You can get the PDF of the 1st Edition free at her website (I encourage you to give the $5 donation if you can).
I blogged about her book and ideas last year when she began a Kickstarter campaign - I got the PDF version of the book (and donated $5). Her mission is to educate people on how to eat healthfully on the equivalent of SNAP (food stamps) budget.
In my posts I give some of my recipes which are similar or along the same economy line.
swap-your-grits-for-oatmeal-and-up
Face of Hunger
And, if you like my recipes, you might enjoy my recipe book too:
Question: Do you have a healthy and inexpensive recipe that is your go-to when you either can't think of something for a meal or you have to economize?
Share in the comments section and I will make sure they get posted, and give you create if you like.
-- Catherine, The Herb Lady
Leanne Brown has released a 2nd edition of her awesome book "Good and Cheap." She has added 20 more recipes.
I cannot say enough good things about this book and her work. If you want to maximize your food dollar - this is THE book for you.
The other part of her books project is the charitable part - she donates a book to a person in need for every book sold. How cool is that!
You can get the PDF of the 1st Edition free at her website (I encourage you to give the $5 donation if you can).
I blogged about her book and ideas last year when she began a Kickstarter campaign - I got the PDF version of the book (and donated $5). Her mission is to educate people on how to eat healthfully on the equivalent of SNAP (food stamps) budget.
In my posts I give some of my recipes which are similar or along the same economy line.
swap-your-grits-for-oatmeal-and-up
Face of Hunger
And, if you like my recipes, you might enjoy my recipe book too:
Question: Do you have a healthy and inexpensive recipe that is your go-to when you either can't think of something for a meal or you have to economize?
Share in the comments section and I will make sure they get posted, and give you create if you like.
-- Catherine, The Herb Lady
Friday, July 03, 2015
Around The Garden, July 3, 2015
Dear Folks,
A nice over-cast morning. We finally got a tiny bit of rain after days of dust and wind - a whopping .1 inches :-)
I have 3 Roselle plants going in the garden, finally found some happy spots for them (I tried a purchased plant 2 years ago and it was not happy where I put it. I started these new plants from seeds I got last year from the Arizona Herb Association at the Boyce Thompson Arboretum Herb Festival.
I started by soaking the seed for 3 days (March 24-27), then started them in Jiffy pellets and transplanted out April 8, 2015. They require warm soil to do well.
I was not sure about sun needs, so I opted to put the one in the picture in an almost full sun area and
the other 2 in a spot where they are shaded. The shaded ones are a 1/3 of the size of the full sun one.
This is the kind of experimenting I do to determine an edible's happy spot. I may move the other 2, if rain / overcast timing works out.
Roselle (Hibiscus sabdariffa) called Sorrel in the Caribbean and in Latin America and Flor de Jamaica in Mexico, is a tropical native of West Africa.
This lovely member of the hibiscus / Malva (Hollyhock and Mallow) family is most known for the red colored, cranberry-like flavored beverage made from the calyx fruit (base of the flower).
The calyx are picked fresh and dried. Many Middle Eastern and Spanish grocery stores carry the dried flowers. The flowers have both vitamins and minerals. You can read up on Roselle at wikipedia
Next are some of my "Glass Gem" corn. I planted these primarily to refresh the seed inventory. This is a Flint (field, ground meal, popcorn) variety that has a lovely range of colors from pastel to purple, tan and brown.
The "empty" spots on the cobs are where the pollination is incomplete, so the kernels did not develop.
There is a wonderful history behind the "Glass Gem" variety - you can read up on it and also, if in stock, purchase seed from Native Seeds/Search.
Edible Flowers
For shear "wafting" appeal few flowers rival the true Jasmine in fragrance.
Jasminum Simbac also known as Arabian Jasmine, is a shrub and not to be confused with other plants called Jasmine, which are primarily vines.
Arabian Jasmine is the only Jasmine flower which is edible. If you have had Jasmine Tea you have enjoyed the fragrance of this beautiful flower.
Once settled down in our desert garden this shrub will grow for years. During the winter it may suffer cold damaged, but springs right back as the soil and air temps warm up. Stems may root to the ground at the leaf nodes. Prune after all danger of frost is over.
We get flowers 2-3 times a year in waves and there is an indescribable pleasure in walking past the shrub and being enveloped in the lovely scent and site of this plant.
Have a wonderful and safe Holiday!
-- Catherine, The Herb Lady
For planting and cooking help, check out my calendar and books for sale at my publisher's site
A nice over-cast morning. We finally got a tiny bit of rain after days of dust and wind - a whopping .1 inches :-)
I have 3 Roselle plants going in the garden, finally found some happy spots for them (I tried a purchased plant 2 years ago and it was not happy where I put it. I started these new plants from seeds I got last year from the Arizona Herb Association at the Boyce Thompson Arboretum Herb Festival.
I started by soaking the seed for 3 days (March 24-27), then started them in Jiffy pellets and transplanted out April 8, 2015. They require warm soil to do well.
I was not sure about sun needs, so I opted to put the one in the picture in an almost full sun area and
the other 2 in a spot where they are shaded. The shaded ones are a 1/3 of the size of the full sun one.
This is the kind of experimenting I do to determine an edible's happy spot. I may move the other 2, if rain / overcast timing works out.
Roselle (Hibiscus sabdariffa) called Sorrel in the Caribbean and in Latin America and Flor de Jamaica in Mexico, is a tropical native of West Africa.
This lovely member of the hibiscus / Malva (Hollyhock and Mallow) family is most known for the red colored, cranberry-like flavored beverage made from the calyx fruit (base of the flower).
The calyx are picked fresh and dried. Many Middle Eastern and Spanish grocery stores carry the dried flowers. The flowers have both vitamins and minerals. You can read up on Roselle at wikipedia
Next are some of my "Glass Gem" corn. I planted these primarily to refresh the seed inventory. This is a Flint (field, ground meal, popcorn) variety that has a lovely range of colors from pastel to purple, tan and brown.
The "empty" spots on the cobs are where the pollination is incomplete, so the kernels did not develop.
There is a wonderful history behind the "Glass Gem" variety - you can read up on it and also, if in stock, purchase seed from Native Seeds/Search.
Edible Flowers
For shear "wafting" appeal few flowers rival the true Jasmine in fragrance.
Jasminum Simbac also known as Arabian Jasmine, is a shrub and not to be confused with other plants called Jasmine, which are primarily vines.
Arabian Jasmine is the only Jasmine flower which is edible. If you have had Jasmine Tea you have enjoyed the fragrance of this beautiful flower.
Once settled down in our desert garden this shrub will grow for years. During the winter it may suffer cold damaged, but springs right back as the soil and air temps warm up. Stems may root to the ground at the leaf nodes. Prune after all danger of frost is over.
We get flowers 2-3 times a year in waves and there is an indescribable pleasure in walking past the shrub and being enveloped in the lovely scent and site of this plant.
Have a wonderful and safe Holiday!
-- Catherine, The Herb Lady
For planting and cooking help, check out my calendar and books for sale at my publisher's site
Monday, June 29, 2015
I was Interviewed back in 2013 - More tips and history from The Herb Lady
Dear Folks,
Back in March 2013 I was interviewed for an Oral History project by Scottsdale Public Library.
I thought folks who are just learning about my work gardening and cooking with the garden bounty in the desert, might like some of my history and tips.
If you have attended one of my lectures, or perhaps if you wanted to and could not make it, I touch on some of the high points to gardening successfully in the desert, along with some of the whys and hows of how I became so passionate about growing some of our own food. And, why I think this is my mission: to encourage folks to grow some or more of their own food.
The interview is about 55 minutes long. Wonderful Anna Quan Leon was the gracious and patient interviewer - get me started on my favorite subjects and I just prattle on, and on!
FYI - after the interview was over, another point was brought up so Anna did a post-interview, but for technical reasons, it had to be added as an addendum at the "beginning" of the tape - so the introduction comes after that short series of comments.
I hope you enjoy this if you decide to listen. Maybe friends or family in desert areas may enjoy it also.
The picture (that is me in my "Minnie Pearl" hat) and the audio are the property of Scottsdale Library and all rights belong to them.
MP3 Audio
Main page at Scottsdale Library on my interview - click on the link next to my picture to get more detail.
In the interview I mention several recipes (one found in my book is my "Vegetarian Pot Pie" made with tofu -- turned out great), and a cracker recipe made with seeds, nuts and cheese.
Here is the link on the blog for one version of the cracker recipe. The beauty of the recipe is you can change out all the ingredients for different flavors.
I hope you enjoy the interview.
Always happy to answer questions.
-- Catherine, The Herb Lady
My books
Ibook
https://itunes.apple.com/us/artist/catherine-crowley/id372564893?mt=11
amazon - print
http://www.amazon.com/Catherine-Crowley/e/B002C1HWG0/ref=sr_tc_2_0?qid=1367065857&sr=1-2-ent
Barnes & Noble - print and Nook ebook
http://www.barnesandnoble.com/c/catherine-crowley
Kobo
http://store.kobobooks.com/en-US/Search?query=Catherine%20Crowley&fcsearchfield=Author
Lulu
http://www.lulu.com/spotlight/herbs2u
Back in March 2013 I was interviewed for an Oral History project by Scottsdale Public Library.
I thought folks who are just learning about my work gardening and cooking with the garden bounty in the desert, might like some of my history and tips.
If you have attended one of my lectures, or perhaps if you wanted to and could not make it, I touch on some of the high points to gardening successfully in the desert, along with some of the whys and hows of how I became so passionate about growing some of our own food. And, why I think this is my mission: to encourage folks to grow some or more of their own food.
The interview is about 55 minutes long. Wonderful Anna Quan Leon was the gracious and patient interviewer - get me started on my favorite subjects and I just prattle on, and on!
FYI - after the interview was over, another point was brought up so Anna did a post-interview, but for technical reasons, it had to be added as an addendum at the "beginning" of the tape - so the introduction comes after that short series of comments.
I hope you enjoy this if you decide to listen. Maybe friends or family in desert areas may enjoy it also.
The picture (that is me in my "Minnie Pearl" hat) and the audio are the property of Scottsdale Library and all rights belong to them.
MP3 Audio
Main page at Scottsdale Library on my interview - click on the link next to my picture to get more detail.
In the interview I mention several recipes (one found in my book is my "Vegetarian Pot Pie" made with tofu -- turned out great), and a cracker recipe made with seeds, nuts and cheese.
Here is the link on the blog for one version of the cracker recipe. The beauty of the recipe is you can change out all the ingredients for different flavors.
I hope you enjoy the interview.
Always happy to answer questions.
-- Catherine, The Herb Lady
My books
Ibook
https://itunes.apple.com/us/artist/catherine-crowley/id372564893?mt=11
amazon - print
http://www.amazon.com/Catherine-Crowley/e/B002C1HWG0/ref=sr_tc_2_0?qid=1367065857&sr=1-2-ent
Barnes & Noble - print and Nook ebook
http://www.barnesandnoble.com/c/catherine-crowley
Kobo
http://store.kobobooks.com/en-US/Search?query=Catherine%20Crowley&fcsearchfield=Author
Lulu
http://www.lulu.com/spotlight/herbs2u
Tuesday, June 23, 2015
Watermelon and Free Seed Share reminder
Dear Folks,
This year I actually got various transplants in the ground - on time! On February 15th I transplanted some tomatoes (we have been harvesting them for about 3-4 weeks now) cantaloupe and Blacktail Mountain Watermelon.
I forgot to take a picture of the cantaloupe - which we ate and I saved seeds from.
And the Blacktail Mountain Watermelon.
Because of the placement of the vines (I was trying something new - limited foot space but growing up a string/pipe trellis, the various shading from the surrounding trees did limit sunlight so while the vines were (and still are) nice and healthy we only got 2 useable fruit off the cantaloupe (sweet and delicious) and 1 nice one off the watermelon. Who knows if the vines live through the summer I may get more fruit later on. :-)
It is as described over at Baker Creek - sweet and delicious!
"70 days. One of the earliest watermelons we know of, superb for the north, but it also grows well in heat and drought. The flesh is red and deliciously sweet. Fruit have a dark rind and weigh 8-12 lbs. each. This excellent variety was developed by our friend Glenn Drowns, owner of the Sand Hill Preservation Center in Iowa. A favorite of many gardeners across the USA. One of the best we have ever tried!" -- http://www.rareseeds.com/blacktail-mountain-watermelon/
I am also saving seeds from this melon.
Free Seed Share
And about saving seeds, some of the seeds in my seed bank I bring to the upcoming Seed Share at Mesa Community Farmers Market are from my gardens.
If you are not aware of (just 1 of the reasons for savings seed from something you have grown) a process usually called "regional adaptation" - meaning re-sowing seed grown in an area, your garden, becomes better adapted and productive with each successive generation.
This Friday, June 26th,
9 a.m. - Noon
Mesa Community Farmers Market
Center Street, South of University
I host this event 3 times a year to coincide with the next sowing season. Fall sowing begins the middle to July.
You do not have to bring seed to pick up some. If you bring seed, please bring only organic or naturally grown non-gmo either from your garden or purchased. I suggest focusing on edible varieties.
I hope to see you Friday! Have a great week.
-- Catherine, The Herb Lady
My books and planting calendar are available in print or as PDFs
My Publisher
You can also find the books at these other options on the internet
Ibook
https://itunes.apple.com/us/artist/catherine-crowley/id372564893?mt=11
amazon - print
http://www.amazon.com/Catherine-Crowley/e/B002C1HWG0/ref=sr_tc_2_0?qid=1367065857&sr=1-2-ent
Barnes & Noble - print and Nook ebook
http://www.barnesandnoble.com/c/catherine-crowley
Kobo
http://store.kobobooks.com/en-US/Search?query=Catherine%20Crowley&fcsearchfield=Author
This year I actually got various transplants in the ground - on time! On February 15th I transplanted some tomatoes (we have been harvesting them for about 3-4 weeks now) cantaloupe and Blacktail Mountain Watermelon.
I forgot to take a picture of the cantaloupe - which we ate and I saved seeds from.
And the Blacktail Mountain Watermelon.
Because of the placement of the vines (I was trying something new - limited foot space but growing up a string/pipe trellis, the various shading from the surrounding trees did limit sunlight so while the vines were (and still are) nice and healthy we only got 2 useable fruit off the cantaloupe (sweet and delicious) and 1 nice one off the watermelon. Who knows if the vines live through the summer I may get more fruit later on. :-)
It is as described over at Baker Creek - sweet and delicious!
"70 days. One of the earliest watermelons we know of, superb for the north, but it also grows well in heat and drought. The flesh is red and deliciously sweet. Fruit have a dark rind and weigh 8-12 lbs. each. This excellent variety was developed by our friend Glenn Drowns, owner of the Sand Hill Preservation Center in Iowa. A favorite of many gardeners across the USA. One of the best we have ever tried!" -- http://www.rareseeds.com/blacktail-mountain-watermelon/
I am also saving seeds from this melon.
Free Seed Share
And about saving seeds, some of the seeds in my seed bank I bring to the upcoming Seed Share at Mesa Community Farmers Market are from my gardens.
If you are not aware of (just 1 of the reasons for savings seed from something you have grown) a process usually called "regional adaptation" - meaning re-sowing seed grown in an area, your garden, becomes better adapted and productive with each successive generation.
This Friday, June 26th,
9 a.m. - Noon
Mesa Community Farmers Market
Center Street, South of University
I host this event 3 times a year to coincide with the next sowing season. Fall sowing begins the middle to July.
You do not have to bring seed to pick up some. If you bring seed, please bring only organic or naturally grown non-gmo either from your garden or purchased. I suggest focusing on edible varieties.
I hope to see you Friday! Have a great week.
-- Catherine, The Herb Lady
My books and planting calendar are available in print or as PDFs
My Publisher
You can also find the books at these other options on the internet
Ibook
https://itunes.apple.com/us/artist/catherine-crowley/id372564893?mt=11
amazon - print
http://www.amazon.com/Catherine-Crowley/e/B002C1HWG0/ref=sr_tc_2_0?qid=1367065857&sr=1-2-ent
Barnes & Noble - print and Nook ebook
http://www.barnesandnoble.com/c/catherine-crowley
Kobo
http://store.kobobooks.com/en-US/Search?query=Catherine%20Crowley&fcsearchfield=Author
Tuesday, June 16, 2015
Free Seed Share Coming Up - Friday, June 26th
Dear Folks,
My next 3-times a year FREE Seed Share is coming up.
Mesa Community Farmers Market
Center Street south of University, Mesa
June 26, 2015
9 a.m. - Noon
It may sound counter-intuitive to have a seed share in June, in the heat, however if you want winter squash including pumpkins you have to count backwards 90-120 days from Halloween or Thanksgiving. Also, getting call veggie and herbs seeds in the ground allows for them to germinate as soil cools

How It Works:
Choose: Any seeds we have – small envelopes will be available with pens to select and mark what you want to take home.
Bring: Any seeds you harvested. Share any organic or heirloom seeds you purchased. Focus on edible seed varieties.
What: No - GMOs - if you are unsure if the seeds you have are GMO, please just bring yourself to choose seeds available.
Why: Grow some of your own food, help “your economy,” and share with friends and family.
Where: Mesa Community Farmers Market, Center Street, South of University on the East Side.
You Do Not Need To Bring Seeds to participate.
You can have my month-to-month planting information at your fingertips in the PDF version of my calendar. Purchase once ($6) and download into all devices you have which read PDF.
http://www.lulu.com/shop/herbs-2-u/desert-gardening-success-perpetual-calendar/ebook/product-22030956.html
-- Catherine, The Herb Lady
My next 3-times a year FREE Seed Share is coming up.
Mesa Community Farmers Market
Center Street south of University, Mesa
June 26, 2015
9 a.m. - Noon
It may sound counter-intuitive to have a seed share in June, in the heat, however if you want winter squash including pumpkins you have to count backwards 90-120 days from Halloween or Thanksgiving. Also, getting call veggie and herbs seeds in the ground allows for them to germinate as soil cools

How It Works:
Choose: Any seeds we have – small envelopes will be available with pens to select and mark what you want to take home.
Bring: Any seeds you harvested. Share any organic or heirloom seeds you purchased. Focus on edible seed varieties.
What: No - GMOs - if you are unsure if the seeds you have are GMO, please just bring yourself to choose seeds available.
Why: Grow some of your own food, help “your economy,” and share with friends and family.
Where: Mesa Community Farmers Market, Center Street, South of University on the East Side.
You Do Not Need To Bring Seeds to participate.
You can have my month-to-month planting information at your fingertips in the PDF version of my calendar. Purchase once ($6) and download into all devices you have which read PDF.
http://www.lulu.com/shop/herbs-2-u/desert-gardening-success-perpetual-calendar/ebook/product-22030956.html
-- Catherine, The Herb Lady
Sunday, May 31, 2015
Homemade Dried Vegetable Stock/Bouillon
Dear Folks,
The sun dried apples are done, on to my next sun drying project a Vegetable Stock/Bouillon Powder.
First step find a recipe!
I discovered that there are all sorts of homemade stock/bouillon recipes out there, but a lot of them had things in them I did not like. Many "vegetable" version called for dried beef or chicken bouillon as an ingredient.
I suppose I could grind up some of my dry cured salami but that was not what I was looking for.
I wanted a vegetable and herb powder to add to soups, stews, pasta / grain water or even salad dressings.
As I was looking at all the recipes I did not want, when my "Duh" moment hit. What I was looking for was a vegetable stock recipe - but dried.
After looking at a few stock recipes (Martha had some good ideas but added a potato - later I thought). Other basic stock recipes cautioned against adding garlic as part of the base. Martha also cautioned against using any of the broccoli family as it may bring an off taste to the base (I did throw a couple of curly kale pieces in my recipe below).
So looking over what I had in the garden I decided on the ingredients below. Although bay leaf is always added to soups and stews I chose to use some conehead thyme (an herb with a flavor mix of savory, thyme and oregano) as a replacement. When I use the mix later I can always add a bay leaf. I grow bay. I have a huge tree. However it is very difficult to get it ground really well that does not result in sharp pieces, e.g., I always opt to use bay whole (except when I cure meats during the curing process I crush up the bay but remove all later on).
Day 1
Vegetable Stock Base - Dried
Young red onion (roasted on the grill)
Red and green celery young stalks and leaves
Carrots
Green bell pepper
Greens: sorrel, red leaf lettuce, curly kale
Rosemary,
Conehead Thyme
Basil
Ratios are approximate - I used about 50% more carrot than the onion and celery (equal amounts of those). For the herbs and greens about the amount called for in a recipe for soup or stew 5-6 sprigs total.
About greens in this mix - I wanted things which could add their own flavor and possibly a little bulk.
I thought these would take a day or two to dry completely and then use my bullet grinder to reduce to powder and store to use as needed.
We grilled the other day and I threw some of our young red onions on - had left over so I think the smoky flavor of the grill will add to the overall flavor of the mix.
Some of the combination is based on my Herb Soup recipe where all of the flavors of lettuces and herbs creates an incredible mix of layered flavors.(I posted the recipe at the Valley Permaculture Site.)
Day 2
You can see in the picture how much most the veggies and herbs shrunk (about 5 hours in our 97 degree temp). The onions and carrots took a little more than the 5 hours. (You want them bone dry.)
Day 3
I actually ground them today (the 31st) - I just did not get to it yesterday. This is about a 1/4 cup of final powder and the flavor is AWESOME - I love how this turned out. Because of the celery (particularly the red variety which tends to hold more natural sodium than the green) the mix tastes like it has salt added.
It will be easy to adjust salt and anything else I want to add when using this mix like, bay leaf, garlic or shallots (there is no pepper spice in it for instance). Just a nice basic veg and herb mix for flavoring anything that a bouillon powder would be used for and it will keep for a long time in my dark pantry.
So my dear readers - don't buy store bought if you are growing vegetables and herbs - make your own "solar powered" soup and stew base.
-- Catherine, The Herb Lady
The sun dried apples are done, on to my next sun drying project a Vegetable Stock/Bouillon Powder.
First step find a recipe!
I discovered that there are all sorts of homemade stock/bouillon recipes out there, but a lot of them had things in them I did not like. Many "vegetable" version called for dried beef or chicken bouillon as an ingredient.
I suppose I could grind up some of my dry cured salami but that was not what I was looking for.
I wanted a vegetable and herb powder to add to soups, stews, pasta / grain water or even salad dressings.
As I was looking at all the recipes I did not want, when my "Duh" moment hit. What I was looking for was a vegetable stock recipe - but dried.
After looking at a few stock recipes (Martha had some good ideas but added a potato - later I thought). Other basic stock recipes cautioned against adding garlic as part of the base. Martha also cautioned against using any of the broccoli family as it may bring an off taste to the base (I did throw a couple of curly kale pieces in my recipe below).
So looking over what I had in the garden I decided on the ingredients below. Although bay leaf is always added to soups and stews I chose to use some conehead thyme (an herb with a flavor mix of savory, thyme and oregano) as a replacement. When I use the mix later I can always add a bay leaf. I grow bay. I have a huge tree. However it is very difficult to get it ground really well that does not result in sharp pieces, e.g., I always opt to use bay whole (except when I cure meats during the curing process I crush up the bay but remove all later on).
Day 1
Vegetable Stock Base - Dried
Young red onion (roasted on the grill)
Red and green celery young stalks and leaves
Carrots
Green bell pepper
Greens: sorrel, red leaf lettuce, curly kale
Rosemary,
Conehead Thyme
Basil
Ratios are approximate - I used about 50% more carrot than the onion and celery (equal amounts of those). For the herbs and greens about the amount called for in a recipe for soup or stew 5-6 sprigs total.
About greens in this mix - I wanted things which could add their own flavor and possibly a little bulk.
I thought these would take a day or two to dry completely and then use my bullet grinder to reduce to powder and store to use as needed.
We grilled the other day and I threw some of our young red onions on - had left over so I think the smoky flavor of the grill will add to the overall flavor of the mix.
Some of the combination is based on my Herb Soup recipe where all of the flavors of lettuces and herbs creates an incredible mix of layered flavors.(I posted the recipe at the Valley Permaculture Site.)
Day 2
You can see in the picture how much most the veggies and herbs shrunk (about 5 hours in our 97 degree temp). The onions and carrots took a little more than the 5 hours. (You want them bone dry.)
Day 3
I actually ground them today (the 31st) - I just did not get to it yesterday. This is about a 1/4 cup of final powder and the flavor is AWESOME - I love how this turned out. Because of the celery (particularly the red variety which tends to hold more natural sodium than the green) the mix tastes like it has salt added.It will be easy to adjust salt and anything else I want to add when using this mix like, bay leaf, garlic or shallots (there is no pepper spice in it for instance). Just a nice basic veg and herb mix for flavoring anything that a bouillon powder would be used for and it will keep for a long time in my dark pantry.
So my dear readers - don't buy store bought if you are growing vegetables and herbs - make your own "solar powered" soup and stew base.
-- Catherine, The Herb Lady
Subscribe to:
Posts (Atom)