Sunday, April 30, 2017
National Herb Week and Herb Day
Dear Folks,
Tomorrow, May 1st, begins National Herb Week, which ends on Mother's Day, May 7th.
National Herb Day is Saturday, May 6th.
Each year the week begins on the Monday before Mother's Day.
[All of the herbs in the picture are grown in my gardens. I have also grown or grow many more.]
There are so many national "weeks" and "days" you can find one for any food or activity, but to me, this is a real and logical celebration of plants which provide us with flavor, aroma, healing and just plain ways to feel good.
Herbs are the original medicines from which most modern drugs are founded on, albeit, the modern ones are mostly now synthesized to allow for patenting and also to exponentially increase the potency.
In your life you probably use herbs or essential oils and may not even know it.
Your body lotion may contain Calendula for it's soothing properties. The petals are also used in foods as a "poor man's saffron" for its distinctive color.
If you ever had a toothache and used clove oil to ease the pain. That oil is sourced from the same plant which gives you the flavor for baking, and interestingly, it is one the main essential oils which give Sweet Basil it's well-loved flavor. Other basil varieties may have cinnamon, lemon or lime essential oils too.
Peppermint may be in your lotions to ease muscle aches.
Lavender provides the wonderful fragrance in some cosmetics, but is also in cleaning agents, herb blends and is used to ease headaches and as a sleep aid.
Herbs have been used in centuries old liquor recipes.
In fact, most culinary herbs also have medicinal properties. Basil and mint for stomach issues, thyme for respiratory, rosemary for antibacterial action, and sage to help digest fatty meats.
NOTE: Herbs which are ONLY medicinal should only be used with expert guidance. I suggest culinary herbs for their medicinal qualities because they are safer to use by the average person, but even a good thing can be overdone. Be aware of your, and your family's, allergies and sensitivities.
This week and for Mother's Day put together a bouquet using herbs from your garden and fill the house, decorating the table, with these wonderful and useful plants.
Celebrating Herbs!
Click on the link above to read about 25 different herbs and spices. 2 years ago I created a series of posts celebrating 25 herbs and spices mentioned in the Bible with history and recipe ideas.
Once you pull up the link you can search for an herb by name. I hope you enjoy these posts.
A quirky recipe I read* 30+ years ago . . .
Lavender Scented Salad Dressing - and - Wood Polish!
1/8 cup olive, avocado or good vegetable oil
1 tablespoon cider vinegar
1 tablespoon vodka
10 drops essential oil of lavender**
Mix all together and shake well when using.
For polish apply and let sit for a minute or two to the furniture or panel and then buff. The vinegar dissolves the dirt and grease and the alcohol helps the oil sink in.
As a salad dressing this would be nice, lightly dressing a salad of tomatoes and lettuce, salt and pepper to taste. Other herbs like rosemary, oregano or thyme could be added to taste. Dressings can also be used to baste or marinate meats or fish.
* Unfortunately I don't recall where I read it, but I knew it would be fun to try.
** ONLY use true essential oil of lavender if you are using this for food. Food essential oils should ONLY be used with a carrier oil, never directly on food or your body.
What are you planning for National Herb Day and National Herb Week?
Make it a great week for herbs in your garden and kitchen!
My simple herb planting chart shows when to plant 48 different herbs here in the valley and all USDA 9b zones. This PDF will allow you to have it handy on any device which reads PDFs. Click here or in the upper side bar to purchase - $5.00
My recipe books are also available for purchase in the side bar.
-- Catherine, The Herb Lady
If you enjoyed this post, subscribe below by entering your email, to get all my posts!
Disclaimer: Clicking on links on this blog may earn me a small commission if you purchase something. Your price does not change.
Labels:
National Herb Day,
National Herb Week
Tuesday, April 25, 2017
Around The Garden Mid-April
Dear Folks,
Some of the flowers are fading and some are just getting into all of their glory. (Don't miss our newest "guest" in the gardens "Bob" - near the bottom of this post.)
With a couple of exceptions our gardens are all edible. The main exception for me is a flower which is not edible but is so stunning I have several different color variations. My dad started this back in the 80s when he gave me my first Amaryllis bulb, a blushing pink, which has produced pups multiple times and I have distributed them through out the gardens.
Several years ago, I was at the Sun City Farmers Market with my friends and spotted this drop-dead gorgeous amaryllis and just had to have it. Not only does it bloom every year now, it gave me seeds 3 years ago, which I am growing and will distribute around the gardens also (according to the experts it will take 5+ years for the bulb to get big enough to produce a flower and I'm hoping for something as spectacular as this).
Off topic, sort of - a great opportunity to listen to Lisa Steele "Fresh Eggs Daily" chicken whisperer (my title for her) talks Chickens In the Garden, with Grep Peterson over a Urban Farm.
Some time in the future, I'm pretty sure we will have (again) chickens and maybe ducks for their wonderful eggs and personalities.
Many of us grew up with honeysuckle flowers and the joy of licking the nectar from their little filament.
I put together a bowl of fresh berries for a dinner we made with friends last week and I sprinkled the honeysuckle and pineapple guava blossoms over the top - yum!
Fresh and edible flowers like these two are a perfect garnish and taste addition to fruits.
If you like a little zip in your fruit salads, try nasturtium flowers and some of the herbs are blooming like lemon thyme.
Another old fashioned edible flower favorite are daylilies. NOTE: the stunning star gazers and similar are NOT edible.
Daylilies, if you have not grown them, literally bloom for 1 day and then make way for the next flower(s) to open up over the following days. They are lovely petals to nibble on, you can make a yogurt or cheese dip and stuff them, or just sprinkle the petals on salads.
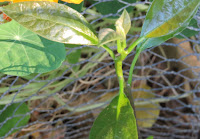
I have an Aravaipa* Avocado Tree planted last October and it is doing great. A month or two later I bought some avocados and decided to see if I could get the seeds to root. About a month ago one of them had roots, finally, so I planted it in the same general area as my under-story, coffee/mango/avocado trees. Yesterday I spotted a nice healthy stem/trunk. It is protected by one of my chicken wire hats. I pinched the tip back to encourage it to branch. We shall see. [*Called the Aravaipa Avocado for the Aravaipa Canyon in Arizona where the mother tree was discovered, this species is said to be temperature tolerant from 14 to 120 degrees. ]
The caper plants are flowering, and I am soooo looking forward to berries in a month or two to harvest and ferment (pickle). Along with my friend Jacq Davis at Epic Yard Farm, I believe waiting for the berries and passing on just picking the unopened flower buds is the more productive way to make use of this great plant. [Read up on how Suzanne Vilardi and figured out how to grow caper plants in our Arizona desert and harvest the seed to grow new plants.]
One of the visitors this time of year is the Giant Swallow Tail Butterfly. Citrus tree leaves are the host for this beautiful butterfly and the curiously interesting caterpillars start emerging and chewing on some leaves before cocooning into butterflies again. Many people, even desert plant experts, consider these pests (they are pollinators in the butterfly stage along with bees and hummingbirds) and we do not view them as pests. If you enjoy butterflies you should understand their need for host plants. I would encourage you to embrace the idea of "hosting" the egg and caterpillar stage of these magnificent butterflies.
While not a frequent visitor to our gardens, they are quite shy, the Cardinals show up a couple of times a year, and Deane managed to snap a picture (through the kitchen window) of this handsome male eating seed on the berm where we "host" the various birds. We also have a couple of feeders but a lot of these guests prefer the openness of the berm.
And now for our newest guest "Bob" - a Male Bobwhite Quail! Named for their very distinctive call, he showed up last week and has been around morning and evening. We have both gotten quite a lot of joy watching him. He is not particularly skitterish and Deane has enjoyed the "first light" wake up call in the mornings to get him up and closing our windows down before the sun heats up. [When we can during the year we open the house up to pull all the fresh night coolness in.] The only other time we had a Bobwhite visit us was a quick stop over on our gate about 7.or 8 years ago and that distinctive call allowed me to see and get a photo of him or her (don't remember who visited us).
I hope you enjoyed a peak at our gardens. Share this blog with your friends and family.
If you missed the May planting / sowing information here is the link.
My desert planting calendars and books are available for purchase in the sidebar.
Have a great time in your gardens!
-- Catherine, The Herb Lady
If you enjoyed this post, subscribe below by entering your email, to get all my posts!
Disclaimer: Clicking on links on this blog may earn me a small commission if you purchase something. Your price does not change.
Wednesday, April 19, 2017
Watch this Important Documentary on Seed! Available for a Short time.
Dear Folks,
No discussion of food can be complete without the talking about seed. [Pictured is my saved Egyptian Spinach, Garlic Chive and Roselle seed.)
This new documentary "SEED: The Untold Story" is so important I hope you will consider watching and sharing.
They who control the seed, control all of our food!
The streaming video is available free until May 1, 2017.
Watch here.
So what can we gardeners do?
We can grow natural and heirloom varieties and SAVE THE SEED, by allowing some of the healthiest plants to mature to fully ripe seed. [Pictured: Drying tomato seed for storage.]
Not only are we doing our small part in saving edible plant seeds, we are also creating our own regional adaptation. That wonderful and natural phenomenon where the subsequent generations of plants in our gardens become more adapted to not only the climate in our region, but also our own gardens.
Once your seeds are fully dried, store as you would any spice, coffee or tea - cool, dry, dark. Personally I prefer paper envelopes but glass or plastic containers work too. Just remember they must be completely dried before you store.
SHARE the seed with others. I host free seed sharing events at Mesa Urban Garden, but now both Mesa and Phoenix libraries have seed banks where you can check out some seed and then when you harvest you can return newly harvested seed back to the bank. All FREE!
A lesser know fact about the "modern" farming of hybrids and GMOs is the loss of nutrient density in these foods where quantity became the focus over quality. If you have to eat 2.5 to 3.5 times the amount of a food to get the same nutrient density as was available 50-70+ years ago, what really has been achieved???? (Source: Study of USDA Direct Farm Reports from Farmers over a 40 years period.)
Share this important video with family and friends, even those who do not garden. It is important that everyone understand the challenges and risks to our food production systems.
-- Catherine, The Herb Lady
If you enjoyed this post, subscribe below by entering your email, to get all my posts and please share with your family and friends!
Disclaimer: Clicking on links on this blog may earn me a small commission if you purchase something. Your price does not change.
Monday, April 17, 2017
May Planting/Sowing Tips
Dear Folks,
As we move into the warmer months, what to plant and sow options begin to decrease.
Planting/Transplanting is more of a challenge for the plants as they have to deal with rising air temperatures while trying to get their roots established.
[Be sure to read my note (end of post) on how weeds identify soil and nutrients below.]
A story illustration many years ago - I believe it was Sunset Magazine - compared two transplanted shrubs. One planted in October and one planted around April 1st. By July both shrubs looked about the same. But by the end of the summer, the one planted the prior October was thriving and 3 times the initial size while the April planted one was struggling to survive.
What happened? The October transplant, while not doing a lot of above the ground growth, was setting down good healthy roots. The April planted shrub was struggling with increasing air and surface soil temperatures while trying to get those shallower roots going.
If you choose to transplant now, particularly with shrubs and trees, create the two berm system. In my photo from my short video, I show you where the first and second berms should be: 1st one about 12 inches away from the trunk of the plant; 2nd one about 3 feet out. Mulch between the berms and that is where you deep water the plants. This method keeps water from sitting at the base of the trunk, keeps pest bugs and diseases from getting to the plant; and encourages the roots to go deep and spread. With shrubs and trees all the feeder roots will eventually be out at the drip line (the edge of the canopy - width - of the plant).
With other types of transplants: vegetables, fruits, herbs and edible flowers, mulch this time of year is a great thing but, again, do not let the mulch touch the base of the plants.
MAY PLANTING: Artichoke, Jerusalem; Beans, Soy; Cantaloupe; Caper plants; Cucumbers; Eggplant; Fig Trees; Fruit Trees (With Care); Melons, Musk; Okra; Peanuts; Peppers, Sweet; Peppers, Chilies; Potato, Sweet; Purslane; Squash, Summer; Squash, Winter; Tomatillo
SEED IN: Basil, Chive (Garlic or Onion), Epazote, Perilla, or Catnip-- making use of the canopy of flowering or vegetable plants.
EDIBLE FLOWERS TO PLANT: Impatients Wallarana; Marigolds, including Tangerine Scented (Tagetes Lemonii), Citrus Scented (Tagetes Nelsonii); Portulaca; Scented Geraniums; Sunflower Roselle/Jamaica Sorrel (Hibiscus sabdariffa)
NOTE: Give a hair cut to low growing herbs like thyme, marjoram and oregano after they finish blooming.
--Temperatures will remain above 90 from Approx May 29 to September 29th.
--Potatoes - while harvesting, save some for replanting next Jan 1st - store in cardboard (like cardboard egg cartons) in your crisper/frig away from other veggies.
--Fertilize Fruit Trees Memorial Day.
--Tomatoes will stop setting fruit when night time temps go above 80 and stay there. Do Not Pull the plant - they will set fruit again beginning in September.
--DO NOT prune sun damage - the damage continues to protect the underlying growth. Wait until fall to begin pruning off sun damage when the day time temps drop back below 100 consistantly.
EDIBLE FLOWER TIP:
Edible flowers blooming right now that go well with all the berries ripening are honeysuckle and pineapple guava. Sprinkle over or toss with a mixed berry salad/dessert.
The petals on the pineapple guava are like eating a piece of candy. Delicious!! The nectar from both flowers adds to fruit.
ALWAYS know your and your family's allergic issues when eating flowers which may have pollen in them.
Weeds! Fascinating barometers of soil conditions and nutrients.
Geoffl Lawton's weekly newsletter this week included a great article on the Permaculture Institute site on what the weeds in our yards tell us about the soil. I encourage you to read the entire article and click on the internal links. Common mallow loves barren areas. Why? It's huge tap root can reach down below the compaction seeking moisture. Many of us have seen an explosion of Pineapple Weed (one of the false chamomiles) this spring in both the desert and areas of our gardens. Why? Hard pan from both the rain run off and baking sun are ideal conditions for this weed.
Under the section "Nutrient Porfile" is a 42 page article on weeds, pests and diseases and the role of various weeds (including eating them).
Have a great time in your garden!
-- Catherine, The Herb Lady
You can purchase my gardening calendars (when to plant/sow) and books from the side bar here on the blog.
If you enjoyed this post, subscribe below by entering your email, to get all my posts, and please share my blog with others!
Disclaimer: Clicking on links on this blog may earn me a small commission if you purchase something. Your price does not change.
Friday, April 14, 2017
Do You Have This Zippy Snack Pod in Your Garden?
Dear Folks,
I just plunked some roselle seeds in the garden. (Sow Hibiscus sabdariffa now to have edible leaves for harvesting through the summer (as a lettuce substitute) and the wonderful Vitamin C rich flower calyx in the fall.)
As I was coming back I passed these tasty, tangy pods on one of my plants and grabbed some to show you.
Hint they are not a sugar pea or any kind of pea.
Most people are not aware of this edible seed pod, you usually eat the root!
What is it?
Radish!!
There is even a variety of radish grown specifically for this green edible pod.
You can see information on the "Rat's Tail Radish" on Baker Creek, for more information on that particular variety.
However ALL OF the radish varieties have edible pods. You just need to make sure you get them green and tender, like a sugar pea pod.
I had not harvested this radish and was just ignoring it - the bees love the flowers and suddenly their they were ready for the picking!
What is growing in your garden that you may not recognize as edible?
Have a wonderful, and safe Easter and Passover Weekend,
-- Catherine, The Herb Lady
If you enjoyed this post, subscribe below by entering your email, to get all my posts and share with your friends and family!
Disclaimer: Clicking on links on this blog may earn me a small commission if you purchase something. Your price does not change.
Thursday, April 13, 2017
2 Ingredient Sorbet Results
Dear Folks,
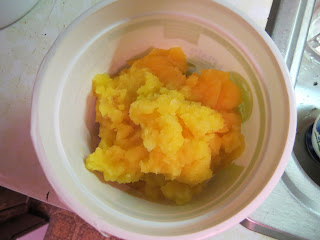
I made the orange juice (our own oranges) and banana sorbet and I thought it turned out great. Like a Granita it was crystalline in texture (think more solid slushy) and we thoroughly enjoyed it.
FYI - I tried posting a picture on Facebook but for some reason I can't post pictures there.
Anyway, I used our Deni Ice Cream maker. If using one of these make sure your liquid is well chilled before hand so the combination of the frozen base and the chilled liquid gives you the best results.
[Second picture below: The banana pieces were mashed and mixed in during the churning process.]
I may try this with some milk, cream or half and half to create a sherbet with a more ice cream consistency. With this combination of fruit and milk I think I will get something closer to an Orange Creamsicle (one of my favorite treats from the Good Humor Man trucks when I was a kid). Oh and maybe I can create a version of the now discontinued "Swiss Chocolate" ice cream which was an orange creamsicle sherbet with chocolate chips in it!!!
If you have not tried using an ice cream maker the final results come out more soft than hard. To harden you need to put into the freezer.
I stirred mine a couple of times during freezing to keep it from turning into a solid frozen juice. With milk or cream it won't be that solid when fully frozen.
The best part is you can mix up your fresh juice and fruit combinations to your and your family preferences. How "cool" is that! (pun intended :-)
-- Catherine, The Herb Lady
Please share with your friends and family who enjoy gardening and cooking. Thank you!
If you enjoyed this post, subscribe below by entering your email, to get all my posts!
Disclaimer: Clicking on links on this blog may earn me a small commission if you purchase something. Your price does not change.
Tuesday, April 11, 2017
Dolma, Stuffed Grape, or Fig, or Nasturtium OR...
Left Nasturtium / Right Fig |
I have written about using my huge nasturtium leaves to make Dolma, the addictive Middle Eastern dish/snack made by stuffing grape leaves with a mixture of grains, maybe meat and herbs.
Several years ago I was sitting at my kitchen table, gazing at my HUGE nasturtium leaves (some 8+ inches across), I started researching Dolma, because I had the idea of using those nasturtium leaves instead of grape leaves.
I was also looking for ways to mimic the already processed grape leaves which are available in cans or jars to make the Dolma. I learned I could make it without the necessity of processing the leaves first - an all-in-one cooking process. Bingo!
Along the way I learned that many of the original Dolma from ancient times were made with fig leaves. Of course! Figs are native to that area of the world, why wouldn't they use the fig leaf. Called "Thrion" Dolma made with fig rather than vine leaves is still found in Greece, Turkey and presumably other areas.
The trick is to get the fig leaves while they are still young and not as leathery as the older leaves*. For the prior two years I missed my opportunity, but this year I actually caught the leaves in time. So I made up a batch of Dolma using half fig and half nasturtium leaves to fill the pot. I had made up a batch of my grain mix (barley and quinoa) and just had to add some shredded carrot and chopped olives. Mix up lemon juice and olive oil and I was ready to fill and cook.
When you pick fig leaves, there is a latex type sap which you want to rinse off, by soaking the leaves for a while. Cut off stem. As you can see, I left the fig leaf intact to allow for rolling.
My Basic Dolma Recipe.
This basic recipe is so easily adapted to your preferences. I like Barley/Quinoa to boost the protein, but you can use any grain or combination you like. You can add meat if you like. Keep the lemon juice/oil proportions pretty much as noted, the 'tang' of the lemon is what gives a lot of flavor to the finished product. [The carrots are to keep the dolmas packed tight for cooking - nice extra flavored snack!]
Comparison of Nasturtium to Fig? I think I liked my nasturtium a bit more than the fig, but I would certainly make it again, just because I have fig trees!
Many leaves can be used to make Dolma. Find leaves you love and give the recipe a try. What unique leaf would you try or have tried??
* My friend Cricket Aldridge has a site (gardenvariety.life) where she posts wonderful ideas for using your garden bounty. She introduced me to the idea of using dried fig leaves for tea. Wonderful! I have a jar of my dried fig leaves for use when I want to add to my cup of tea. Older leaves, that are in perfect condition, can be used for this. Since I missed the young leaves for Dolma last year I made up for it by grabbing nice older leaves to dry and store.
Have a great day in the garden and kitchen!
P.S. If you missed my post on drying herbs and more here is the link.
-- Catherine, The Herb Lady
Like my facebook page and please share this blog if you enjoyed this post.
Find my books and garden calendars for purchase on the sidebar here on the blog.
If you enjoyed this post, subscribe below by entering your email, to get all my posts!
Disclaimer: Clicking on links on this blog may earn me a small commission if you purchase something. Your price does not change.
Sunday, April 09, 2017
Sharing Blueberry Seed Saving and 2 Ingredient Healthy Sorbet Tips
Dear Folks,
My blueberries are coming along nicely.
I am a little under the weather right now so I don't have a lot of creative oophm, but I saw this cool video on saving blueberry seeds I thought I would share with you and also a fun 2 ingredient really healthy sorbet recipe I received from one of the newsletters I get in my email.
Both of these things I want to try.
The blueberry seed saving technique is similar to how you save tomatoes. The idea is to get all the pulp away from the seed so you can get just the seed. While the video does not show storing them, that is exactly what can be done once the seeds are dried and stored properly.
I had never thought of trying to get seeds from my blueberries, I just scarf them up as soon as they are ripe in late May and June (blueberries ripen over time). Now I will let some intentionally get over ripe to harvest seed, chill and plant. I've been meaning to add more blueberry plants to the my container gardens (they need to be in containers here in the valley because you need to help keep the soil acidic), so wouldn't it be cool to get plants from the one I already have!
How to save blueberry seeds
Orange Juice and Bananas = Sorbet!!
I love sorbet!! Any kind of fruit. This recipe overcomes one of the challenges of making sorbet or ice cream for that matter. Sweetness.
You need to add more sugar or choice of sweetener than you think when you freeze things. Cold reduces the sweet taste. This combination, I'm sure, solves that challenge.
I receive Tori Avey's e-newsletter with wonderful recipe ideas focused on her interest in cooking and culinary history. So many great ideas on her site so I encourage you to subscribe and receive her email recipes.
While Tori is using store bought orange juice and bananas, I am going to use some of our own fresh squeezed juice and if my timing is right some of my own bananas! Or if I can't wait store bought bananas.
Tori notes freezing the ingredients and then using your food processor to churn them into this healthy treat. I actually have one of those ice cream makers which uses a drum you freeze ahead of time, so my plan is to, when I'm up for it, blend the fruit and juice and then churn in the frozen drum.
Have a best day!
-- Catherine, The Herb Lady
If you enjoyed this post, subscribe below by entering your email, to get all my posts!
Disclaimer: Clicking on links on this blog may earn me a small commission if you purchase something. Your price does not change.
Wednesday, April 05, 2017
Drying Herbs and More for Storage
Dear Folks,
There are many discussions on drying herbs and other foods. It is the perfect way to preserve many kinds of foods for long term storage and later use.
Herbs in particular present a couple of unique challenges.
1) Flavor and Aroma, and
2) Color
One need only look at a dried leaf from a tree to understand the color issue. Dead and dried the leaf is brown, tan or white.
The other, far more important, issue is the flavor and aroma of the herb when dried. After all that is the point of preserving herbs. You want that full amount (or as much as possible) of the essential oils to flavor your food and entice you and your family to dinner.
Some herb essential oils are more sensitive to heat. Thin leafed varieties such as cilantro or parsley don't hold up to cooking or heat as well. The stems of parsley can used to make chicken soup for instance, but if you want to add the leaves the general instructions usually say to add at the last.
TIP: Whenever you are using herbs in cooking, add half for the cooking process and add the other half just before serving.
Back to drying. Check the internet and the recommendations will be: Hang to dry in the kitchen or a dry place; dry in the microwave, or oven (on low); use an electric dehydrator; or the sun.
My preferred method of drying herbs is in the refrigerator.
You may have purchased "freeze-dried" herbs like chives at the store. Freeze-Drying is NOT using the freezer.
Freeze-Drying refers to rapidly removing the moisture from the air at a low (above freezing) temperature to preserve the food.
Our modern refrigerators do this quite nicely, although not at the level of commercial units. I'm sure you have forgotten something in the frig which was open, only to be discovered later as a "dried" whatever-it-used-to-be.
Credit the constant removal of excess moisture in your refrigerator for this result.
Freeze drying herbs does two wonderful things to your herbs: it maintains most or all of the color AND it keeps those wonderful essential oils, thus the flavor and aroma, more intact.
Over the years, after using paper towels or paper plates in various locations (depending on where I had room) for drying the herbs, I finally hit on an upper shelf which is over the meat/cheese keeper drawer and the exact length of cooling racks. Perfect!! Now I can dry two levels of herbs, with or without the paper towels (I use the paper if the leaves are small so they do not drop through).
[Pictured: Chervil on the left, parsley on the right. In the jars already is dill on the left and cilantro on the right.]
Process:
1) Pick the herbs after the sun has been on them for at least an hour, and after any dew has dried off.
DON"T pick on a cool, damp, overcast morning. The essential oils re-treat in the cold making the herb less flavorful and can even make them taste awful. Picking them after the sun has been on them means all those wonderful oils are now at their peak in the leaves.
2) Rinse well to get dust and any critters off them. Spin dry or shake very well.
3) DO NOT CHOP - you will dry (and store) them whole, stems and all. This keeps the flavor and aroma more intact.
When you go to use the dried herbs later, crushing those dried leaves will immediately tell you the flavor is still there.
4) Spread out on a tray, paper towel or plate and label with the herb and date. You will use that information later when you package up the dried herbs.
5) Expect the process to take 1-3 weeks or so depending on how thick the leaves are and how much you are drying. If you are drying a large bunch, turn and rotate as needed to expose all surfaces.
To PREVENT mold the herbs must be perfectly dry before storing in jars.
6) When finished, put in jars with as little crushing as possible to preserve those great flavors. Label and store in your cool, dry, dark pantry. Try to keep them away from the stove where the heat and light can reduce the lifespan of all that flavor.
7) What about the stems? The stems make great flavoring options for soups, stews and stirfrys. Just bundle together while cooking, and remove before serving, as you would a bay leaf. Dried mint stems make nice stirrers for coffee, hot chocolate or tea.
You could certainly use ziplock bags, but I prefer to use jars which can be reused over and over again.
You can dry vegetables in the same way. If you have a bumper crop of carrots, peppers, onions and garlic they can all be dried, after being rinsed and chopped up. It tickles me no end to go into MY pantry to get some dried garlic for use, garlic I grew and dried.
HOW LONG will these last? I have dried Oreganos and Stevia, and more that are over 2 years old and are as fragrant (and tasty) as the day I stored them. A rule of thumb for any dried herb or spice is 6 - 12 months. Go by taste and scent. If you stored and dried them properly they do not go bad, they just start to loose them "oomph" requiring more to achieve the same flavoring.
My BACKUP drying method is our wonderful, intense sun.
[Pictured: My red onion harvest, chopped and on the trays and then fully dried - they can shrink quite a bit.]
Any day the air temperatures are going to be in the mid-80s or higher with a clear bright sun, is a good day to dry in the sun. I use the sun drying for large volumes of herbs or vegetables. Although it would be great to have a refrigerator dedicated to drying, that is not going to happen :-) So the sun helps me out.
I have a set of electric dehydrator trays (Only no motor) I picked up at a yard sale some years ago to expand the amount of drying space.
Place your rinsed herbs or chopped vegetables on trays, lined with aluminum foil or parchment paper (metal trays helps the drying process), and place in the sun. Cover lightly with either paper towels or one of those picnic net covers. Depending on how much you are drying it may take more than 1 day. BUT bring in the trays at night to keep the food from reabsorbing moisture.
You can even get creative with your drying. Dry several herbs together, in small amounts. When they are finished drying, crush together to form your own blend. SMALL amounts means you will use these blends up before the crushed herbs loose their oomph.
Taking the combination possibilities one step further dried, celery, carrots, onions, bell pepper, and herbs together to create my own salt-free vegetable bouillon, which turned out so awesome I which I had the ability to send you a sniff of it! I used my spice grinder to get it down to a nice coarse powder.
Read up on my prior post on sun drying here
And how I sun dried my Roselle here..
AND last but not least -- if you have enjoyed "kale chips" or other leafy green dried chips, they are easily made in the sun. Rinse, tear into pieces, toss with just the tiniest bit of oil, sprinkle of salt (Parmesan cheese if you like) spread out on a tray in the sun and when dried you have wonderful chips (which you will probably devour in about 2 minutes like I did!).
Actually that was not the last -- I have also made crackers in the sun. Nice to have the sun do some 'cooking' instead of heating up the house with the oven.
Lemon/Rosemary Seed Crackers
1 cup sunflower seeds, ground
2 tablespoons golden flax seeds, ground*
2 tablespoons seasame seeds, leave whole
1/2 teaspoon salt
1/3 cup finely shredded Monterey Jack Cheese
1 tablespoon crushed dried rosemary (if using fresh use 2-3 tablespoons finely chopped)
Zest of 1 lemon
1/2 cup of juice from the lemon (but you may not need all of it).
*Gold flax seeds are milder in flavor than the regular
I have a bullet grinder but you can use any kind of grinder you need to grind the seeds if not already ground.
Put all the dry ingredients in a bowl and stir, add cheese, stir again, then add lemon juice a little at a time until you have a moist but not soggy "mash" and mix well so everything is moistened.
Spread on aluminum foil, silpat or parchment paper. Cover with a piece of wax paper and roll out to even depth - about 1/8 - 1/4 inch, and even up the sides a bit by squaring off. Use a long straight blade to score (or pizza wheel) - you don't have to cut all the way through - it just makes it easier to break up after they cool.
Place in the sun. You may need to flip them to ensure drying all the way. These are ADDICTIVE!
I hope this gives you some great ideas for preserving your bounty to enjoy later on. One of the great things about gardening in the Desert is we can grow, use and store all through the year, following our seasonal harvests. We don't have to jam it all in at one crazed time in the fall.
If you like posts, please share.
You can also like my facebook page.
Have a great day in the garden and kitchen!
-- Catherine, The Herb Lady
P.S. Links for purchasing my books and calendars are on the sidebar here on the blog.
If you enjoyed this post, subscribe below by entering your email, to get all my posts!
Disclaimer: Clicking on links on this blog may earn me a small commission if you purchase something. Your price does not change.
There are many discussions on drying herbs and other foods. It is the perfect way to preserve many kinds of foods for long term storage and later use.
Herbs in particular present a couple of unique challenges.
1) Flavor and Aroma, and
2) Color
One need only look at a dried leaf from a tree to understand the color issue. Dead and dried the leaf is brown, tan or white.
The other, far more important, issue is the flavor and aroma of the herb when dried. After all that is the point of preserving herbs. You want that full amount (or as much as possible) of the essential oils to flavor your food and entice you and your family to dinner.
Some herb essential oils are more sensitive to heat. Thin leafed varieties such as cilantro or parsley don't hold up to cooking or heat as well. The stems of parsley can used to make chicken soup for instance, but if you want to add the leaves the general instructions usually say to add at the last.
TIP: Whenever you are using herbs in cooking, add half for the cooking process and add the other half just before serving.
Back to drying. Check the internet and the recommendations will be: Hang to dry in the kitchen or a dry place; dry in the microwave, or oven (on low); use an electric dehydrator; or the sun.
My preferred method of drying herbs is in the refrigerator.
You may have purchased "freeze-dried" herbs like chives at the store. Freeze-Drying is NOT using the freezer.
Freeze-Drying refers to rapidly removing the moisture from the air at a low (above freezing) temperature to preserve the food.
Our modern refrigerators do this quite nicely, although not at the level of commercial units. I'm sure you have forgotten something in the frig which was open, only to be discovered later as a "dried" whatever-it-used-to-be.
Credit the constant removal of excess moisture in your refrigerator for this result.
Freeze drying herbs does two wonderful things to your herbs: it maintains most or all of the color AND it keeps those wonderful essential oils, thus the flavor and aroma, more intact.
Over the years, after using paper towels or paper plates in various locations (depending on where I had room) for drying the herbs, I finally hit on an upper shelf which is over the meat/cheese keeper drawer and the exact length of cooling racks. Perfect!! Now I can dry two levels of herbs, with or without the paper towels (I use the paper if the leaves are small so they do not drop through).
[Pictured: Chervil on the left, parsley on the right. In the jars already is dill on the left and cilantro on the right.]
Process:
1) Pick the herbs after the sun has been on them for at least an hour, and after any dew has dried off.
DON"T pick on a cool, damp, overcast morning. The essential oils re-treat in the cold making the herb less flavorful and can even make them taste awful. Picking them after the sun has been on them means all those wonderful oils are now at their peak in the leaves.
2) Rinse well to get dust and any critters off them. Spin dry or shake very well.
3) DO NOT CHOP - you will dry (and store) them whole, stems and all. This keeps the flavor and aroma more intact.
When you go to use the dried herbs later, crushing those dried leaves will immediately tell you the flavor is still there.
4) Spread out on a tray, paper towel or plate and label with the herb and date. You will use that information later when you package up the dried herbs.
5) Expect the process to take 1-3 weeks or so depending on how thick the leaves are and how much you are drying. If you are drying a large bunch, turn and rotate as needed to expose all surfaces.
To PREVENT mold the herbs must be perfectly dry before storing in jars.
6) When finished, put in jars with as little crushing as possible to preserve those great flavors. Label and store in your cool, dry, dark pantry. Try to keep them away from the stove where the heat and light can reduce the lifespan of all that flavor.
7) What about the stems? The stems make great flavoring options for soups, stews and stirfrys. Just bundle together while cooking, and remove before serving, as you would a bay leaf. Dried mint stems make nice stirrers for coffee, hot chocolate or tea.
You could certainly use ziplock bags, but I prefer to use jars which can be reused over and over again.
You can dry vegetables in the same way. If you have a bumper crop of carrots, peppers, onions and garlic they can all be dried, after being rinsed and chopped up. It tickles me no end to go into MY pantry to get some dried garlic for use, garlic I grew and dried.
HOW LONG will these last? I have dried Oreganos and Stevia, and more that are over 2 years old and are as fragrant (and tasty) as the day I stored them. A rule of thumb for any dried herb or spice is 6 - 12 months. Go by taste and scent. If you stored and dried them properly they do not go bad, they just start to loose them "oomph" requiring more to achieve the same flavoring.
[Pictured: My red onion harvest, chopped and on the trays and then fully dried - they can shrink quite a bit.]
Any day the air temperatures are going to be in the mid-80s or higher with a clear bright sun, is a good day to dry in the sun. I use the sun drying for large volumes of herbs or vegetables. Although it would be great to have a refrigerator dedicated to drying, that is not going to happen :-) So the sun helps me out.
I have a set of electric dehydrator trays (Only no motor) I picked up at a yard sale some years ago to expand the amount of drying space.
Place your rinsed herbs or chopped vegetables on trays, lined with aluminum foil or parchment paper (metal trays helps the drying process), and place in the sun. Cover lightly with either paper towels or one of those picnic net covers. Depending on how much you are drying it may take more than 1 day. BUT bring in the trays at night to keep the food from reabsorbing moisture.
You can even get creative with your drying. Dry several herbs together, in small amounts. When they are finished drying, crush together to form your own blend. SMALL amounts means you will use these blends up before the crushed herbs loose their oomph.
Taking the combination possibilities one step further dried, celery, carrots, onions, bell pepper, and herbs together to create my own salt-free vegetable bouillon, which turned out so awesome I which I had the ability to send you a sniff of it! I used my spice grinder to get it down to a nice coarse powder.
Read up on my prior post on sun drying here
And how I sun dried my Roselle here..
AND last but not least -- if you have enjoyed "kale chips" or other leafy green dried chips, they are easily made in the sun. Rinse, tear into pieces, toss with just the tiniest bit of oil, sprinkle of salt (Parmesan cheese if you like) spread out on a tray in the sun and when dried you have wonderful chips (which you will probably devour in about 2 minutes like I did!).
Actually that was not the last -- I have also made crackers in the sun. Nice to have the sun do some 'cooking' instead of heating up the house with the oven.
Lemon/Rosemary Seed Crackers
1 cup sunflower seeds, ground
2 tablespoons golden flax seeds, ground*
2 tablespoons seasame seeds, leave whole
1/2 teaspoon salt
1/3 cup finely shredded Monterey Jack Cheese
1 tablespoon crushed dried rosemary (if using fresh use 2-3 tablespoons finely chopped)
Zest of 1 lemon
1/2 cup of juice from the lemon (but you may not need all of it).
*Gold flax seeds are milder in flavor than the regular
I have a bullet grinder but you can use any kind of grinder you need to grind the seeds if not already ground.
Put all the dry ingredients in a bowl and stir, add cheese, stir again, then add lemon juice a little at a time until you have a moist but not soggy "mash" and mix well so everything is moistened.
Spread on aluminum foil, silpat or parchment paper. Cover with a piece of wax paper and roll out to even depth - about 1/8 - 1/4 inch, and even up the sides a bit by squaring off. Use a long straight blade to score (or pizza wheel) - you don't have to cut all the way through - it just makes it easier to break up after they cool.
Place in the sun. You may need to flip them to ensure drying all the way. These are ADDICTIVE!
I hope this gives you some great ideas for preserving your bounty to enjoy later on. One of the great things about gardening in the Desert is we can grow, use and store all through the year, following our seasonal harvests. We don't have to jam it all in at one crazed time in the fall.
If you like posts, please share.
You can also like my facebook page.
Have a great day in the garden and kitchen!
-- Catherine, The Herb Lady
P.S. Links for purchasing my books and calendars are on the sidebar here on the blog.
If you enjoyed this post, subscribe below by entering your email, to get all my posts!
Disclaimer: Clicking on links on this blog may earn me a small commission if you purchase something. Your price does not change.
Subscribe to:
Posts (Atom)